|
Electronics (Page 3)
This page was last
updated on 9 May 2002.
Knotmeter/Depthsounder
GPS VHF
Radar Laptop Computer
and GPS Interface
Return
to Page 1
Return
to Page 2
|
|
Laptop
Computer and GPS Interface
I am a traditional navigator, in
the modern sense. What does that mean? Well, it doesn't mean that
I'm going to navigate with a sextant, although I do know how. Of course
I'm going to use GPS, and for a failsafe I have a second GPS. My main GPS
has a plotter with G-map cartridges, and these provide sufficient detail to
assist in easy navigation. It's very cool. However, I never rely
completely on anything electronic. You can't navigate without real charts,
and I have real NOAA charts for the whole Maine coast on board. I love
charts--love 'em! Anywhere we ever go, I will have the proper paper charts
on board. Chart Kits are OK, but nothing beats a real chart. Did I
mention I love charts? I really do.
That said, I also like gadgets
and such, to an extent. When an opportunity arose to acquire one of the
best navigation software programs--The Cap'n Voyager--I jumped at it.
Although I will never rely on this program (after all, I love charts), it is
undeniably cool. It's designed to be interfaced with GPS, to show your
ship's position right on the chart on the screen. In addition, it has all
kinds of routing and planning features, and makes navigation a snap since you
can place waypoints at the click of a mouse and navigate directly to them.
Way cool...but I wouldn't dream of relying on this.
With the Cap'n, I got a CD that
contains all (all!) of the NOAA charts between Block Island, RI and the Canadian
border. That's a lot of charts, and it's been fun over the winter to
browse through them on the screen. (I love charts.)
|
|
 A
while back, I purchased a Dell laptop computer (Pentium II, 266 MHZ; 128
Mb RAM). I wanted this so that I could write on the boat, keep logs,
download photos, update the website (from shore), etc. A
while back, I purchased a Dell laptop computer (Pentium II, 266 MHZ; 128
Mb RAM). I wanted this so that I could write on the boat, keep logs,
download photos, update the website (from shore), etc.
The navigation program is set up
to allow a comprehensive NMEA 0183 interface between the computer and the GPS,
for dialogue back and forth and sharing of pertinent information. With
this capability set up, the program reaches new heights of convenience and
usefulness. It should be easy to set up the interface--after all, both GPS
and computer are designed for it. Right?
Yeah, right.
|
|
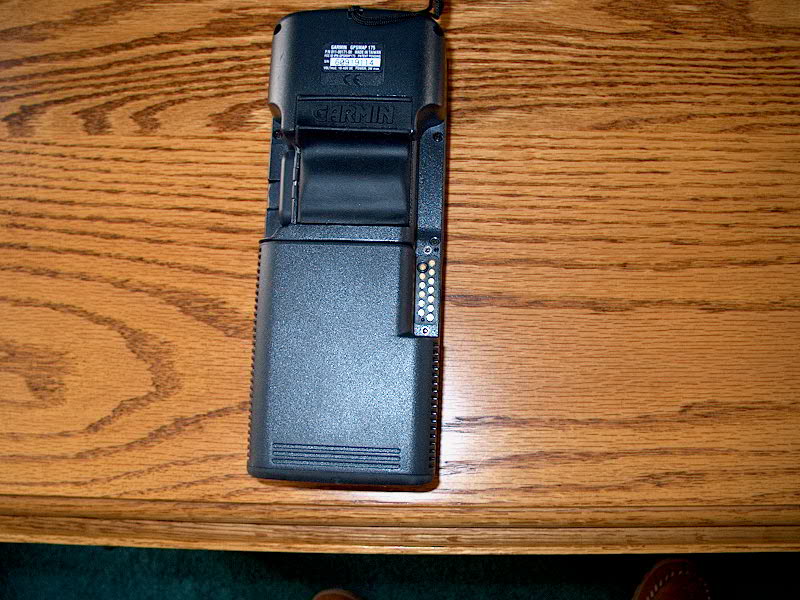
 When I installed my GPS, I
purchased a mounting bracket and external DC power/data cable from Garmin; the
way the GPS 175 is set up, there is a flush set of gold contacts on the back,
and the power/data cable, with small, spring-loaded pins, contacts these when
you install the GPS in the bracket; the cable is screwed to the bracket.
This is all well and good. After I bought the laptop, I also purchased,
from Garmin, a PC interface cable. Well, as it turns out, installation was
hardly so hunky-dory. The first thing I found was that basically I didn't
need to have When I installed my GPS, I
purchased a mounting bracket and external DC power/data cable from Garmin; the
way the GPS 175 is set up, there is a flush set of gold contacts on the back,
and the power/data cable, with small, spring-loaded pins, contacts these when
you install the GPS in the bracket; the cable is screwed to the bracket.
This is all well and good. After I bought the laptop, I also purchased,
from Garmin, a PC interface cable. Well, as it turns out, installation was
hardly so hunky-dory. The first thing I found was that basically I didn't
need to have  bought the interface cable; the original power/data cable I bought
has all the wires needed for NMEA connections. Second, use of the
interface cable, as supplied, is mutually exclusive with use of the original
power/data cable; there's not an extra plug or anything on the back of the
GPS. This whole thing stumped me for a while--at first, I couldn't see how
I could possibly interface and supply DC power to my GPS. Then, it
seemed that there was no way that it couldn't be possible--that
would simply be too dumb. Well, it's not quite that dumb--but
almost. bought the interface cable; the original power/data cable I bought
has all the wires needed for NMEA connections. Second, use of the
interface cable, as supplied, is mutually exclusive with use of the original
power/data cable; there's not an extra plug or anything on the back of the
GPS. This whole thing stumped me for a while--at first, I couldn't see how
I could possibly interface and supply DC power to my GPS. Then, it
seemed that there was no way that it couldn't be possible--that
would simply be too dumb. Well, it's not quite that dumb--but
almost.
|
|
After some research online at the
Garmin website and in my Garmin manual, I figured out that I could make this all
work--the power/data cable that I already had attached contained all the
necessary wires. OK. So, all I had to do was cut off the GPS end of
the new PC interface cable (which has a DB9 serial port at the other end for
computer connection) and connect the appropriate wires. Simple.
Instantly, I ran into a problem
that would prove to be difficult to get past (well, at least until I had an epiphany
later on). The wires
inside the GPS power/data cable are all color-coded--from the wiring diagram on
the Garmin site, the ones I wanted were blue, brown, and the ground
(black). That's helpful. I thought that, given that the PC cable was
from Garmin and intended for connection to this GPS, that it would probably
contain wires that were the same color. Think again. It turns
out that the three wires inside the PC cable were white, black, and
yellow. So much for a nice, simple connection. Am I crazy, or
wouldn't it have made sense to have blue, black, and brown wires inside the PC
cable?
OK, I thought, I'll just peek
inside this serial connector somehow and see which wire goes to which pin.
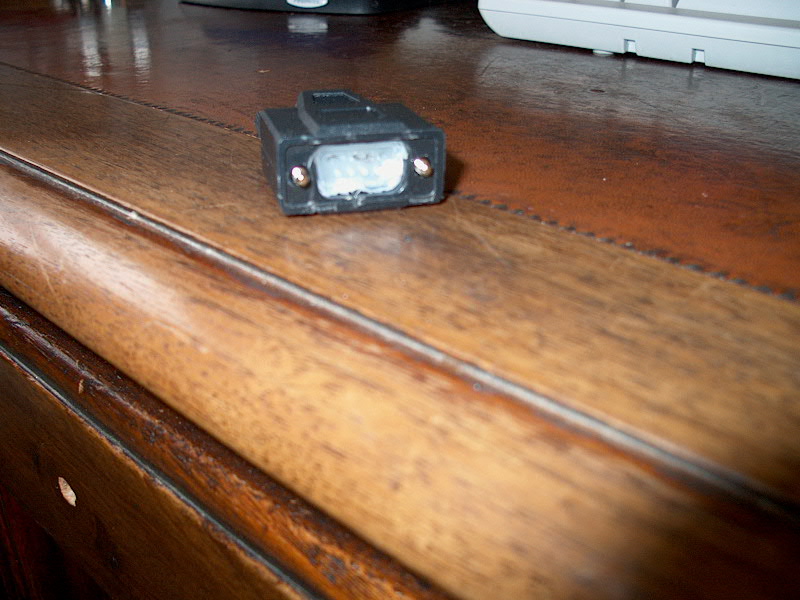
A DB9 connector, for those who don't know, is the small 9-pin connector that you
might use to connect a modem to the back of your computer. The computer
has the male connection, with external pins, and the cable has female
pins. Each pin is numbered according to a standard. I only had to
figure out three wire colors; the other pins in this particular cable had no
wires connected, as they were not needed.
|
|
 Well,
have you ever tried to take one of these connectors apart? It's a molded
plastic head, with the wires inside. After looking at it, I slowly pried
up the face of the plug, and it started to come out. Cool, thought I, the
innocent, I'll just keep slowly pulling this out, and it will pull the wires
with it so I can see what wire goes where. Then I'll be on my way. Well,
have you ever tried to take one of these connectors apart? It's a molded
plastic head, with the wires inside. After looking at it, I slowly pried
up the face of the plug, and it started to come out. Cool, thought I, the
innocent, I'll just keep slowly pulling this out, and it will pull the wires
with it so I can see what wire goes where. Then I'll be on my way.
As you are probably guessing,
this was not the case! What actually happened was that the stupid little
wires pulled right out of the backs of the pins, since the whole mess inside is
encased in a semi-hard plastic. There was no way I could see which wire
went where, and, of course, this ruined the connector anyway--there was no way
to reinstall it. Sigh.
Moving on. I had trashed
one cable, but I wasn't dead yet. Next, I researched online, looking for a
wiring standard for DB9 connectors. I thought I struck gold--I found a few
sites that contained this information. Since I happened to have another
standard serial cable with two female ends, that I had purchased for some other
computer use, lying around the house, I figured I could cut off one end, and
then, using the wiring information I found online, determine the correct wire
colors for each pin, and then simply connect the wires to the GPS cable.
Seemed logical and simple enough--between the wiring information from the Garmin
site and the new "standard" wiring colors, it would be a breeze.
Psyched, I made up the connections on the boat, crimped and sealed, and
arrogantly tied up the wires and cleaned up the tools before proceeding.
After all, the wiring standard had to be right, right?
Wrong. Of course. Why
would it be right? I could not get the GPS to be recognized by the nav
program. I tried everything. Apparently, the wires were
wrong. Double sigh.
Still kicking, I tried one more
plan--a surefire way to make this work. The serial cable I was now using
had had two female ends...one was still connected, and would remain so, but the
other was sacrifice-able. A little cautious dissection and surgery, and I
could figure out if the wires ran to the pins as they were supposed to according
to the DB9 "standard", or else figure out which wire color went
where. Then, since I had to assume that each end of the cable (with
identical connectors) would be wired the same way.
|
|
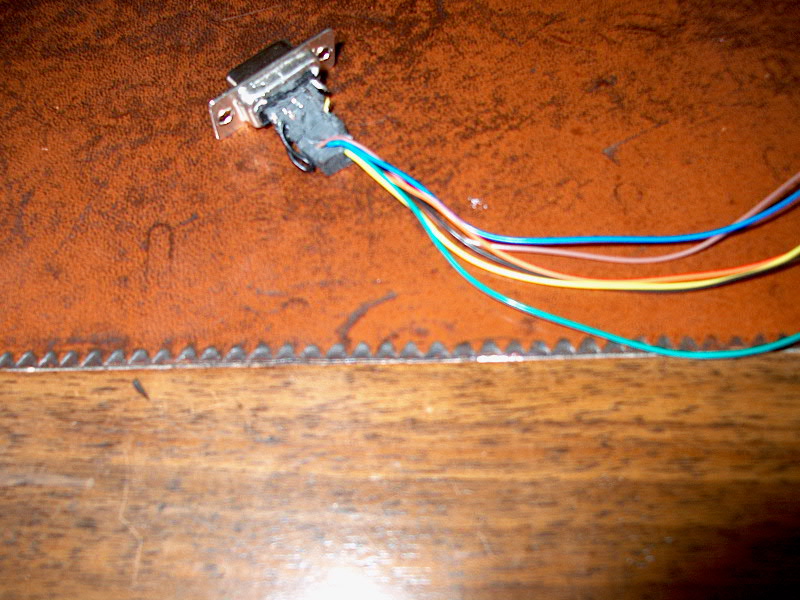 With
a sharp serrated knife, I carefully cut through the plastic connector housing
and removed it without too much trouble. Now, I was faced with a rubbery
block of junk that encased the individual wires and the backs of the pins.
I could see some of the wires swirling around at the surface, taking illogical
paths to God knows where. Ever so slowly, I pared away the rubbery junk,
taking pains not to cut any of the wires or remove their insulation so that I
wouldn't be able to identify them. I only needed to figure out pins 2, 3,
and 5. All other wires were irrelevant. After 10 minutes of cutting
(it's kind of like an archeological dig, where patient people remove hundreds of
pounds of dirt with whisk brooms so that they don't damage the bones or pottery
or whatever) I thought I had it. Pin 2-brown; pin 3-red; pin
5-yellow. Having learned my lesson before, I simply twisted the wires
together this time, leaving permanent connections till I was sure. With
a sharp serrated knife, I carefully cut through the plastic connector housing
and removed it without too much trouble. Now, I was faced with a rubbery
block of junk that encased the individual wires and the backs of the pins.
I could see some of the wires swirling around at the surface, taking illogical
paths to God knows where. Ever so slowly, I pared away the rubbery junk,
taking pains not to cut any of the wires or remove their insulation so that I
wouldn't be able to identify them. I only needed to figure out pins 2, 3,
and 5. All other wires were irrelevant. After 10 minutes of cutting
(it's kind of like an archeological dig, where patient people remove hundreds of
pounds of dirt with whisk brooms so that they don't damage the bones or pottery
or whatever) I thought I had it. Pin 2-brown; pin 3-red; pin
5-yellow. Having learned my lesson before, I simply twisted the wires
together this time, leaving permanent connections till I was sure.
Still, I couldn't get the program
to find the GPS. This was most demoralizing. I tried uninstalling
and reinstalling the COM1 port on the computer; I disabled the network; I
manually entered information in the Cap'n GPS.ini file as some of the
troubleshooting info I had gotten online indicated...and all for nothing.
|
|
My
first
thought was to look for a female DB9 connector that I could take apart and wire
to my specifications. I figured I could find something like this at Radio
Shack. However, it was a Sunday morning, and, as usual, I was up
early. By the time it was late enough in the morning for the store to be
open (they don't open till 1100), I had come up with new plans of attack.
The first thing I did was go up
to the boat and remove the GPS (it's a handheld, after all), power cable, and
bracket. It's easy to do, and I don't know why I didn't think of it
before. It was a nasty, cold, raw, rainy day, and I figured everything
would be better if I worked in my warm living room instead of on the cold
boat. With all my equipment in the house, I prepared to try everything
over again. I cut back both the GPS cable and the serial cable to new,
clean ends, installed new batteries in the GPS, and set it to the simulator mode
to provide a "false" fix, since the antenna doesn't work
indoors. Then, referring again to my numerous diagrams and printouts, I connected
the wires as I thought would be correct. Still nothing. After some
diagnostics, I quit.
It was about this time that I had
my epiphany: I was looking over the remains of my Garmin-supplied PC
interface cable. The cable comes with a pre-wired attachment and plastic plug
connector designed to be connected to an aftermarket AC or DC (cigarette lighter
plug) adapter. I was thinking how it was too bad that it was set up this
way, as I didn't want to plug my GPS into ship's power through an adapter,
though if I did I could use the cable intact without worrying about the silly
DB9 wiring. Then the "DUH!" factor hit me: why couldn't I
remove the connector from the power end of the cable (instead of the difficult,
PC end) and just hard wire that into the system? Since the cable was
already trashed, I cut off the connector. Yup, two wires, red and black.
Perhaps, dear reader, this
seems like a foregone conclusion after you've read the above. But it
really didn't seem obvious to me in the slightest until that moment. With
the clarity of hindsight, it now seems idiotic that I didn't think of this
sooner. If there's one tried-and-true rule about boat projects (or nearly
any project), whatever the level of frustration was the day before, it's that if
you take a break and look at things with a fresh outlook the next day, a
solution almost always becomes apparent immediately.
|
|
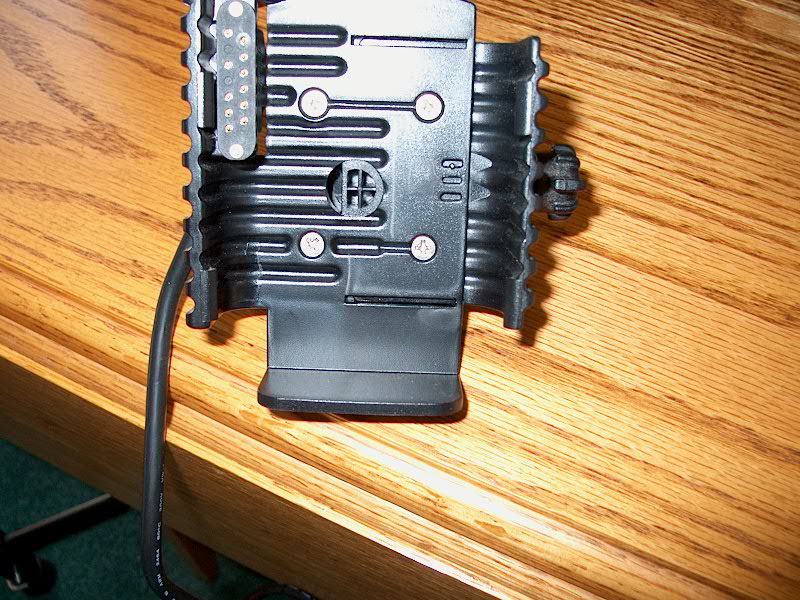
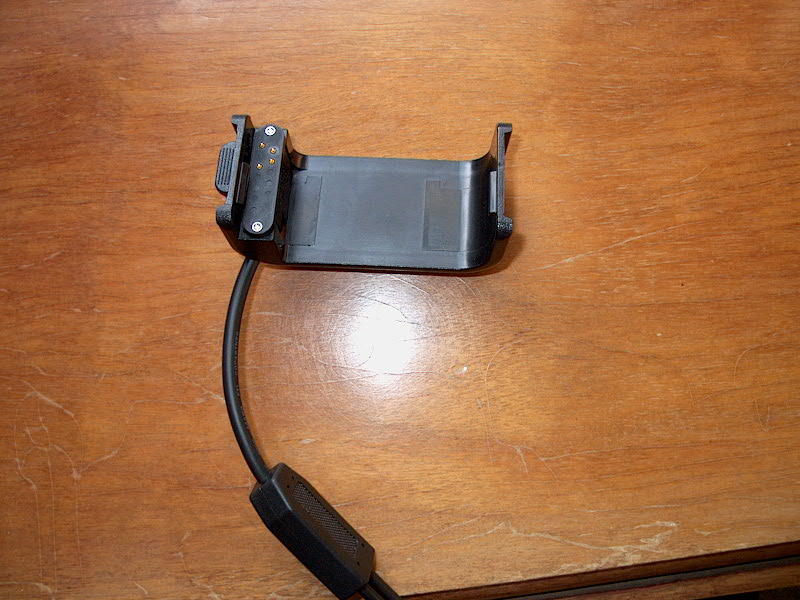
 So,
I ordered a new cable, complete. All I have to do is unscrew the existing
power/data cable from the GPS bracket mount, unscrew its counterpart from the
bracket that is supplied with the new cable (not a mounting bracket--all cables
for my particular Garmin come with a sort of cradle that forces the contacts
together--see the photo) and reattach the new cable (with only a 4-pin
connector--hot, ground, and data in/out transfer wires) to the mounting bracket
in its stead. This should take care of the wiring problems. So,
I ordered a new cable, complete. All I have to do is unscrew the existing
power/data cable from the GPS bracket mount, unscrew its counterpart from the
bracket that is supplied with the new cable (not a mounting bracket--all cables
for my particular Garmin come with a sort of cradle that forces the contacts
together--see the photo) and reattach the new cable (with only a 4-pin
connector--hot, ground, and data in/out transfer wires) to the mounting bracket
in its stead. This should take care of the wiring problems.
The happy news is that this plan
worked! I tested the setup indoor first, with the GPS on battery
power--all worked fine. I then moved out to the boat, wired up the GPS
permanently, and checked it out again. It worked! I tied up the
excess wires again and the job was done. Phew.
Power consumption with the GPS,
inverter, and laptop running was observed to be about 3.2 - 4.0 amps.
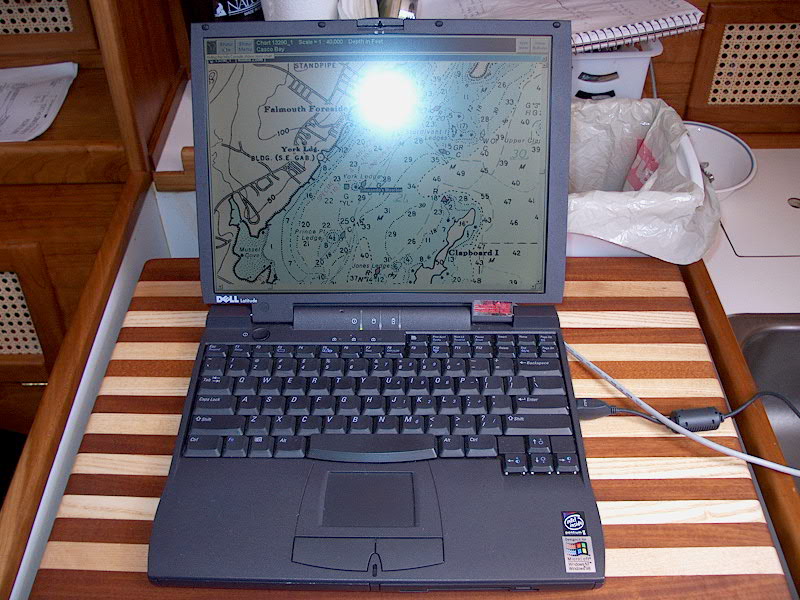
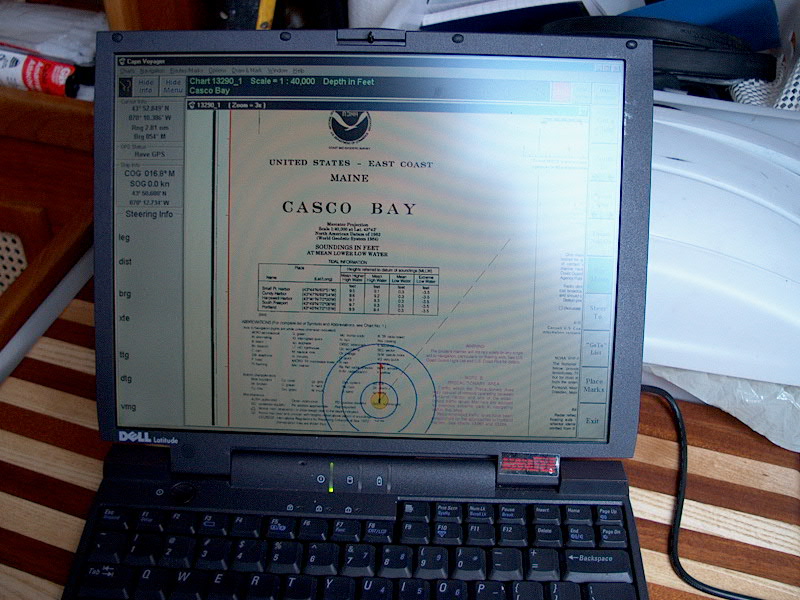
The screen shot below is
something you never want to see when you're actually out sailing; the bull's-eye
is the position of the boat (on the hard at my home when this was taken).
If you see this and you're sailing in the fog, you know you are really
lost!
|
|
|
|