|
Small Projects: 2003
August 14, 2003
Tiller Damage and Repair
For some time, I had been
aware that my tiller--a laminated mahogany/ash stock tiller manufactured
by H&L Marine that I purchased new in 2001--was not in the greatest
shape. The glue used in these manufactured tillers tends to let go
between the laminations over time, and I had seen signs of this.
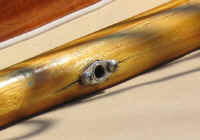
Also, the glue failure was exacerbated by the fact that I had drilled a
large hole into the tiller in order to install my tiller extension
housing., which of course allowed water in through the top. I
wasn't too concerned about it, as I planned to build a new tiller over
the coming off-season anyway.
At some point, I replaced
the screws holding the tiller extension, since the originals were
stripped. (The tiller extension puts a fair strain on the tiller
when in use, especially on aggressive beats where the weather helm is
significant. I always steer with the extension--it just feels
wrong without it, to me.) The larger screws seemed to be the kiss
of death, and a small split began to form shortly thereafter.
 During
a spirited sail one day, I noticed with some trepidation that the tiller
was splitting right down the middle, in essence, from top to
bottom. Yikes! I abandoned the tiller extension's use for
the rest of the day (which made me unhappy...I missed it) and had no
trouble; the split was not catastrophic yet, but could easily have
become worse had I continued to use the tiller extension. During
a spirited sail one day, I noticed with some trepidation that the tiller
was splitting right down the middle, in essence, from top to
bottom. Yikes! I abandoned the tiller extension's use for
the rest of the day (which made me unhappy...I missed it) and had no
trouble; the split was not catastrophic yet, but could easily have
become worse had I continued to use the tiller extension.
I didn't want to replace
the tiller, since I wanted to build my own during the winter. But
I needed to be able to use the extension, so obviously I'd have to do
something since the current situation was unworkable. I didn't
particularly care about the existing tiller--it could make a decent
second spare (I have the original, too), so the type of repair was not
important as long as it worked.
Back on the mooring, I
removed the tiller from the tiller head and replaced it, temporarily,
with the original solid oak tiller that came with the boat. This
allowed me to tie the rudder securely, as I always do. Plus, I
could still use the boat, though I'd enjoy myself less with the old
tiller. I brought the "new" tiller home with me for a
quick repair. |
 First,
I removed the hardware in the way, and then sanded the varnish off the
wood in an area all the way around the tiller at the damaged spot--about
6-8 inches in width. Next, I cleaned the surface all up, and mixed
some thick epoxy, which I forced into the hole where the tiller
extension housing had been to fill and seal it. (Later, I'll red rill
the hole from scratch). I cut two strips of fiberglass cloth--one
about 3-4" in width, the other a couple inches wider. After
soaking them in epoxy resin, plus one smaller scrap of cloth that I applied
to the split portion of the tiller first, I wrapped the pieces around
the tiller, building up a relatively heavy band of fiberglass reinforcement.
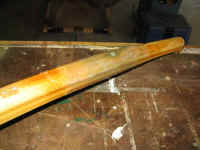
I rolled the material smooth and left it to cure. First,
I removed the hardware in the way, and then sanded the varnish off the
wood in an area all the way around the tiller at the damaged spot--about
6-8 inches in width. Next, I cleaned the surface all up, and mixed
some thick epoxy, which I forced into the hole where the tiller
extension housing had been to fill and seal it. (Later, I'll red rill
the hole from scratch). I cut two strips of fiberglass cloth--one
about 3-4" in width, the other a couple inches wider. After
soaking them in epoxy resin, plus one smaller scrap of cloth that I applied
to the split portion of the tiller first, I wrapped the pieces around
the tiller, building up a relatively heavy band of fiberglass reinforcement.
I rolled the material smooth and left it to cure. |
|
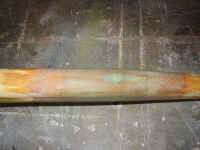
 The next day, when the
resin was cured, I sanded the patch smooth, faired in the edges, and
redrilled the holes for the tiller extension hardware as needed.
Then, as a final touch, I applied a coat of varnish to the whole
tiller--including the patch. The patch may not be particularly
elegant, but it is strong and effective. The next day, when the
resin was cured, I sanded the patch smooth, faired in the edges, and
redrilled the holes for the tiller extension hardware as needed.
Then, as a final touch, I applied a coat of varnish to the whole
tiller--including the patch. The patch may not be particularly
elegant, but it is strong and effective.
|