|
Ports and Hatches
|
|
Forward
Hatch | Portlights |
|
Forward
Hatch Replacement
Updated 1 March 2001
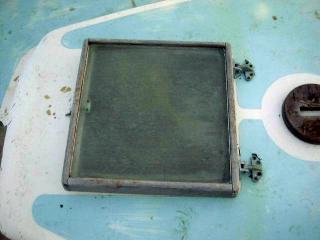
The forward hatch in the vee berth is original, made simply from four sections of teak and a piece of plexiglass. The bolts securing the bronze hinges were already removed, and I removed the hatch for good once the shed was built. We will not be reusing the hatch; the boat came with a very nice Bomar hatch that has never been installed, so we will be reconfiguring the opening to utilize the new hatch.
|
 |
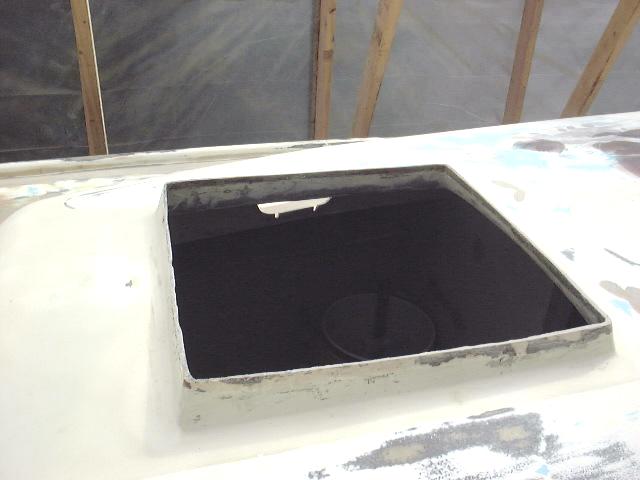 |
| The first step to install the new hatch
was to remove the raised fiberglass coaming that was in place. Using
a sawz-all, I cut this off flush with the deck. Next, I positioned
the new hatch over the opening and marked the area that needed to be cut
out. Using a jigsaw, I roughed out the opening. Final
adjustments were made with a grinder, sanding where necessary to true up
the opening and to expand it as necessary. Trial and error fitting
finally resulted in a properly-sized opening. |
|
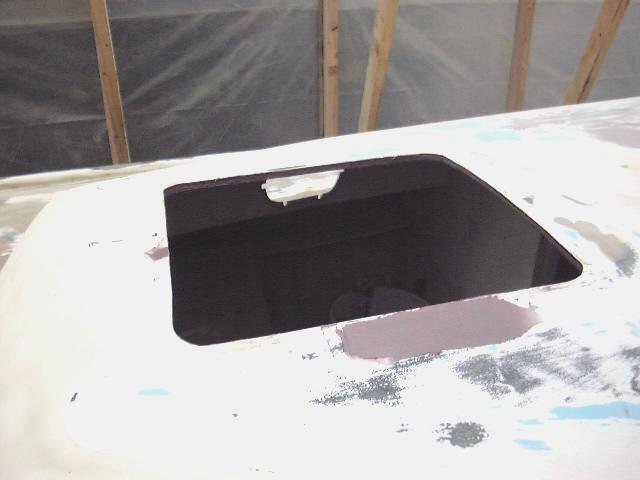
Making the new cutout exposed some of
the balsa core, which was in good condition (although I had previously
determined that the coachroof was in good shape). I hope the new
hatch won't leak, but to ensure that the core will not be damaged, I dug
out about 1/2" or so of the core all along the edges of the opening
with a putty knife and a wire brush. After cleaning the dust and
core bits out, I spread some unthickened epoxy in the gap to seal the
wood, then stuffed it full of epoxy filler, much like I did around the
edges of the deck during the recore
project. This will be sanded smooth later.
|
I began laying out the wood frame for
the new hatch by cutting some 8/4 mahogany to a 2" width, then
cutting four pieces slightly longer than needed to surround the
hatch. To determine the cutout so that the forward and aft pieces
match the curvature of the deck, I clamped them to the deck at the
centerline and scribed the arc using a compass. Then, I cut the
curves with my jigsaw. With a little sanding, these pieces fit
pretty well. |
|
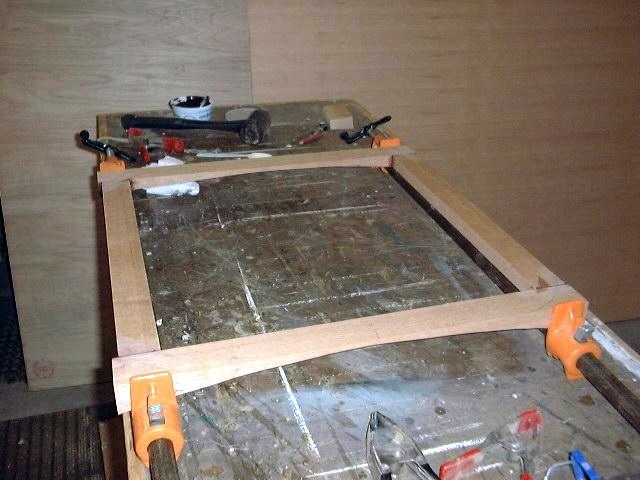
The
side pieces required a bevel on the bottom to match the angle of the deck,
which I determined using a bevel gauge. I then ripped them to the
proper thickness and angle on the table saw. Then, using the new
hatch as a guide, I placed the forward and aft pieces in their proper
position, and cut the side pieces to length to fit. Using the
compass again, I scribed a cut line about 3/4" outside of the hatch
frame--an appropriate reveal--and ripped the four pieces to the proper
width on the table saw. Then, I glued the four joints with resorcinol
glue and clamped up the pieces. I removed the hatch from the middle
during the clamping process.
When the glue kicked, I cut the curves
at the four outside corners with my jig saw, then rounded the top edges
using a 1/4" roundover bit in my router table. Finally, I
sanded everything smooth with 120 grit.
|
|
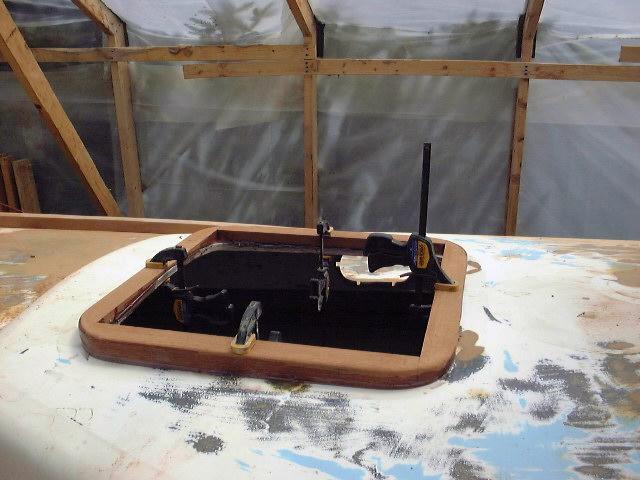
A
couple days later I permanently installed the hatch trim on the
coachroof. I mixed up a batch of thick epoxy and gooped it all
around the hatch opening. Then, I set the frame in place, squeezing
out the excess epoxy. This will help make up any slight
irregularities in the hatch frame and deck. I lightly clamped the
frame in place, taking care not to distort it in any way, lest the hatch
not fit properly later. I cleaned up the excess epoxy and let it
kick.
The next day, I sanded the epoxy smooth
where needed, and applied a second coat, forming a slight fillet at the
bottom with my finger. This rounded area will make the installation
look better, and will aid in keeping the area clean later on.
|
|
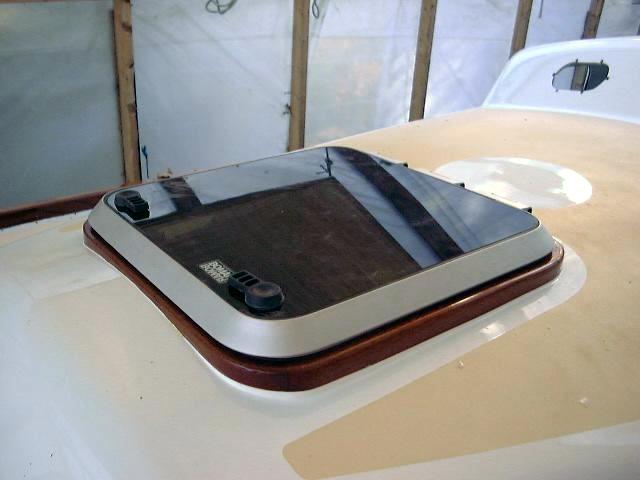
After
some final sanding, I applied three coats of varnish over several days, as I did
on the toerails. I will be applying many more, probably up to 10 coats,
before all is said and done.
I installed the hatch permanently by first
drilling pilot holes through the 14 screw holes on the hatch. I then
removed the hatch, cleaned the surround, and applied a heavy bead of silicone
over the area. I pressed the hatch into place and secured it with 14 #8 x
1" stainless screws, which are mostly held by the mahogany hatch
surround. I determined that bolts would be unnecessary in this
application.
|
|
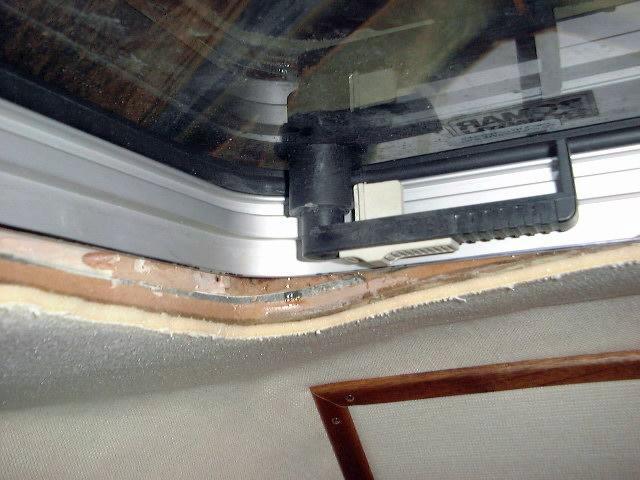
The
next step was to trim out the inside of the hatch. When I originally
cut the opening for the hatch, I left he inside corners round to match the hatch
outline. This posed a problem for installing wood trim from the
inside. Also, the bi-directional curvature of the coachroof made things a
little more complicated. In the center of the hatch, particularly forward,
the crown of the deck left little exposed; however, on the sides, as you can see
in the photo, there was a substantial gap to fill. Ideally, I wanted to
run trim right up to the protruding flange on the hatch that you can see.
This would provide a clean appearance.
To that end, my first--and overly
optimistic--plan was to install 1/4" thick trim boards over the gap and
bend them to fit into the curves at the hatch corners. Yeah, right.
I tried kerfing out the back side of a sample board, and there was just no way I
was going to get that much of a bend. This was discouraging, and I
put the project aside for a while.
|
|
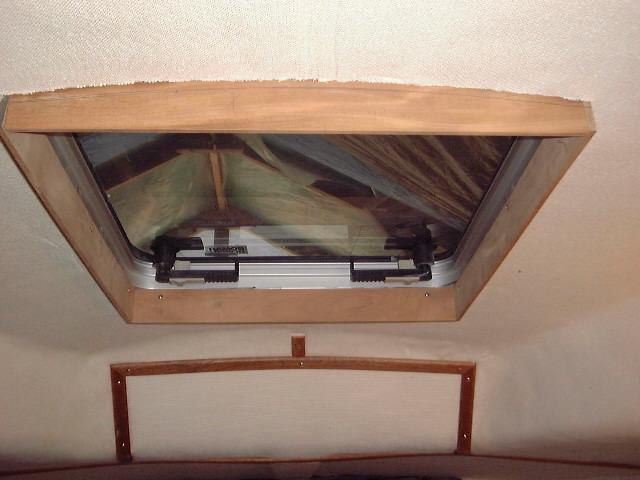
Eventually,
I decided to square off the opening in the deck and install trim below the hatch
only. The first step was to use my jigsaw to trim the corners square--with
the hatch in place. Next, I dry fitted four 1/4" thick mahogany
boards, cutting them to length to fit the four sides of the hatch opening and
securing them into the edge of the opening--which is sealed with solid epoxy to
about 1" depth--with screws (photo, right). With this done, I used a
scrap piece of the 1/4" material to scribe a line on the outside of the
boards to match the contours of the overhead. I cut the pieces along the
lines, and reinstalled them with screws and polysulfide caulk.
|
|
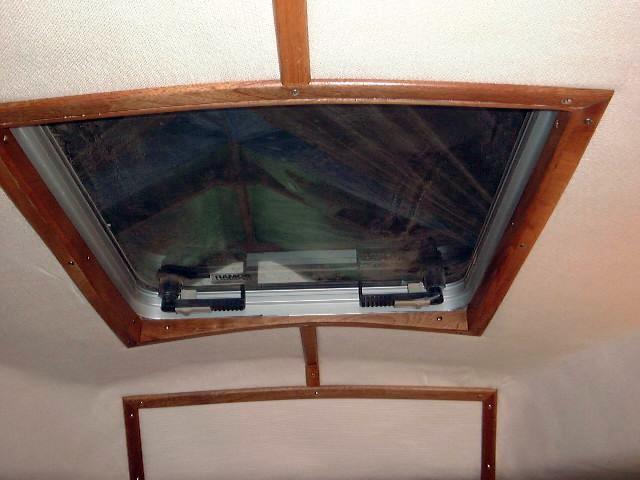
Next,
I installed smaller (3/4" wide) trim pieces along the outside edge of the
vertical pieces, to finish off the opening and close off the remaining gap
between the headliner and the hatch opening. These pieces are rounded over
on the outer edges. I installed them with screws directly into the
overhead; the wooden exterior hatch trim above eliminated any worries about the
screws coming through the deck above, and the screws were short in any
case. I sanded any unevenness smooth, cleaned the wood, and applied three
coats of tung oil. Later, I filled the small gaps at the corners with some
mahogany-colored Sikaflex.
|
|
 |
Update:
August 2008
After several years of inexorable deterioration in hinge action, I
declared the inexpensive aluminum hatch--which once seemed to be the
best thing I had received with the boat in her original state--to be
beyond salvation.This particular
hatch featured friction-type hinges that required no support rods or
pistons to hold the hatch in an infinite number of positions. At
first, this worked well, but over time, the inevitable corrosion between
the aluminum and dissimilar metals in the hatch construction began to
restrict the motion of the hinges. While the hinges still worked,
the hatch became stiff enough to operate that I began to open and close
it only from the foredeck, rather than from inside the boat. I
made several attempts to clean up and repair the hinges, to no
particular avail.
Compounding the hatch issues, the added
force required to operate the hatch began to not only work open the
non-welded extruded hatch seam, but to eventually loosen--and then
strip--the very screws that held one of the hinges to the frame.
This combination of failures caused the hatch to become virtually
untenable: the hatch wouldn't close squarely with its frame, and
only by shoving and torqueing the hatch from above could I even get the
latches to catch when I tried to close it. Junk.
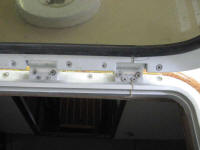
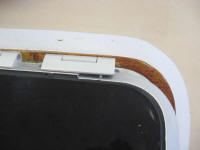
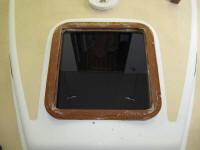
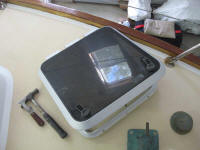
Look
carefully at the photo on the left, and you can see how the hatch is angled to
starboard (to the left in the photo); the other two photos show, from
the inside and outside, the broken weld seam and loose/stripped hinge
screws. |
|

|
|
As a result, I added "hatch
replacement" to my growing list
of boat upgrades and improvements planned for winter 2008-2009.
Shortly after the boat arrived back at the shop following the end of the
season, I removed the old hatch--a straightforward event involving
removing the mounting screws and prying the hatch free from its silicone
bedding.
After spending a bit of
time researching my options for the new forward hatch, and
based upon some experience with various hatch types and
styles, I decided upon the
Lewmar Ocean Series 60, a sound hatch with good
features. The 60 size, according to its dimensional
drawings, would be an exact fit in the opening that I
already had--one of the few times in any industry where
sizing seems to be standard across manufacturers (what a
concept).
One thing I really liked
about this hatch was its venting feature: the hatch
can be closed and latched in such a way as to allow constant
ventilation, but without allowing rainwater in. Also,
the hatch featured handles that are operable from inside or
outside--another feature that I was used to and wanted to
keep.
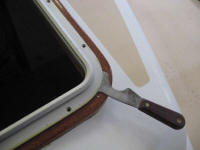
More to come once I receive the new
hatch. In the meantime, I planned to clean up and revarnish the
wooden hatch surround in preparation for the new hatch. |
|
|
|
Portlights
Updated
on 19 June 2002 Large,
Fixed Ports
Small,
Opening Ports |
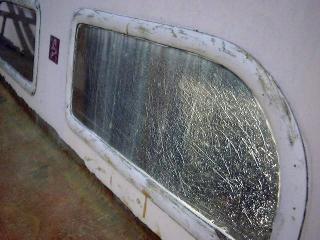 Large,
Fixed Ports:
Glissando has the original bronze frames around the ports in the main salon.
The bronze frames were painted when we got the boat and contained badly scratched plexiglass. The paint will be stripped, the bronze shined, and the plexiglass replaced with Lexan. The inside frames are
also bronze, although they are covered with some sort of plating that is in fair
condition. This picture shows how they looked. Large,
Fixed Ports:
Glissando has the original bronze frames around the ports in the main salon.
The bronze frames were painted when we got the boat and contained badly scratched plexiglass. The paint will be stripped, the bronze shined, and the plexiglass replaced with Lexan. The inside frames are
also bronze, although they are covered with some sort of plating that is in fair
condition. This picture shows how they looked.
The ports were easy to remove, held in place with a series of screws on the inside. Once the screws were out, the frames came right out, although there was more of that sticky gray caulking.
To remove the paint from the port frames, I
applied a coat of standard stripper and let it work for a few minutes. The
paint bubbled off within 5 minutes and was easily removed with bronze
wool. Next, I began cleaning up the bronze with a combination of sanding,
bronze wool, and metal cleaner (Noxon). This did a fairly good job of
brightening the bronze, although some more detail work is required before the
frames will be ready for reinstallation.
|
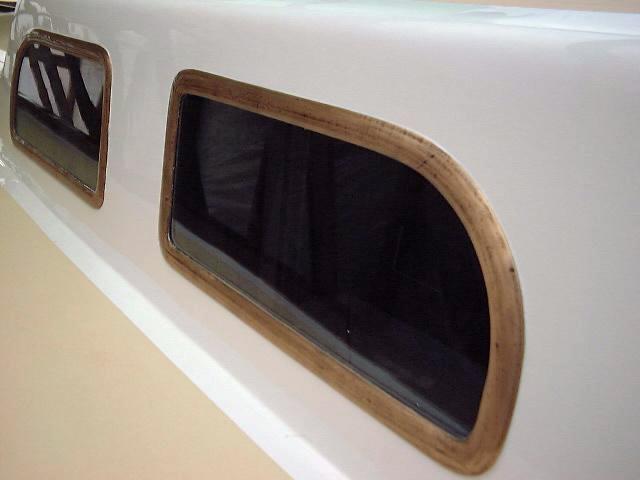 After
cleaning , I protected the bright bronze with a number of coats of spray
lacquer. I have had pretty good luck with this in the past on other
projects, although I figure I will have to clean and re-lacquer the port frames
every couple years or so. Or, maybe it won't hold up at all. Only
time will tell. This photo shows the ports completely installed with the
new lexan; the glass appears black because it was a gray day and there was no
light inside the cabin. It is NOT smoked or bronze
Lexan; it is clear. After
cleaning , I protected the bright bronze with a number of coats of spray
lacquer. I have had pretty good luck with this in the past on other
projects, although I figure I will have to clean and re-lacquer the port frames
every couple years or so. Or, maybe it won't hold up at all. Only
time will tell. This photo shows the ports completely installed with the
new lexan; the glass appears black because it was a gray day and there was no
light inside the cabin. It is NOT smoked or bronze
Lexan; it is clear.
|
 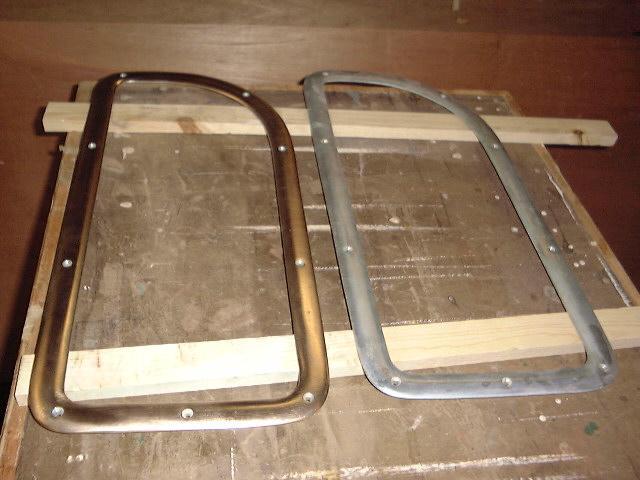 The
interior port frames are just like the exterior, although they had been covered
with some sort of plating or coating in a silver color. There was some
pitting, and they generally didn't look good enough. I ended up sanding
off the coating with my random orbit sander, then polishing the sander marks off
with a drill-mounted wire wheel. This produced very nice results, with
sort of a machined look that I happen to like. I sprayed the inner f The
interior port frames are just like the exterior, although they had been covered
with some sort of plating or coating in a silver color. There was some
pitting, and they generally didn't look good enough. I ended up sanding
off the coating with my random orbit sander, then polishing the sander marks off
with a drill-mounted wire wheel. This produced very nice results, with
sort of a machined look that I happen to like. I sprayed the inner f rames
with spray lacquer as well--but these should hold up better being out of the
weather. rames
with spray lacquer as well--but these should hold up better being out of the
weather.
I took the old, miserably scratched and
dismal plexiglass to a local plastic supplier, Plastic
Supply, Inc., where they cut me new ports exactly matching the old. I
chose 3/8" clear Lexan for the replacements--it is much stronger than
plexiglass, although it may be more susceptible to scratching.
I determined that it would make
installation easier if I first installed the lexan in the outer frame, making a
one-piece unit; with this done, it should be easier to align the various pieces
and install the inner frames.
|
|
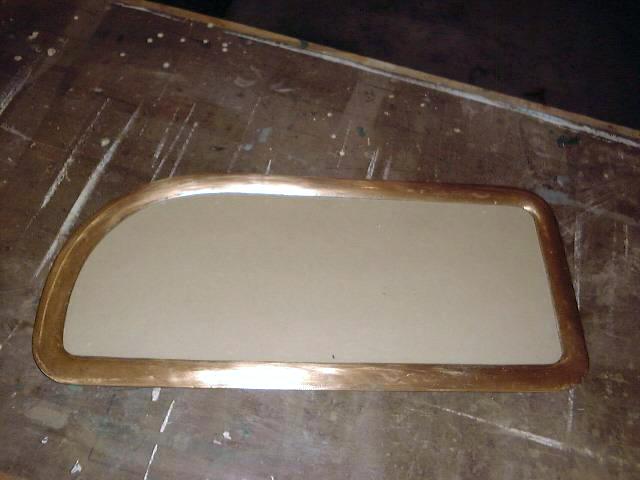 I
began the process of installing the ports. First, I laid out the outer
frames, lexan and inner frames to be sure that all four would properly
fit. I numbered the pieces to keep things in order. Next, laying the
outer frame over the lexan (which, as with all plastics, was covered with
adhesive paper for protection) I ran a sharp utility knife around the inside of
the frame, tracing the exact location of the frame on the paper. Removing
the frame, I was able to remove the thin strip of paper from beneath the
frame. This is necessary to allow the sealant to adhere directly to the
plastic--but trimming allows the remainder of the paper to stay on, protecting
the plastic during installation and making it easy to clean off excess sealant. I
began the process of installing the ports. First, I laid out the outer
frames, lexan and inner frames to be sure that all four would properly
fit. I numbered the pieces to keep things in order. Next, laying the
outer frame over the lexan (which, as with all plastics, was covered with
adhesive paper for protection) I ran a sharp utility knife around the inside of
the frame, tracing the exact location of the frame on the paper. Removing
the frame, I was able to remove the thin strip of paper from beneath the
frame. This is necessary to allow the sealant to adhere directly to the
plastic--but trimming allows the remainder of the paper to stay on, protecting
the plastic during installation and making it easy to clean off excess sealant.
With this done, I ran a heavy bead of
silicone caulk over the exposed area of the port, and then applied the heavy
bronze frame over the top, pressing it evenly into the caulk while being careful
not to squeeze out all the sealant. The frames were heavy enough to stay
in place without clamping. I repeated this process on all four
ports. The next day, when the sealant was cured, I ran the knife carefully
around the inside of the frame and removed the excess sealant that had squeezed
out--big rubber bands!
Before installing the frames in the boat, I
repeated the layout process using the inside frame--it will make things easier
when I am on the boat.
We installed the ports in a couple stages,
to make things easier and to help ensure the best bonding. After the lexan
was installed in the port frames as described above, the next step was to
install the outer frames in the openings in the cabin trunk. I ran a bead
of silicone along the inside of the port frame where it will rest against the
cabin, and pressed the frame into place from the outside. With my wife
holding it in place, I went inside the boat and temporarily installed the inside
port frame with several screws, thus pulling the outer frame into place and
holding it there while the silicone cured. We repeated this process for
all four frames. NO, ONLY ONE FRAME,
ACTUALLY!!! I had not enough of the original screws left, and I knew we'd
never be able to successfully install all four ports. Thus, we stopped
after one.
When the silicone cured, I removed the
inner frames to check the seal between the outer frames and the
fiberglass. Then, I caulked the inner frame and reinstalled it permanently
with the appropriate screws. NOPE!
DIDN'T WORK!!! You caught me--I wrote this before I had actually tried the
procedure. The Web Gods always get me if I try to anticipate the projects
at all in order to stay ahead of the website updates...gotta watch that!
:)
UPDATE:
Actually, we only installed one port using the above procedure. It became
obvious after the one port that a different approach would be needed. When
I removed the inner frame a couple days after installing the port, the silicone
seal on the outside frame was compromised along one portion of the frame.
Therefore, I had to remove it and clean off the old caulk.
After a couple week break,
I was ready to try again. New screws that I had ordered had arrived, and I
had some long bolts with nuts that I could use to pull the reluctant ports
properly into place and hold them while I fiddled with the stupid short screws
required to attach the two frames together. In case you are not aware of
the Triton's port setup, here goes. The outer frame is held in place from
the inside by machine screws that pass through the inner frame and thread into
the outer frame. While this provides a clean, fastener-free appearance on the
exterior, it brings with it some serious practical problems. Because of
the inner liner, or, on the older boats without liners, the unevenness of the
thickness of the cabin trunk, each screw on each frame is a custom fit.
That's right, they are any number of different lengths. If you remove the
ports, make sure to label the screws as to their location if you plan to reuse
them--this will save you much of the frustration that I encountered. I ran
into more complications with the new screws, too--read on! Perhaps you
might begin to see why I am currently calling this project the
WORST
PROJECT TO DATE in the restoration.
It's not the difficulty, or the nastiness factor--it's the aggravation of the
stupidity of the setup; in other words, reinstalling the port frames is much,
much more difficult than it needs to be. Perhaps that is why you don't see
this sort of port frame anymore.
I had ordered some 8-32
machine screws for the ports in two lengths--5/8" and 1/2",
according to the two basic lengths I could see in the old screws I had
left. I thought these were the right size--I had tested the threads in the
port frames with some screws I had on hand, and that size seemed to fit
properly. With these on hand, I figured I was all set.
Wrong! Turns out the
screws are actually 10-24 diameter. I don't know why the other ones seemed
OK, but they sure didn't hold when I tried using them from the inside during
installation. With the old screws I had left over from the original
frames, my helper and I were able to get two ports in. Then, I had to run
into town to the hardware store for some #10 screws (3/4") that would be
the right size.
|
|
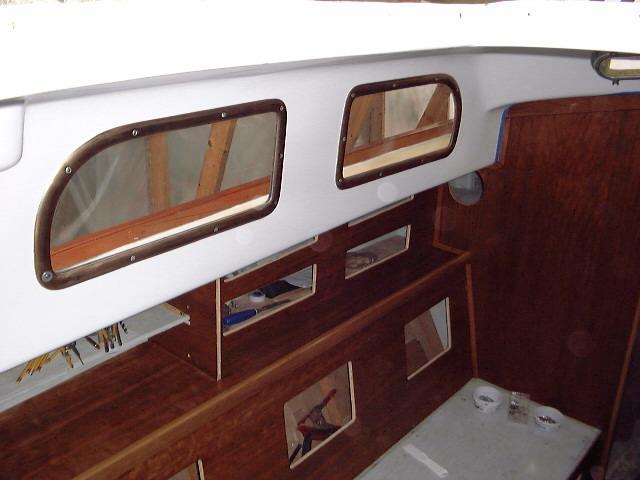 Of course, this didn't work
perfectly either. 3/4" is too long to work--they bottom out, and then
push the outer frame away from the cabin side. To make it work, I
installed washers beneath the screw heads on the inside, a temporary measure
that held the screws out just far enough so that I could tighten them and pull
the frames together as required. Later, I'll figure out a way to replace
these screws with something more attractive and permanent--either 5/8"
screws, or maybe some pan heads and washers to trim things off better. I
will wait to do this for several weeks or more, to ensure that the bedding
compound is completely cured. This way, the compound will hold the ports
in place while I replace one screw at a time. I sure don't want to rebed
again. Of course, this didn't work
perfectly either. 3/4" is too long to work--they bottom out, and then
push the outer frame away from the cabin side. To make it work, I
installed washers beneath the screw heads on the inside, a temporary measure
that held the screws out just far enough so that I could tighten them and pull
the frames together as required. Later, I'll figure out a way to replace
these screws with something more attractive and permanent--either 5/8"
screws, or maybe some pan heads and washers to trim things off better. I
will wait to do this for several weeks or more, to ensure that the bedding
compound is completely cured. This way, the compound will hold the ports
in place while I replace one screw at a time. I sure don't want to rebed
again.
Later on, after the sealant
cured, I carefully removed, one at a time, the longer or mis-matched bolts and
replaced then with #10 x 5/8" machine screws. By removing only one
fastener at a time, I was able to prevent the sealant around the port from
becoming compromised, and with the remaining fasteners in I found that the outer
frame was pulled in tightly enough so that the short 5/8" fasteners could
begin to grab the threads, but did not bottom out.
|
|
In summary, here is
the
port installation process that worked for me. The objective was to get a
good seal all around the inside and outside edges of the frames, and to hold the
ports securely in place.
1. With the paper
still on the Lexan, temporarily fit each window in the outer port frame, mark
the outline of the frame on the paper and remove paper outside the line.
2. Install Lexan in
outer port frame with caulk--polysulfide or butyl. Allow to cure.
3. Using the inner
frame, follow the procedure in step one to mark the paper on the inside of the
frame, and remove the excess outside of the line. Leave the paper on the
center portions of the windows, inside and out--makes for easy cleanup and
protects the windows during installation.
4. Run bead of caulk
(I used Butyl Rubber--very sticky and cures very rubbery and flexible) around
edge of outer port frame.
5. Carefully install
outer frame in cutout and have helper hold it in place--but not too tightly, or
it slides and can pop right out of the hole.
6. From inside the
boat, realign the outer frame as necessary to ensure that it covers the entire
cutout--the tolerance is very small.
7. Run bead of caulk
around edge of inner port frame--a little insurance against cabin leaks, but
probably not necessary from a structural or waterproofing
standpoint.
8. Install inner
frame and secure temporarily with two or three long (1 1/4" or greater)
machine screws with washer and nut. By screwing the screw all the way into
the threaded hole, and then tightening the nut against the frame and washer, the
frames can be pulled together as necessary.
9. Install other
screws around frame, hoping that they will actually reach or that they don't
bottom out. I ended up using temporary washers on each screw to hold them
out an appropriate amount for proper tightening. Much later, I'll come
back and replace them with something more appropriate. Bronze would be
nice.
10. If possible,
replace long screws and nuts with shorter screws so the long ones can be used in
the next port.
11. Move on to the
next one.
12. Clean up the caulk
that oozes out either at the end of the entire job, or after completing each
port. I waited till all four were done, then went back and cleaned up the
excess with a plastic putty knife and paint thinner.
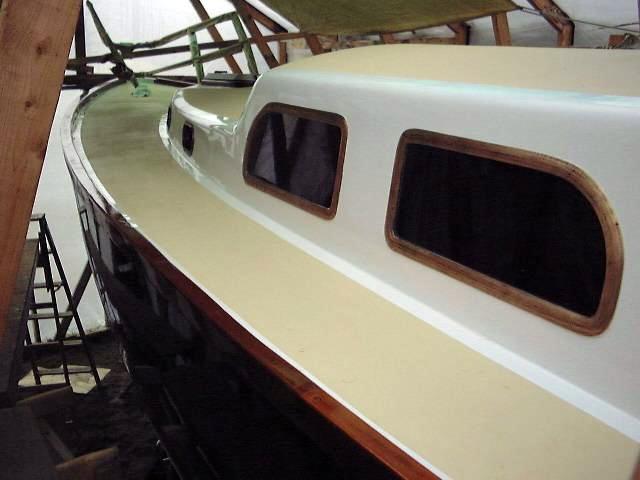  During the installation,
the Lexan was still covered with the protective paper. I removed it the
next day. At first, I tried simply pulling it off by getting an edge
started and peeling; however, because of the cold weather, the rubbery (sort of)
coating beneath the paper wouldn't peel off in pieces bigger than a square
inch. I went inside and got my wife's hairdryer (thanks, Heidi!) and
heated the paper, which allowed it to peel off much more successfully. During the installation,
the Lexan was still covered with the protective paper. I removed it the
next day. At first, I tried simply pulling it off by getting an edge
started and peeling; however, because of the cold weather, the rubbery (sort of)
coating beneath the paper wouldn't peel off in pieces bigger than a square
inch. I went inside and got my wife's hairdryer (thanks, Heidi!) and
heated the paper, which allowed it to peel off much more successfully.
Anyway, the ports are
in! With a few finishing touches, the job will be complete. I'll
post an update later on how I tackle the replacement of the screws. Note
that, despite the appearance in the photo, the ports are clear Lexan, not
smoked! Yes, this matters!
|
|
 Small,
Opening Ports: The
small ports were also in cosmetically bad shape. Restoration was
necessary. I removed
them from the boat--a simple matter of removing the six screws from the trim
ring and prying the pieces away from the sticky gray caulk. The opening
portion of the port is easily removable from the frame by unscrewing the two
screw hinges at the top; removal makes working on the units a little easier. Small,
Opening Ports: The
small ports were also in cosmetically bad shape. Restoration was
necessary. I removed
them from the boat--a simple matter of removing the six screws from the trim
ring and prying the pieces away from the sticky gray caulk. The opening
portion of the port is easily removable from the frame by unscrewing the two
screw hinges at the top; removal makes working on the units a little easier.
|
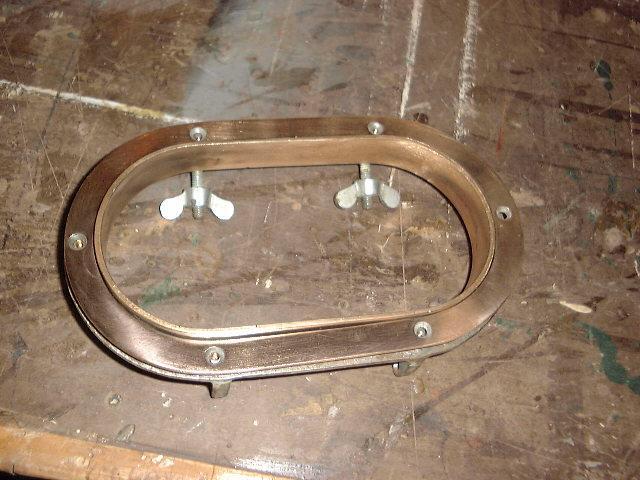 Restoration was a simple, if tedious,
matter of sanding (by hand and machine where possible) and buffing with the wire
wheels on a drill. This took care of cleaning up the trim ring and the
inside (visible part) of the port frame. The interior surfaces, however,
were also treated with the same coating/plating as the large interior port
frames, and this proved too difficult to remove, given the contours and curves
of the ports. I decided to spray paint the interior surfaces with a chrome
paint--seems a better solution than killing myself stripping the old plating,
and certainly cheaper than having them professionally stripped and/or
rechromed. Of course, this may be an option later if I am unhappy with the
way the paint holds up. Restoration was a simple, if tedious,
matter of sanding (by hand and machine where possible) and buffing with the wire
wheels on a drill. This took care of cleaning up the trim ring and the
inside (visible part) of the port frame. The interior surfaces, however,
were also treated with the same coating/plating as the large interior port
frames, and this proved too difficult to remove, given the contours and curves
of the ports. I decided to spray paint the interior surfaces with a chrome
paint--seems a better solution than killing myself stripping the old plating,
and certainly cheaper than having them professionally stripped and/or
rechromed. Of course, this may be an option later if I am unhappy with the
way the paint holds up. |
|
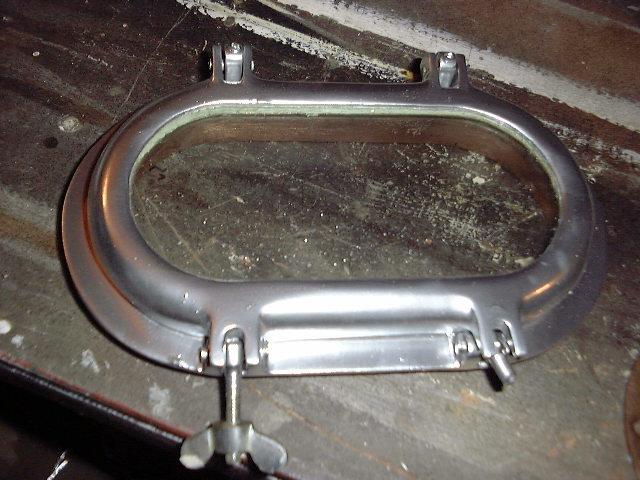 I
lacquered the outside surfaces, including the trim ring. When the lacquer
was dry, I taped it off and sprayed the inside surfaces with the chrome spray
paint. The results were pretty convincing; all that remains to be seen it
how the paint holds up in the harsh ocean environment. I
lacquered the outside surfaces, including the trim ring. When the lacquer
was dry, I taped it off and sprayed the inside surfaces with the chrome spray
paint. The results were pretty convincing; all that remains to be seen it
how the paint holds up in the harsh ocean environment.
The old gasket material had done pretty
well for 37 years, but was trashed; replacement was in order. First, I had
to find the stuff. Thanks to Mark, # 516, I found the material at Defender.
I ordered some 1/4" black square port
rubber gasket material from Defender (part # 900663). Once the material
arrived, it was a simple matter to install it, making sure the seams were at the
top of the port for the best seal. The ports are now ready for
installation.
Installing the ports requires two
people--one inside to hold the port, the other outside to install the frame and
screws. After managing with difficulty to install one by myself, I
requested Heidi's assistance for the remaining five.
The process is thus: first, run a
bead of silicone (or other caulk) around the outer surface of the main body of
the port. (UPDATE: I have no idea why I used
silicone here. I hate the stuff. In any event, the small ports do
not leak at all, but I would certainly not use silicone for any job in the
future.) Then, press it into place in the opening and hold tightly.
From the outside, run another bead of caulk around the edge of the port, press
the bronze trim ring into place and secure with the six very short screws.
Getting the screw threads started can be difficult, so the person inside needs
to press directly behind the screw locations to ensure that the threads will
reach enough to get started. Once all six screws are tightly
installed, clean up the silicone that oozes out along the inner portion of the
trim ring; the stuff that squeezes out along the outer edge is best removed
after it cures by cutting carefully around the edge with a sharp utility knife
and peeling the rubber away.
|
|
 On
#381, and presumably other Tritons with the molded main salon cabin liner, the
screws for the two forward-facing ports are slightly longer than the ones for
the other four ports--this is because the openings are thicker here than forward
where there is no liner. The longer screws will not work forward, and the
shorter ones will not work in the salon. Fortunately, I noticed this
before beginning to install the ports, when I laid out and counted the screws to
make sure I had everything. When I noticed the two lengths, something
clicked and I counted the longer ones--sure enough, exactly 12, enough for the
salon ports. On
#381, and presumably other Tritons with the molded main salon cabin liner, the
screws for the two forward-facing ports are slightly longer than the ones for
the other four ports--this is because the openings are thicker here than forward
where there is no liner. The longer screws will not work forward, and the
shorter ones will not work in the salon. Fortunately, I noticed this
before beginning to install the ports, when I laid out and counted the screws to
make sure I had everything. When I noticed the two lengths, something
clicked and I counted the longer ones--sure enough, exactly 12, enough for the
salon ports.
With the shiny restored ports finally
reinstalled, the exterior of the boat suddenly looked more finished. Once
more step in the right direction!
UPDATE
6/19/02: The forward-facing ports have always leaked on their
"low", or outboard, sides, since they hold water because of their
upward-facing angle. Eventually I got sick of the small leaks and took
care of the problem. Read about it here.
|
|