|
Anchoring Setup and Ground Tackle (Page 4)
This page was last updated on June 2, 2002
35#
CQR 33# Bruce/Claw
20# Danforth
13#
Danforth
Marking
the Anchor Rodes Anchor Rode
Storage/Chain Pipes |
|
Marking
the Anchor Rodes
It's useful, if not essential, to
know how much anchor rode you have out at any time. This means that the
rode must be marked. Most people buy those little plastic strips from the
marine store and install them through the strands of their anchor line--I've
used them myself. The problem with these is that they tend to rip off and
fail in a short time. A better solution is called for.
In Cost Conscious Cruiser,
by Lin & Larry Pardey, I read about their own solutions to marking the
anchor rode. They have a good solution for both all chain and nylon
rodes. My rodes are mostly nylon, so I thought I'd try their marking
solution. I modified the idea slightly for reasons that I'll discuss
below.
Their idea is to use some strong
thread--they used a polyester twine used for mending fishing nets--and create
tight whippings around the line in a predictable, and easy to remember, pattern
to instantly identify how much line is out. The whippings, being small and
tight, hold up well, even when a windlass is used. We don't have windlass
at this time, but the idea still made sense. Because all of their rodes
are the same length, they created a system where the number of markings increase
up to the center of the rode, and then decrease again as it continues--allowing
the rode to be end-for-ended to spread wear, and the marking system would remain
the same.
We have several different-length
rodes, so I couldn't come up with a system to keep the markings consistent from
end to end on all of
them. Therefore, I decided to just keep increasing the number of whippings
for each marking as I went along--this means that there will end up being a lot
of marks at some lengths, but the only downside to this is the time needed to
create all the whippings. I started the job in February, when the Olympics
were on TV. It's pretty mindless work, so this was the perfect time to do
it. I sat on the couch in the living room and did my little sewing
project--it was even kind of fun! It doesn't really take that long, once
you get used to it.. To prevent the number of marks from
getting too ridiculous I decided to use a single wrap of a second color (red) to
signify (and replace) five blue markings. This means that I can
essentially start over every four marks. See the chart below to see how
this works.
Like the Pardeys, I decided to
mark the rodes every 30' of length. The marking system is below:
-
30 feet: One blue
mark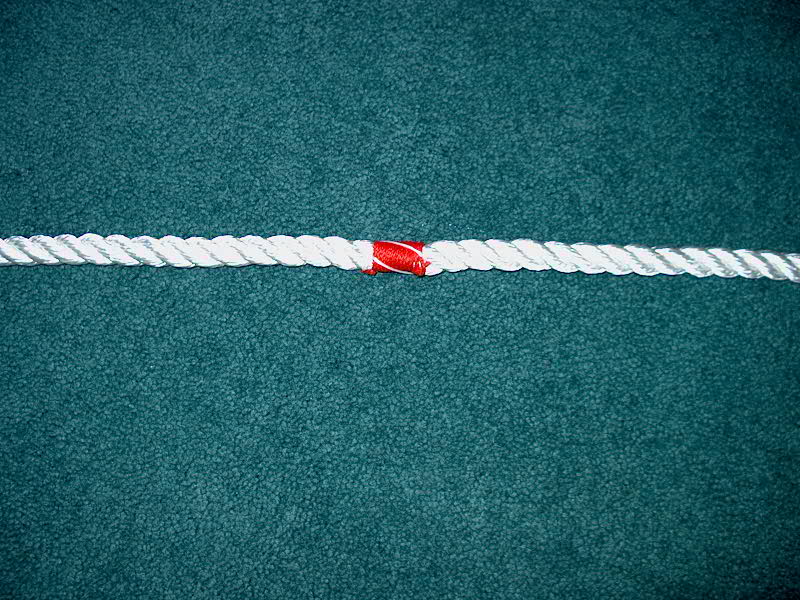
-
60 feet: Two blue
marks
-
90 feet: Three
blue marks
-
120 feet: Four
blue marks
-
150 feet: One red mark
-
180 feet: One red mark
and one blue mark
-
210 feet: One red mark
and two blue marks
-
240 feet: One red mark
and three blue marks
-
270 feet: One red mark
and four blue marks
-
300 feet: Two red marks
-
330 feet: Two red marks
and one blue mark
-
And so on....(if required)
|
|
So, on any given rode, all you
need to do to determine how much is out is multiply the number of marks by
30--easy to do. An added advantage is that the markings are apparent just
by feel, so they can be detected in the dark even without a light if need
be.
I bought a spool of red and a
spool of bright blue
polyester cording called heading twine. (Hamilton
Marine or other fishing supply house) It's very strong, and the bright
color forms an excellent contrast with the white rope. This material is
perhaps a little thick, but it doesn't matter. I debated using a thinner
material they had at the store (black), but decided I liked the bright color of
the heading twine. They had several colors in stock.
 To
make each mark, I cut a length of the heading twine and began by tying it to one
strand of the anchor rode (3-strand nylon). It's easy to separate the
twist of the line for this. I pulled the simple knot tight, and then
wrapped the line tightly around the rode until I had about 3/4"
covered. Then, I completed the wrapping by tying the twine to itself and
again through the strands of the rode. To help seal the knots, I used my
small torch to slightly melt the ends and make the knots permanent. I
repeated this process for each whipping, spacing them about 1-1/2" or so
apart. The line is marked every 30 feet. To
make each mark, I cut a length of the heading twine and began by tying it to one
strand of the anchor rode (3-strand nylon). It's easy to separate the
twist of the line for this. I pulled the simple knot tight, and then
wrapped the line tightly around the rode until I had about 3/4"
covered. Then, I completed the wrapping by tying the twine to itself and
again through the strands of the rode. To help seal the knots, I used my
small torch to slightly melt the ends and make the knots permanent. I
repeated this process for each whipping, spacing them about 1-1/2" or so
apart. The line is marked every 30 feet.
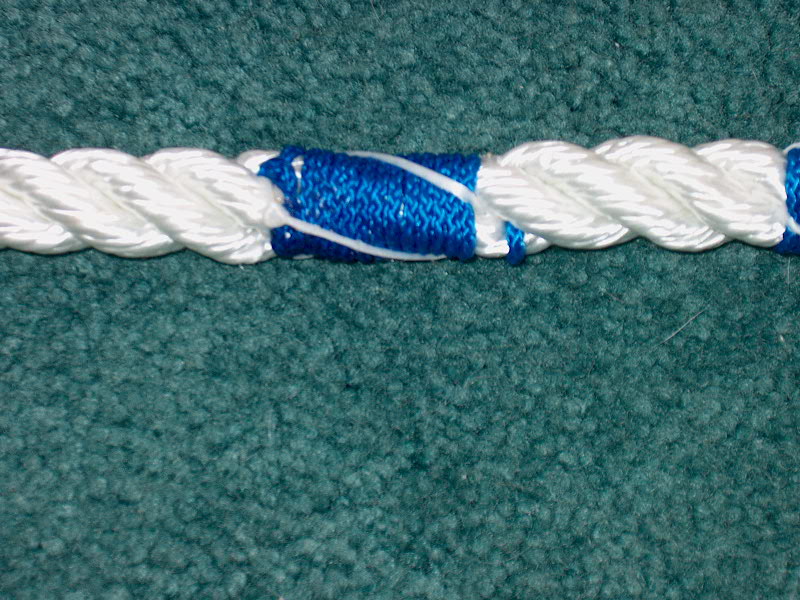
This would probably be enough,
but I went a step further and whipped the marks with some regular white waxed
sail thread. I used a large needle to push the thread through the strands
of the rode, following the twist of the line, and pulling it tight. This
should really secure the marks in place. The heading twine was too thick
for this purpose--that would be one advantage of using the thinner black nylon
stuff I had considered. After tying off the thread, I melted the knots
with my torch and also give the whole whipping a slight bit of heat to sort of
seal the thread and twine together.
|
|
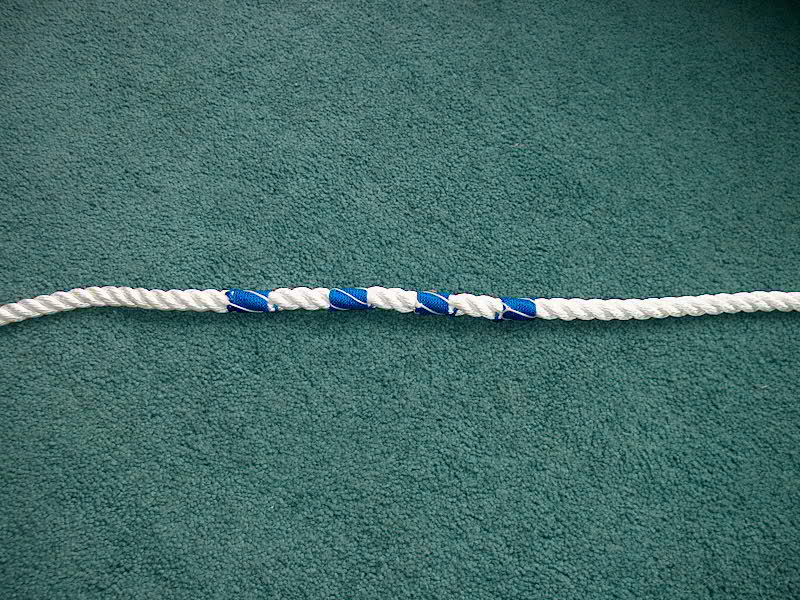 I
found that the polyester twins is very hard on the hands when pulling it
tight. But, in one night--not working the whole time by any stretch--I
marked one of my rodes up to 150' of length. That's a total of 15
whippings. You
can click the picture, left, for a larger view. I
found that the polyester twins is very hard on the hands when pulling it
tight. But, in one night--not working the whole time by any stretch--I
marked one of my rodes up to 150' of length. That's a total of 15
whippings. You
can click the picture, left, for a larger view.
|
|
At
the last marking on each line--usually about 30 feet or so from the bitter
end--I made some unmistakable marks on the line so that it would be obvious that
the end of the line was very near. To do this, I wrapped about 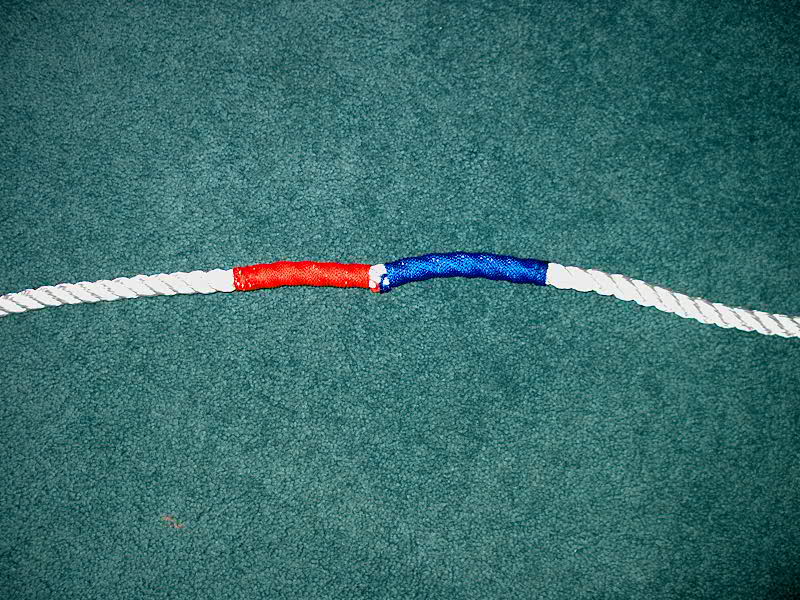 3-4"
of the line with red twine, and a further 3-4" with the blue twine.
This creates a mark that is extremely easy to see and will not be mistaken for
anything else. When this mark comes up through the deck pipe, it's time to
cleat off that anchor rode for good. Then, I added a traditional
whipping to the very end of the line using the white waxed sail thread, just to
supplement the melted end as was supplied by the manufacturer. 3-4"
of the line with red twine, and a further 3-4" with the blue twine.
This creates a mark that is extremely easy to see and will not be mistaken for
anything else. When this mark comes up through the deck pipe, it's time to
cleat off that anchor rode for good. Then, I added a traditional
whipping to the very end of the line using the white waxed sail thread, just to
supplement the melted end as was supplied by the manufacturer.
|
|
Anchor
Rode Storage--Fore and Aft
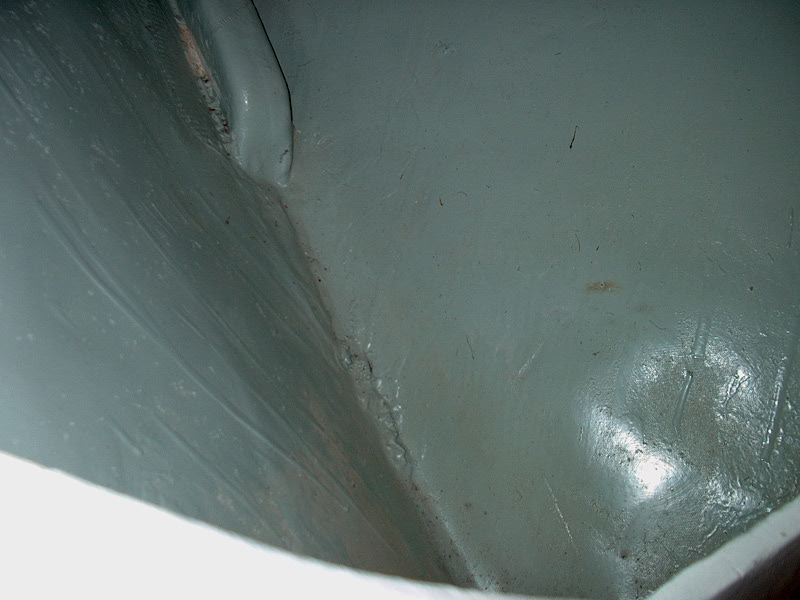 The Triton is blessed with a huge
chain locker forward of the vee berth. There's plenty of room here for two
substantial rodes. Because I installed two anchors at the bow--two anchors
that I want to both be ready to drop at any time--I needed to partition the
chain locker so that the two rodes would stay separate from each other.
The photo shows the chain locker before beginning the divider project--huge and
wide open. The Triton is blessed with a huge
chain locker forward of the vee berth. There's plenty of room here for two
substantial rodes. Because I installed two anchors at the bow--two anchors
that I want to both be ready to drop at any time--I needed to partition the
chain locker so that the two rodes would stay separate from each other.
The photo shows the chain locker before beginning the divider project--huge and
wide open.
To create the simple divider, I
took a few measurements of the space in the locker and cut a piece of
3/4"plywood to fit. It doesn't have to be perfect--it's hidden and is
only a rope divider. Once I was satisfied with the way my piece was
fitting, I coated the entire thing in unthickened epoxy resin to seal it.
When the epoxy cured, I scrubbed off the amine blush with water and a
Scotch-Brite pad, and sanded it to give it tooth for future paint.
|
|
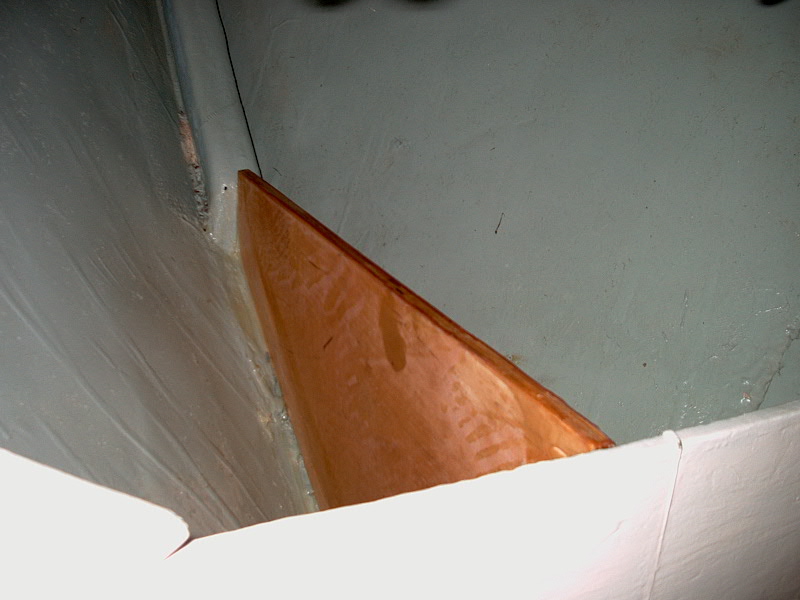 With
a warm day in February, I decided to go ahead and install the divider in
place. I mixed up some thick epoxy (using 406 colloidal silica). I
spread a heavy bead of epoxy along the bottom edge of the locker (in the crease)
and on the bottom, vertical edge of the stem reinforcement. I also applied
some to the forward side of the chainlocker bulkhead where the divider would
touch. Then, I pressed the divider into this goop, and spread any
remaining around to fill gaps and create a small fillet. I left it to
cure. The new divider will eventually be painted to match. With
a warm day in February, I decided to go ahead and install the divider in
place. I mixed up some thick epoxy (using 406 colloidal silica). I
spread a heavy bead of epoxy along the bottom edge of the locker (in the crease)
and on the bottom, vertical edge of the stem reinforcement. I also applied
some to the forward side of the chainlocker bulkhead where the divider would
touch. Then, I pressed the divider into this goop, and spread any
remaining around to fill gaps and create a small fillet. I left it to
cure. The new divider will eventually be painted to match.
A related project is the covering
and finishing of the forward chain locker bulkhead. Please click here
to view that project.
CQR RODE: It may not be the most elegant
solution, but I ran the anchor rode for the CQR anchor through the existing
bronze ventilator on the foredeck. Perhaps I'll install a proper chain
pipe someday, but this works for the moment. For stormy conditions, there
are a couple options to seal off this ventilator: stuff it with clay (or silly
putty!); spray in some canned foam; or install a canvas cover over the entire
thing. Most of the time, for the type of sailing we do so far, we can
leave the ventilator open without a problem.
CLAW RODE: For the second anchor,
I installed a bronze chain pipe made by ABI. It features a removable cover
(with slots for chain and rode) and a large opening (3-1/2") to allow the
rode and chain to easily pass through. None of this stuffing a line
through a tiny hole, an exercise in maximum frustration. Also, I didn't
want one of those oval chromed ones that are so common.
The first thing I did after
getting the new chain pipe was to spray a number of coats of clear lacquer over
the entire thing to prevent it from tarnishing. I found that this worked
well for my exterior bronze last season, although the cold during the winter
seemed to cause the lacquer to shrink and peel off. I'll deal with this
later.
I installed the chain pipe on the
foredeck to allow the second anchor rode to be passed into the chain locker
beneath. Please click here to read
how.
STERN ANCHOR RODE:
For the stern anchor, I think
I'll install another one of those round deck pipes in the poop deck, and create
a storage area for the line in there. This project is complete Click
here.
|
|
