|
Small Projects:
Abovedecks
This page was last updated on 1
April 2002
Chain
Pipes
Waste
and Water Deck Fills Re-lacquering
the Ports
|
|
Anchor Rode Chain
Pipes
I purchased two ABI bronze chain
pipes--one for the foredeck and one for the stern. Originally, I ordered
the two (ABI 1035 BR) from Sailnet; I received one, but not the other.
After several emails to customer service went unanswered, I called and was told
that, although a shipment had come in, mine was still on order. Grr.
A couple weeks later, I called again...but couldn't get through to an
operator. "We're experiencing unusually heavy traffic", qwoth
the voice mail. "If you like, please leave a message." I
left a message requesting that they cancel my overdue backorder and explaining
that, time and again, I try to give
Sailnet a fair chance, only to be let down each time. It's obvious
that I'm not the only one with this problem, or else their email and phone lines
wouldn't be clogged all the time. (I never received a single answer to any
of my emails. In fairness, I did receive a phone message from a
representative there later in the day, apologetic and offering me a discount
coupon at the store. Nice effort, but too little, too late.)
|
|
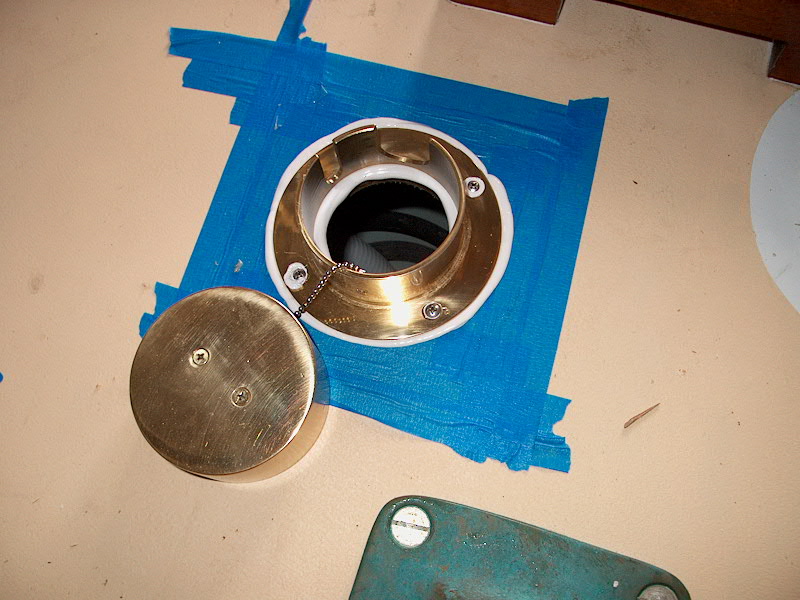
 Anyway, rant aside, I ended up
buying another identical chain pipe at Hamilton Marine (Sailnet could learn
something from these guys...hint hint...). These chain pipes feature full
rotating covers that allow the rode and/or chain to pass through
easily. Plus, they're 3-1/2" inside diameter, so there's plenty
of room to pass a rode, thimbles, and shackles through without a problem. Anyway, rant aside, I ended up
buying another identical chain pipe at Hamilton Marine (Sailnet could learn
something from these guys...hint hint...). These chain pipes feature full
rotating covers that allow the rode and/or chain to pass through
easily. Plus, they're 3-1/2" inside diameter, so there's plenty
of room to pass a rode, thimbles, and shackles through without a problem.
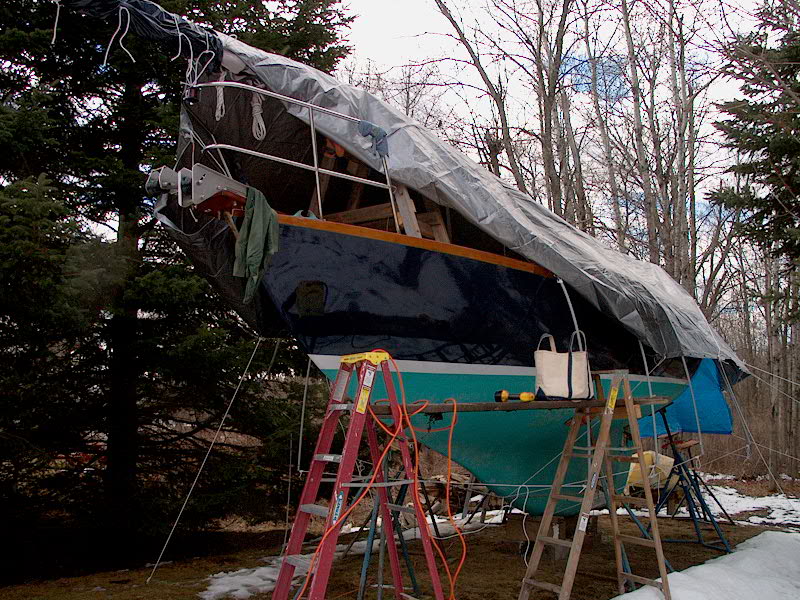
On a pleasant day late in March,
it was warm enough for me to consider using epoxy, so I pulled a portion of the
cover off the bow of the boat. set up some basic staging alongside and prepared
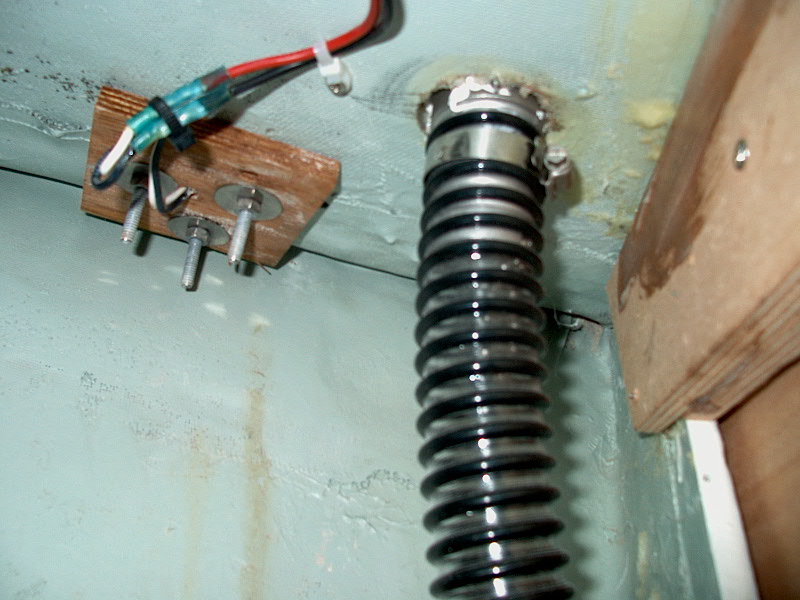
to begin installation of the chain pipe. First, I went below and scoped
out the chain locker from the inside. I wanted to make sure I drilled the
BIG hole in the right place so that it wouldn't interfere with anything
else. To prevent damage, I unscrewed the cable clamps holding some wires
in place along the overhead; I'll reinstall these later.
|
|
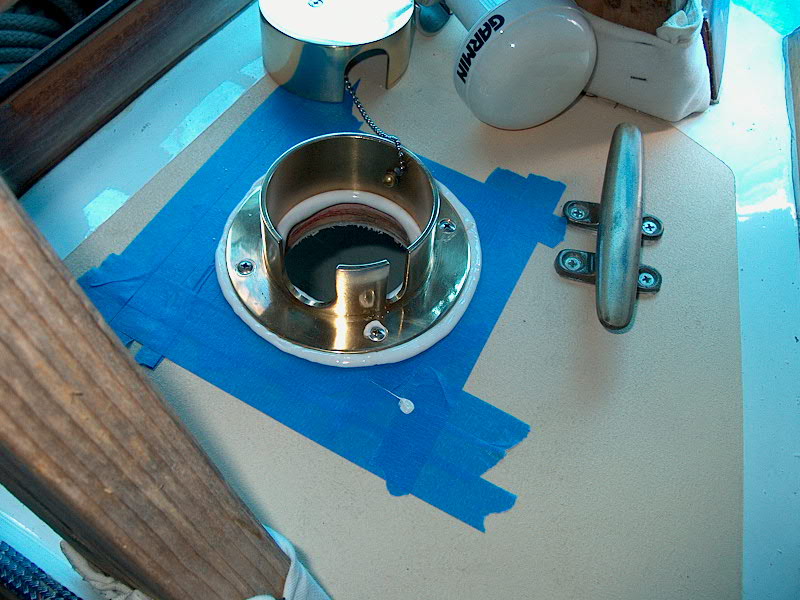
 Once I had some reference points, I went back outside and prepared to drill the hole
from above. I decided to install the new chain pipe pretty much in line
with the associated anchor roller, and nearly a foot back from the end of the
anchor platform on deck. It would have been nice to keep the new chain
pipe symmetrical with the existing ventilator, but that location would have been
too close to the anchor platform and too far off the line of the anchor
roller. With this minor aesthetic consideration aside, I proceeded to
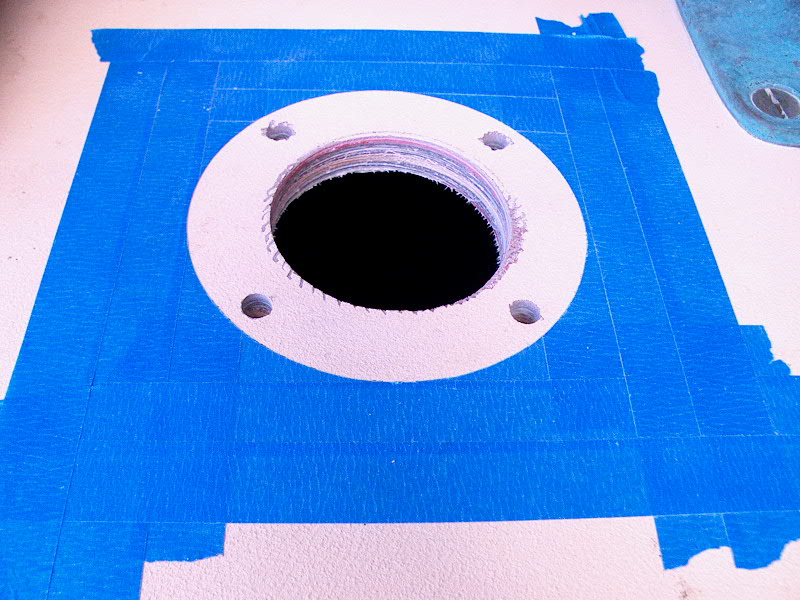
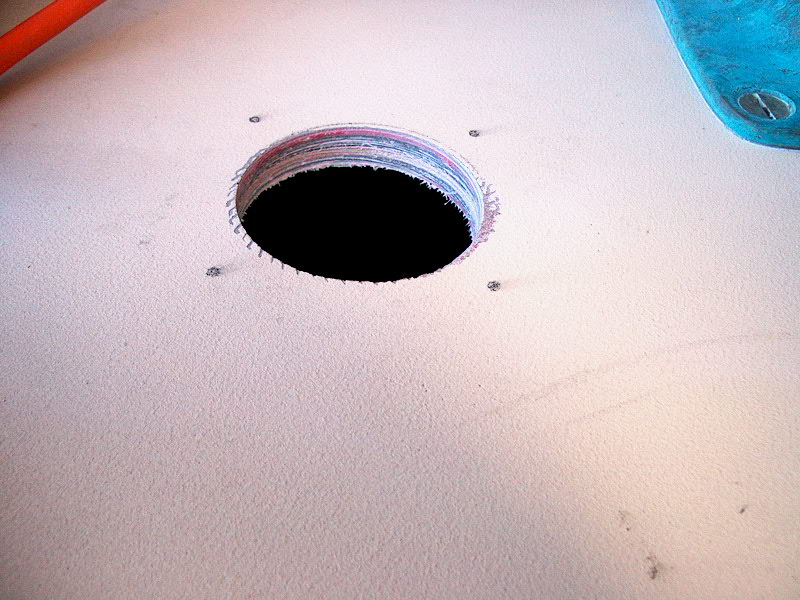
drill a 3-1/4" hole through the deck with a hole saw chucked into by big
1/2" drill. I wanted the inside hole just a bit smaller than the
actual ID of the chain pipe because I thought it would be easier to seal the
flange and keep water out. Before drilling, I double checked the
location...a mistaken 3" hole is not a fun thing. Once I had some reference points, I went back outside and prepared to drill the hole
from above. I decided to install the new chain pipe pretty much in line
with the associated anchor roller, and nearly a foot back from the end of the
anchor platform on deck. It would have been nice to keep the new chain
pipe symmetrical with the existing ventilator, but that location would have been
too close to the anchor platform and too far off the line of the anchor
roller. With this minor aesthetic consideration aside, I proceeded to
drill a 3-1/4" hole through the deck with a hole saw chucked into by big
1/2" drill. I wanted the inside hole just a bit smaller than the
actual ID of the chain pipe because I thought it would be easier to seal the
flange and keep water out. Before drilling, I double checked the
location...a mistaken 3" hole is not a fun thing.
|
|
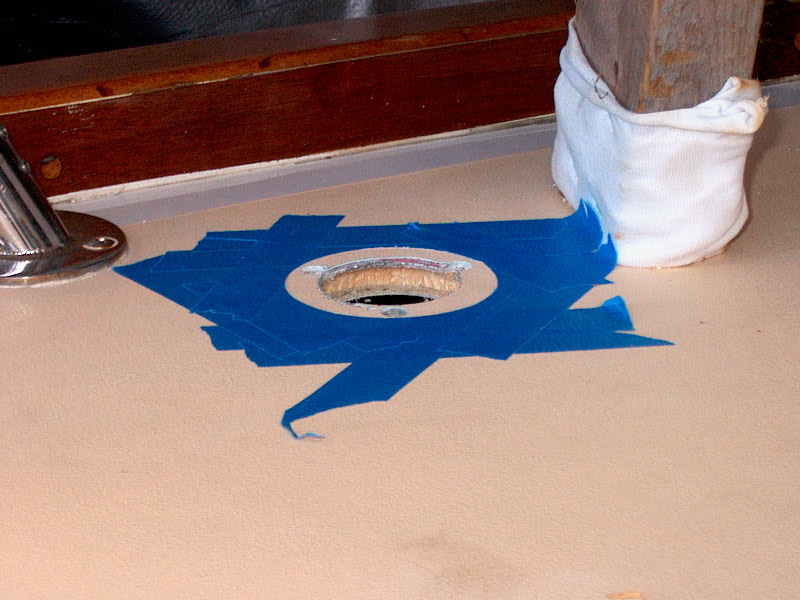
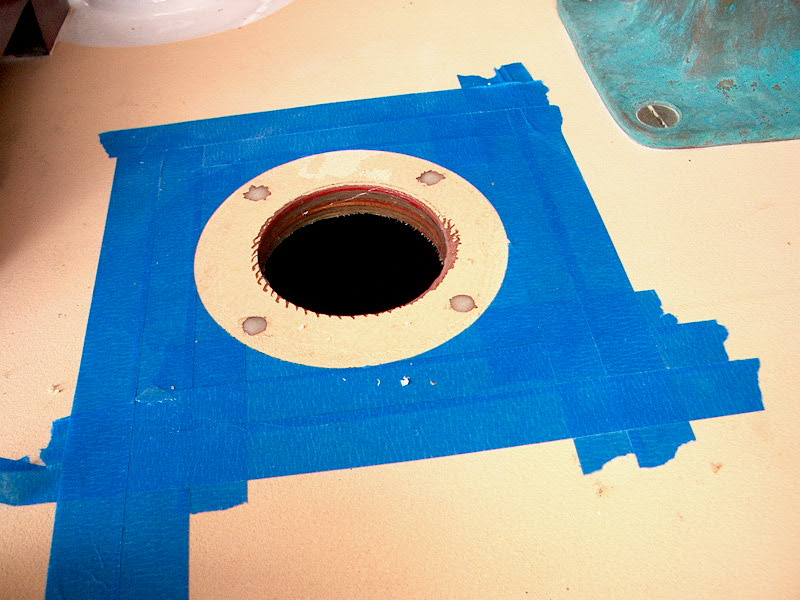
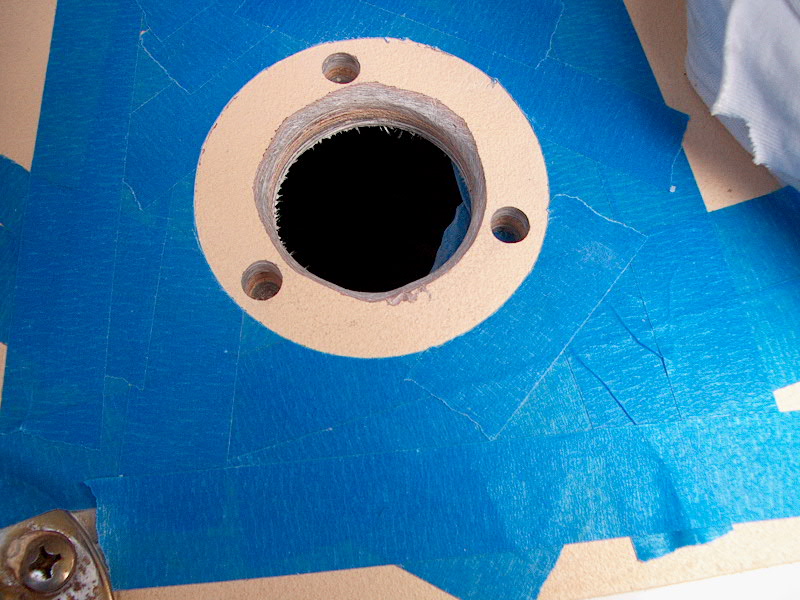
 After
the hole was drilled, I positioned the deck pipe over the hole and marked for
the screw locations. I stuck masking tape all around the hole and, with a
utility knife, cut carefully around the edge of the deck pipe and removed the
tape beneath. This gives me the protection for the deck surrounding
the chain pipe to prevent epoxy or caulk from making a mess of the adjacent
deck. Then, using a 3/8" drill bit, I drilled through the top deck
skin and core and stopped once the bit reached the inner fiberglass skin; this
will prevent the thick epoxy that I'm going to fill the holes with from spilling
out below. After
the hole was drilled, I positioned the deck pipe over the hole and marked for
the screw locations. I stuck masking tape all around the hole and, with a
utility knife, cut carefully around the edge of the deck pipe and removed the
tape beneath. This gives me the protection for the deck surrounding
the chain pipe to prevent epoxy or caulk from making a mess of the adjacent
deck. Then, using a 3/8" drill bit, I drilled through the top deck
skin and core and stopped once the bit reached the inner fiberglass skin; this
will prevent the thick epoxy that I'm going to fill the holes with from spilling
out below.
|
|
 I
mixed up some epoxy thickened with 406 colloidal silica and filled the drilled
holes at the screw locations, tamping it down to ensure that it was filling the
entire hole. I also covered the inside of the deck hole with the thick
epoxy; I didn't remove any of the core because my core in this area is plywood,
and removing it is not as simple as it is with soft balsa. I figure with a
layer of epoxy covering the core inside the deck pipe I should be all set.
Plus, it'll be easy to inspect over the years--just remove the cap. I
mixed up some epoxy thickened with 406 colloidal silica and filled the drilled
holes at the screw locations, tamping it down to ensure that it was filling the
entire hole. I also covered the inside of the deck hole with the thick
epoxy; I didn't remove any of the core because my core in this area is plywood,
and removing it is not as simple as it is with soft balsa. I figure with a
layer of epoxy covering the core inside the deck pipe I should be all set.
Plus, it'll be easy to inspect over the years--just remove the cap.
Later, when the epoxy is cured,
I'll redrill the epoxy plugs at the screw locations to accept some relatively
small screws that will secure the chain pipe in place. Bolts are
unnecessary, and the epoxy plugs will hold the screws and prevent any water from
ever entering the core.
|
After waiting a couple days for
the epoxy to cure, I was able to continue with the installation. A note on
the epoxy is warranted here: I used MAS epoxy resin for this, and for
another job earlier on (the "deck beam" at the chain locker
bulkhead). I don't know what the deal is, but this stuff takes
foooooorever to cure; after 48 hours or more, it is still in the green, dentable
stage. WEST System always cures hard enough to work with in only 24 hours,
sometimes less. Granted, the temperatures have been a little low for epoxy
at night, but WEST has always managed to cure faster. Plus, I always keep
the leftover pot of mixed epoxy on hand, in my heated shop, so that I can gauge
the cure time without having to trudge out to the boat; the pot inside the shop
is in the same general state of cure as the stuff on the boat. I've had the MAS on
hand for nearly a year, so I don't know if that has anything to do with it or
not (most epoxies have a more or less unlimited shelf life, though...).
Whatever the case, I don't like this stuff. WEST System has never, ever
let me down all the times I've used it, so I will purchase some more and use it
for the rest of my projects. I originally purchased the MAS a year ago because it's a lower
viscosity resin that I thought would be better for lamination (such as the false
keel project that I never got to back then). I used it now because I'm out
of WEST System. Now, I'm afraid to use the MAS anymore, for fear that it will take too
long to cure, if at all. At this point, I'm inclined to stay with a known
quantity.
|
|
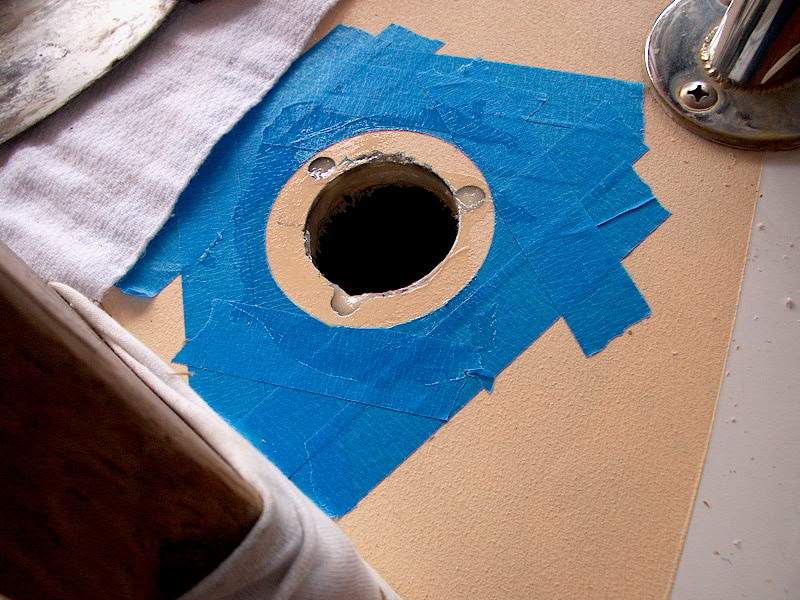
 Anyway,
when the epoxy finally cured enough to continue, I drilled pilot holes with my VIX
bit--a cool bit that has an outer section that rests on the countersink of the
hardware, with a spring-loaded bit inside; when you press the drill down, it
automatically centers the pilot hole in the opening. It's great for
hardware installation. Then, I drilled small countersinks at each hole
location, to provide for that little pool of caulk around each fastener. I
applied a heavy bead of polysulfide to the deck, inside the tape ring, and
screwed the chain pipe fitting into place with four oval head #10 x 1"
screws. I left the squeezed-out caulk for cleanup once it cures for a day
or two. Anyway,
when the epoxy finally cured enough to continue, I drilled pilot holes with my VIX
bit--a cool bit that has an outer section that rests on the countersink of the
hardware, with a spring-loaded bit inside; when you press the drill down, it
automatically centers the pilot hole in the opening. It's great for
hardware installation. Then, I drilled small countersinks at each hole
location, to provide for that little pool of caulk around each fastener. I
applied a heavy bead of polysulfide to the deck, inside the tape ring, and
screwed the chain pipe fitting into place with four oval head #10 x 1"
screws. I left the squeezed-out caulk for cleanup once it cures for a day
or two.
For the stern anchor, I decided that it would be nice
to store a rode in the lazarette beneath the poop
deck. There's plenty of room outboard of the engine exhaust hose (port
side); I'll need to install a small partition inside just to keep things
separate.
|
|
 Following
the same procedure as described above for the identical fitting on the bow, I
drilled a hole for the chain pipe with a hole saw, after determining the best
location. Then, after taping, scribing, and drilling pilot holes and
countersinks, as described above, I installed the new fitting in a heavy bed of
polysulfide, leaving the spill out for clean up later when it cures. Following
the same procedure as described above for the identical fitting on the bow, I
drilled a hole for the chain pipe with a hole saw, after determining the best
location. Then, after taping, scribing, and drilling pilot holes and
countersinks, as described above, I installed the new fitting in a heavy bed of
polysulfide, leaving the spill out for clean up later when it cures.
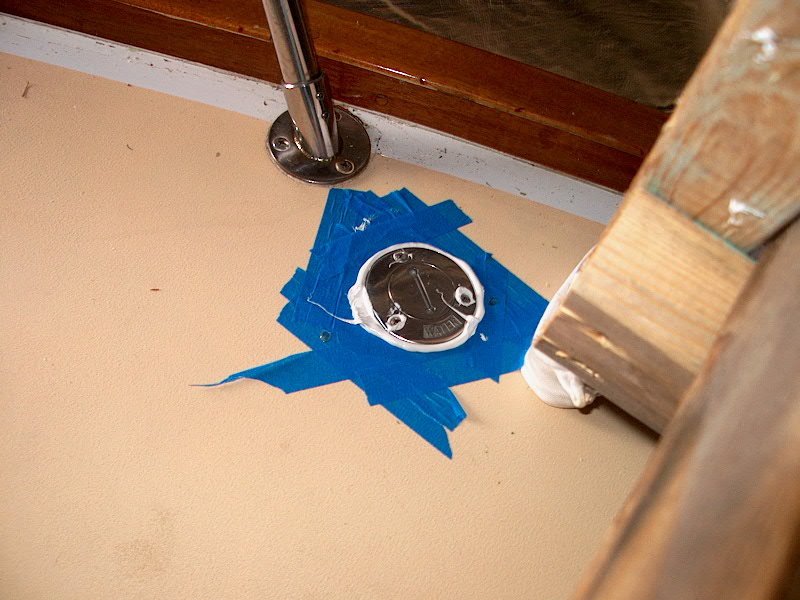
After a couple days, the sealant
was cured sufficiently to continue. Using the edge of a multi-purpose tool
(a putty knife-like thing with some interesting shapes to the blade,
including a sort of pointed end), I carefully cut around the edges of the
fitting, separating the extra caulk from the fitting. Then, I could easily
pull the tape off, with the sealant still attached. I then had to only
clean up a little bit of residue with rags and paint thinner.
Project complete.
|
|
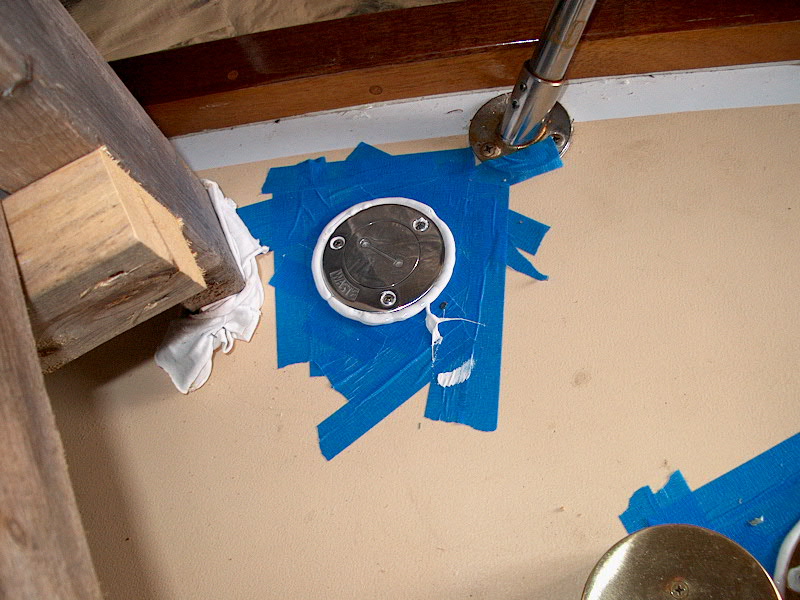
Waste
and Water Fill Deck Pipes
 At
the same time I was working on the chain pipes, I also drilled and sealed the
holes for the new waste pipe and water tank fill. I decided to install
these on the foredeck on either side, just aft of the bow pulpit bases.
From inside the chain locker, I located where I wanted the connections to end up
and drilled a small pilot hole from inside so that I could reference it from on
deck. Then, I drilled holes for the two deck pipes with At
the same time I was working on the chain pipes, I also drilled and sealed the
holes for the new waste pipe and water tank fill. I decided to install
these on the foredeck on either side, just aft of the bow pulpit bases.
From inside the chain locker, I located where I wanted the connections to end up
and drilled a small pilot hole from inside so that I could reference it from on
deck. Then, I drilled holes for the two deck pipes with  a 1-1/2" hole
saw. The waste deck fill is a little larger, and required creating a
slight bevel at the top of the hole to allow the fitting to sit flush. I
used a small sanding drum chucked into my drill for this. With the main
holes cut, I marked for the screw locations and overdrilled the holes with a
3/8" bit for filling with epoxy. a 1-1/2" hole
saw. The waste deck fill is a little larger, and required creating a
slight bevel at the top of the hole to allow the fitting to sit flush. I
used a small sanding drum chucked into my drill for this. With the main
holes cut, I marked for the screw locations and overdrilled the holes with a
3/8" bit for filling with epoxy.
|
|
 The
waste pipe is in the port side of the foredeck, which is cored with
plywood. The starboard side, however, is the original balsa core, as the
foredeck didn't require recoring on this side. At the water tank fill, I
dug out the core inside the hole for the fitting to a depth of 1/4" or
3/8". I then replaced the core with a thick epoxy mixture, and also
filled the overdrilled screw holes.
I left the two prepared holes for the epoxy to cure. The
waste pipe is in the port side of the foredeck, which is cored with
plywood. The starboard side, however, is the original balsa core, as the
foredeck didn't require recoring on this side. At the water tank fill, I
dug out the core inside the hole for the fitting to a depth of 1/4" or
3/8". I then replaced the core with a thick epoxy mixture, and also
filled the overdrilled screw holes.
I left the two prepared holes for the epoxy to cure.
|
|
 After
a couple long days (see the note in the section above), the epoxy had cured
enough to continue. I prepared the screw holes by drilling pilot holes
with a VIX bit, then drilled countersinks at each location
to hold extra caulk right at the screw location where it's needed most. I
installed each fitting with three #10 x 1" oval head stainless steel
screws. I left the caulk squeeze out for clean up in a couple days after
it cures; it's much less messy that way. (Although I made a mess of
the water tank fill because I got my hand in the caulk as I was finishing up...) After
a couple long days (see the note in the section above), the epoxy had cured
enough to continue. I prepared the screw holes by drilling pilot holes
with a VIX bit, then drilled countersinks at each location
to hold extra caulk right at the screw location where it's needed most. I
installed each fitting with three #10 x 1" oval head stainless steel
screws. I left the caulk squeeze out for clean up in a couple days after
it cures; it's much less messy that way. (Although I made a mess of
the water tank fill because I got my hand in the caulk as I was finishing up...)
|
|
 After
a couple days, the sealant was cured sufficiently to continue. Using the
edge of a multi-purpose tool (a putty knife-like thing with some
interesting shapes to the blade, including a sort of pointed end), I carefully
cut around the edges of the fitting, separating the extra caulk from the
fitting. Then, I could easily pull the tape off, with the sealant still
attached. I then had to only clean up a little bit of residue with rags
and paint thinner. After
a couple days, the sealant was cured sufficiently to continue. Using the
edge of a multi-purpose tool (a putty knife-like thing with some
interesting shapes to the blade, including a sort of pointed end), I carefully
cut around the edges of the fitting, separating the extra caulk from the
fitting. Then, I could easily pull the tape off, with the sealant still
attached. I then had to only clean up a little bit of residue with rags
and paint thinner.
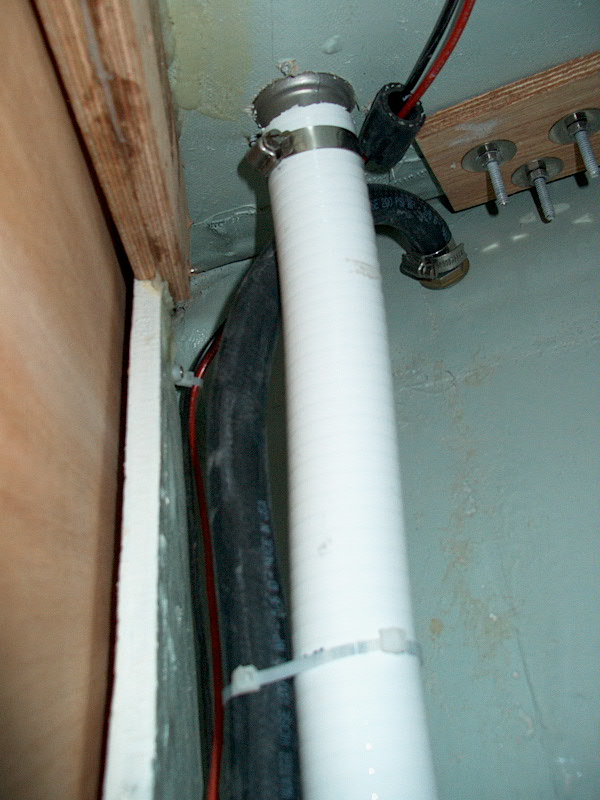
I secured hoses to the new
fittings from inside the chain locker with hose clamps, and secured the hoses
against the bulkhead to keep them neat and out of the way.

Project complete.
|
|