|
Wind Instruments
This page was last
updated on 30 May 2009. |
Yes, they are unnecessary (completely so, in fact). Nonetheless,
electronic wind instruments, which provide a readout of the apparent
wind direction and the apparent wind speed, are pretty cool, and
convenient, if for no other reason than to confirm (or, in many cases,
refute) one's own--or others'--opinion of the actual wind speed at any
given time. I received a set of wind instruments as a gift, and
looked forward to installing and using them. |
 During the winter, with the boat in the
shop, I installed the instrument head in the cockpit, choosing a
location directly above the existing (and matching, more or less)
knotmeter/depthsounder display. Installing the head was simple,
and required drilling a 1-1/4" hole through the bulkhead with a
hole saw. The instrument, which featured its own gasket, then fit
into place nicely; I secured it from the back with the provided
nut. I had pictures of the installation, but lost them in a
January computer crash. This is a more recent picture showing the
back wiring. During the winter, with the boat in the
shop, I installed the instrument head in the cockpit, choosing a
location directly above the existing (and matching, more or less)
knotmeter/depthsounder display. Installing the head was simple,
and required drilling a 1-1/4" hole through the bulkhead with a
hole saw. The instrument, which featured its own gasket, then fit
into place nicely; I secured it from the back with the provided
nut. I had pictures of the installation, but lost them in a
January computer crash. This is a more recent picture showing the
back wiring.
There were two wire leads coming out of
the instrument head: one for the DC power supply, and one, fitted
with a multi-pin connector, for the transducer cable. I wired the
unit to the main electrical panel, a simple chore that I shant bore you
with here. |
The transducer cable came out of the box in
one continuous piece, with a pin connector at one end (to plug into the
instrument head) and attached to the masthead unit (which featured the
tricup windspeed indicator and a small directional windvane) at the
other. Now, ideally it might be nice to run this piece in a
continuous length from the masthead to the instrument head, but
obviously, with the need to step and unstep the mast with some
regularity, this was impossible. The thoughtful folks at Standard
Horizon provided a terminal block to allow cutting and reassembling the
cable as necessary.
Since I didn't know how much cable would
be needed, I decided to begin at the masthead, run the cable through the
mast, and then (and only then) cut off the cable, leaving plenty of
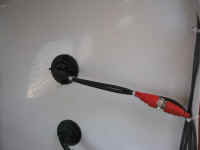
excess for later connection. First, I installed the masthead
indicator, which featured a permanently-wired base plug into which the
forward-facing stalk connected with a multi-pin connector at the
end. The screwholes in the base connector were just too wide to
attach directly to the cast aluminum masthead fitting, so I first
installed a small wooden block in the proper location, screwing and
epoxying it directly to the masthead. Then, I screwed the base
terminal into the wood and snaked the cable down the mast to the
previously-existing mast wiring exit just above the base. Once I
had pulled all the appropriate slack out of the cable, I measured out
about 10 feet extra and cut the cable in two, reserving the other half
(with its pin connector at one end) for inside the boat. I tied up
the excess at the mast base and left it for later (the mast was still on
horses at this point, a few weeks before launch). |
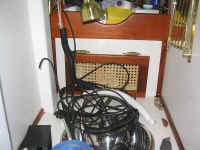 Inside
the boat, I connected the pin terminal at the back of the instrument
head, and then led the remaining cable forward, following existing wire
runs, to the head, where I pulled out all the excess and left it for
later use. (After this photo was taken, I cleaned up and neatened
the wire for storage.) Inside
the boat, I connected the pin terminal at the back of the instrument
head, and then led the remaining cable forward, following existing wire
runs, to the head, where I pulled out all the excess and left it for
later use. (After this photo was taken, I cleaned up and neatened
the wire for storage.) |
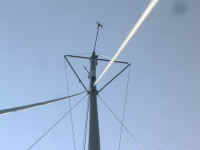 On
launch day a few weeks later, I connected the masthead unit to the base
while the mast was still on deck--a simple matter of pushing in the plug
and tightening the plastic screw collar. The new unit added one
more complexity to the top of the mast. On
launch day a few weeks later, I connected the masthead unit to the base
while the mast was still on deck--a simple matter of pushing in the plug
and tightening the plastic screw collar. The new unit added one
more complexity to the top of the mast. |
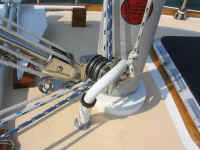 The
final wiring connections inside the boat took much longer than they
should have. Along with the other mast wires, I ran the transducer
cable through a section of white hose running between the mast and a new
stainless steel through hull fitting I installed in the deck, and passed
them into the cabin below. I determined an appropriate amount of
transducer cable from each of the two ends, and cut the excess off,
reserving it for some future use, perhaps. The
final wiring connections inside the boat took much longer than they
should have. Along with the other mast wires, I ran the transducer
cable through a section of white hose running between the mast and a new
stainless steel through hull fitting I installed in the deck, and passed
them into the cabin below. I determined an appropriate amount of
transducer cable from each of the two ends, and cut the excess off,
reserving it for some future use, perhaps. |
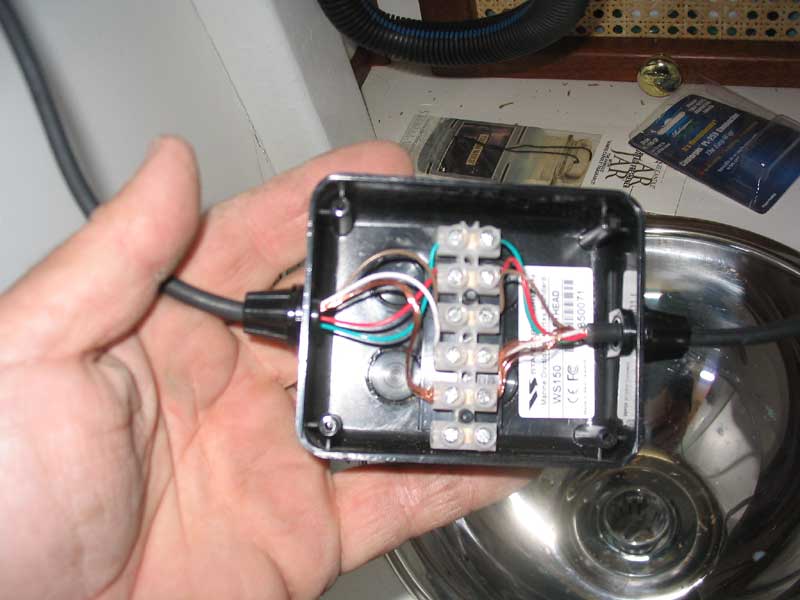
 Provided
in the kit was a small terminal block and a covered plasstic junction
box, into which I led each end of the cable. I stripped off the
outer insulation, revealing five teeny-tiny wires inside. Of
course these wires were smaller than anything that my stripping tool
would work well on, but I used the smallest opening to carefully strip
off the insulation from the ends. Brilliantly, the terminal screws
in the provided terminal would not tighten down far enough to
clamp the microscopic wires in place (it's the sort of terminal with
openings along the sides and top screws that tighten down, trapping the
wire in place beneath). Therefore, after a failed attempt, I was
forced to remove additional insulation and fold the exposed wire ends in
half, then in half again, so that I had a large enough bulk of bare
copper for the screw to grab. Fussy little wires are not my
favorite! Next year, I'll come up with a better means of quick
connect/disconnect. For now, I proceeded. Provided
in the kit was a small terminal block and a covered plasstic junction
box, into which I led each end of the cable. I stripped off the
outer insulation, revealing five teeny-tiny wires inside. Of
course these wires were smaller than anything that my stripping tool
would work well on, but I used the smallest opening to carefully strip
off the insulation from the ends. Brilliantly, the terminal screws
in the provided terminal would not tighten down far enough to
clamp the microscopic wires in place (it's the sort of terminal with
openings along the sides and top screws that tighten down, trapping the
wire in place beneath). Therefore, after a failed attempt, I was
forced to remove additional insulation and fold the exposed wire ends in
half, then in half again, so that I had a large enough bulk of bare
copper for the screw to grab. Fussy little wires are not my
favorite! Next year, I'll come up with a better means of quick
connect/disconnect. For now, I proceeded. |
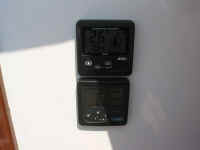 With
the connections securely made at last, after some fighting, I turned on
the power and went on deck to check the operation of the display
unit. It worked! Very cool. With
the connections securely made at last, after some fighting, I turned on
the power and went on deck to check the operation of the display
unit. It worked! Very cool.
I spent some time playing with and
watching the display, then returned below to finish the wiring job. |
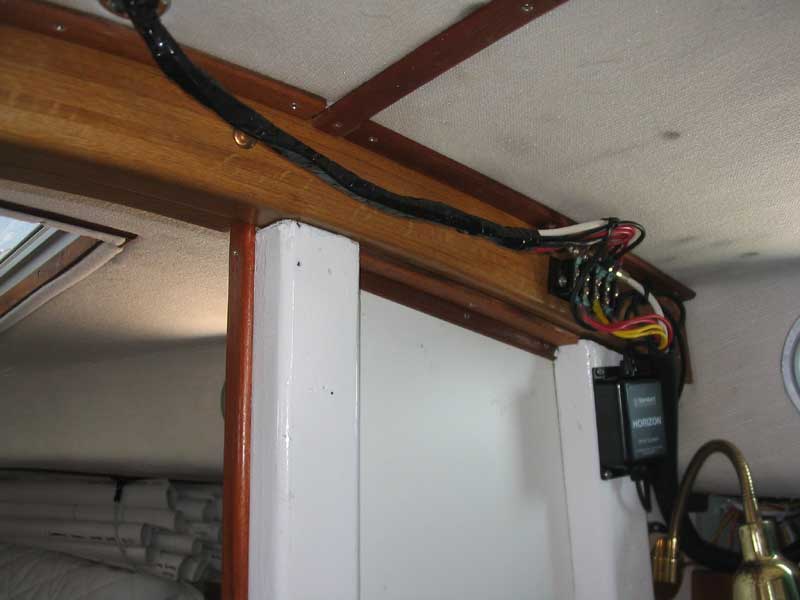
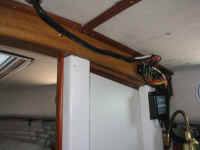 With
so many wires now entering the boat, I decided to create a sort of
harness by wrapping the bundle in black tape for a smoother look.
Then I installed the wind junction box on one of the support beams for
the mast beam, and roughly cleaned up the wiring. I needed a few
different cable clamps, so held off on the final cleanup. This
picture shows the wiring all complete and partially secured, but I
forgot to get a picture of the final arrangement and will post one soon. With
so many wires now entering the boat, I decided to create a sort of
harness by wrapping the bundle in black tape for a smoother look.
Then I installed the wind junction box on one of the support beams for
the mast beam, and roughly cleaned up the wiring. I needed a few
different cable clamps, so held off on the final cleanup. This
picture shows the wiring all complete and partially secured, but I
forgot to get a picture of the final arrangement and will post one soon.
Project complete! |
Update:
2009
After enduring 2 or 3 seasons of inaccuracy,
inconsistent readings, and general non-operation of the original wind
instruments, I decided during the winter of 2008-2009 to replace them.
After much consideration of the various options available, I selected the
TackTick T033 wind system.
Please follow the following links for
additional information on the decision-making process and installation of
these instruments.
2009 Maintenance
and Refit Program: 1/31/09
2009 Maintenance and
Refit Program: 3/29/09
2009 Maintenance and
Refit Program: 4/11/09
As of this writing in May 2009,
the instruments are as yet untested. More information to follow once
the season gets underway. |
|