|
Storm Damage Page 5
This page was last updated on
25 October 2002
Return
to Page 1
Rebuilding
the Anchor Platform Repairs
to the Foredeck Installing
the New Platform
|
|
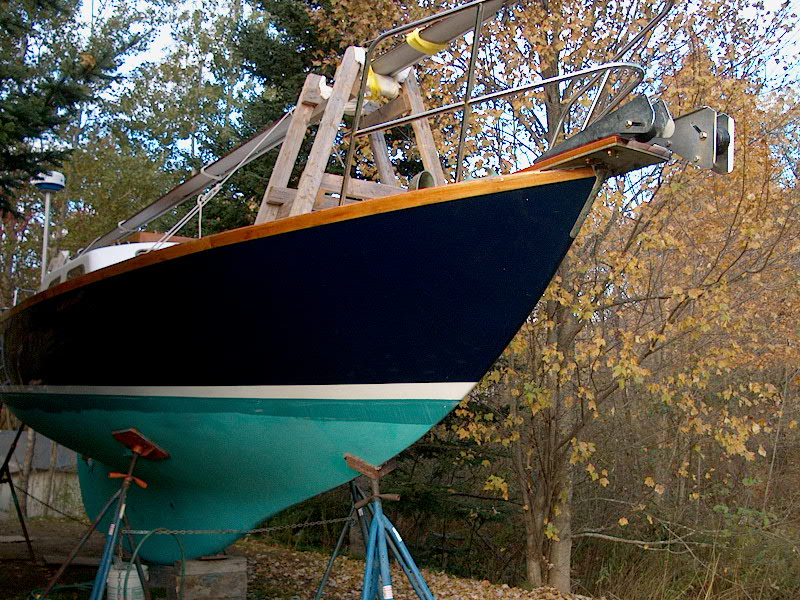
Repairing,
Patching, and Paint Blending--Damaged Bow
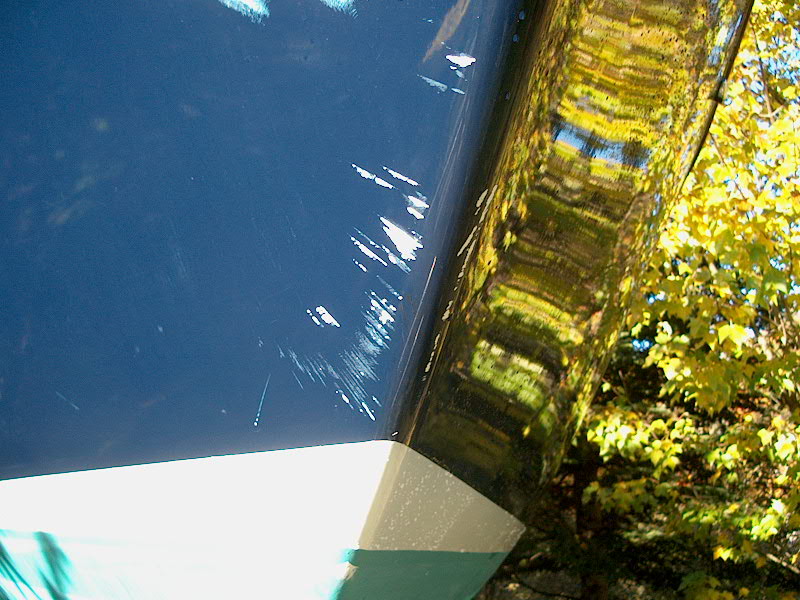
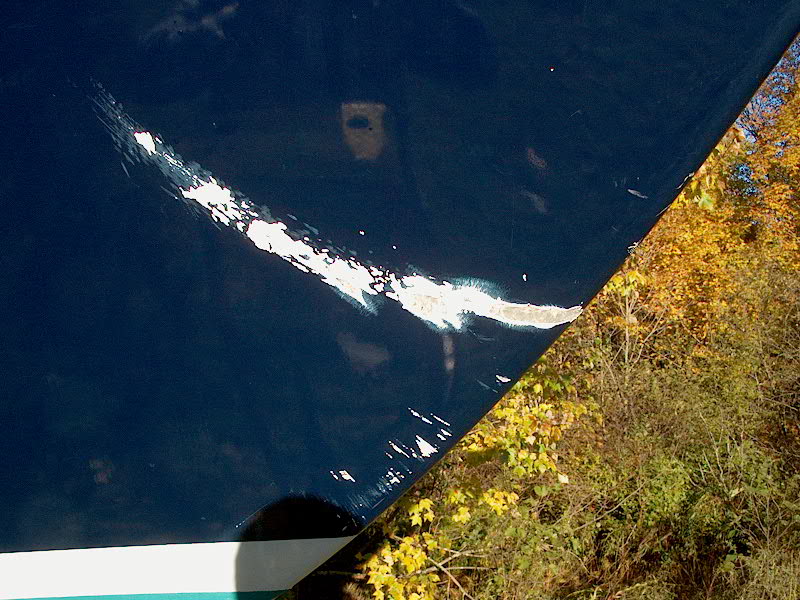 After
enduring any number of comments throughout the summer, mostly revolving around
these two options: "What'd you do to your bow", or "Gee, you
ought to scratch up the other side to match and paint big eyes above it--it
looks like a smile", I could finally tackle the minor fiberglass repair and
Awlgrip touch-up that I'd been wanting to do since that day in May when the
damage occurred. I had decided early on that it was simply too difficult
to try and repair it with the boat in the water, so I concentrated on other
things after the damage occurred. After a while, I got used to it and
hardly noticed it. (Yeah, right.) After
enduring any number of comments throughout the summer, mostly revolving around
these two options: "What'd you do to your bow", or "Gee, you
ought to scratch up the other side to match and paint big eyes above it--it
looks like a smile", I could finally tackle the minor fiberglass repair and
Awlgrip touch-up that I'd been wanting to do since that day in May when the
damage occurred. I had decided early on that it was simply too difficult
to try and repair it with the boat in the water, so I concentrated on other
things after the damage occurred. After a while, I got used to it and
hardly noticed it. (Yeah, right.)
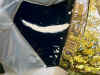
The first step in the process was
to gouge out and smooth the contours of the worst and deepest wounds in the
fiberglass. Fortunately, this was only a small area. I used a random
orbit sander and some 80 grit paper that I was using at the time to sand for my
new, raised bottom paint. A few days later, when I began work in earnest
on the bow paint, I worked a little more to sand these areas by hand, and
roughed up the entire area surrounding the largest curved paint damage. I
used 220 grit paper because I didn't want to create any scratches that would
show up through the Awlgrip.
|
|
 There
are several smaller, less significant chips and scratches in the paint that need
touching up too. However, rather than go crazy with sandpaper and try to
smooth out all the areas (the other areas are scratched just through the
Awlgrip--there's a small edge, but no gouging of the fiberglass), especially
given the relatively unforgiving nature of Awlgrip and the difficulty in
patching and blending, I decided that I would pretty much touch up the blue
paint here, much as one might do with tough-up paint on a car. I'm hoping
that with great care in application, plus some minor buffing and blending later,
this technique will hide the damage from all but a very close-up inspection. There
are several smaller, less significant chips and scratches in the paint that need
touching up too. However, rather than go crazy with sandpaper and try to
smooth out all the areas (the other areas are scratched just through the
Awlgrip--there's a small edge, but no gouging of the fiberglass), especially
given the relatively unforgiving nature of Awlgrip and the difficulty in
patching and blending, I decided that I would pretty much touch up the blue
paint here, much as one might do with tough-up paint on a car. I'm hoping
that with great care in application, plus some minor buffing and blending later,
this technique will hide the damage from all but a very close-up inspection.
See, Awlgrip is not a product
that is intended to be buffed and blended, and attempting to do so tends to make
any repairs quite obvious. Since I really didn't know what kind of results
I'd get at all, it seemed to make sense to not damage the surrounding paint
further (by sanding), at least until I had a better handle on how this patching
was going to go. |
|
 In
the largest and worst, arc/smile-shaped area, however, I had no choice--I had to
sand a bit to smooth it out. But again, I chose not to sand too far afield
when trying to feather the existing paint edges and damaged areas. I
smoothed things out rather well with the 220 grit, and sanded out a small
distance on the undamaged paint, but made no attempts to make the damaged area
completely fair with the surrounding hull. In
the largest and worst, arc/smile-shaped area, however, I had no choice--I had to
sand a bit to smooth it out. But again, I chose not to sand too far afield
when trying to feather the existing paint edges and damaged areas. I
smoothed things out rather well with the 220 grit, and sanded out a small
distance on the undamaged paint, but made no attempts to make the damaged area
completely fair with the surrounding hull.
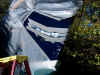
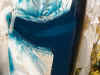
To protect the surrounding hull
from damage during the process, I taped off the area in question with some of my
silver masking tape. The plastic set up a distance away is for later use
in a certain blending technique if I decide to use a small Preval sprayer to
apply the Awlgrip to this area; it will prevent overspray from extending onto
the surrounding hull. More on this later if I choose to go this
route. This tape is really just to protect the hull during the epoxy and
remaining sanding operation; when I paint, I'll be doing some different taping
to help me blend the area. Again, you'll see later.
|
|
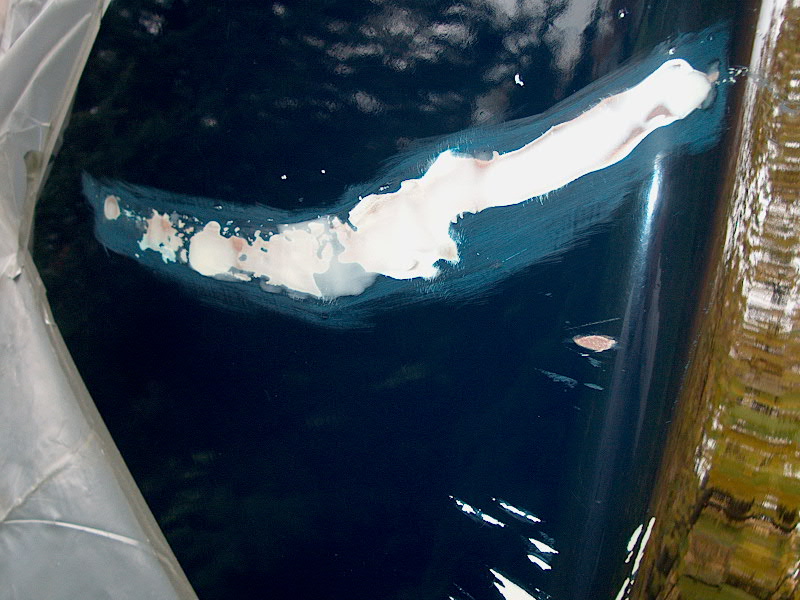
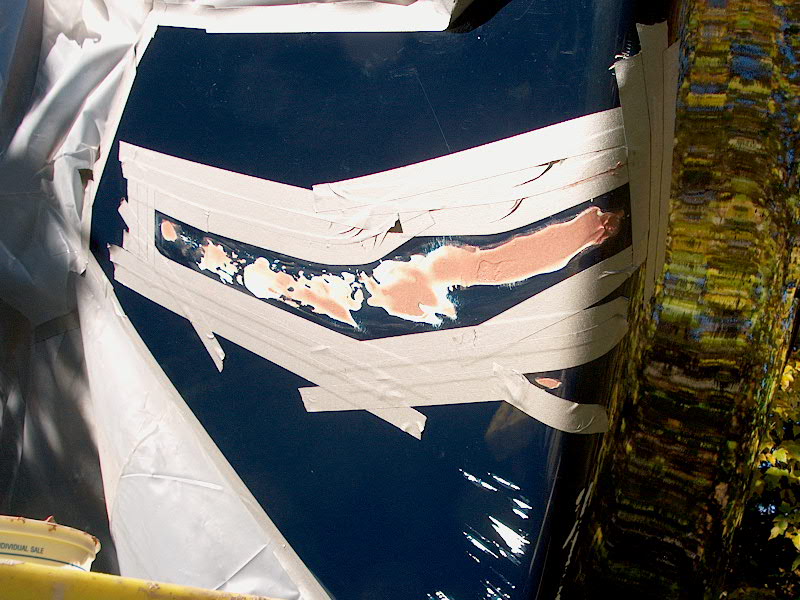 Instead,
I mixed up a small batch of thickened epoxy (West System with silica and 407
fairing compound) and used a putty knife to help fair the less-damaged places in
with the surrounding paint. This thin "skim coat" of epoxy will
make it easier to sand the damaged area smooth. I also filled in the worst
gouges with the epoxy mix, and also a couple of small dings that were too small
for significant fairing and damage repair, but needed to be filled before I
could touch up the paint. I left the epoxy to cure before
proceeding. Instead,
I mixed up a small batch of thickened epoxy (West System with silica and 407
fairing compound) and used a putty knife to help fair the less-damaged places in
with the surrounding paint. This thin "skim coat" of epoxy will
make it easier to sand the damaged area smooth. I also filled in the worst
gouges with the epoxy mix, and also a couple of small dings that were too small
for significant fairing and damage repair, but needed to be filled before I
could touch up the paint. I left the epoxy to cure before
proceeding.
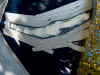
After I applied the epoxy,
I used a rag to wipe off the tape edge to prevent a ridge of epoxy there that
would be hard to sand out and hide later. You'll see more detail about
this particular edge and the steps to make blending it in later. The
deepest gouge extends just around the point of the stem, so I couldn't get the
contour perfect on the first fill.
|
|
 The
next day, I sanded the first coat of filler and prepared for the second, and
hopefully final, coat. Fir this coat, I chose Interlux Epoxy Surfacing
Compound (# 117A/118B). This is a smooth, fine-textured compound that is
an excellent choice for final fairing and as a finishing putty. I mixed up
a small batch and applied a thin coat with a putty knife. I did leave a
bit of extra on the stem so that I could sand it down to the proper contour and
be done with it this time. As before, I carefully wiped off the excess
along the tape edge to prevent a lip from forming there. The
next day, I sanded the first coat of filler and prepared for the second, and
hopefully final, coat. Fir this coat, I chose Interlux Epoxy Surfacing
Compound (# 117A/118B). This is a smooth, fine-textured compound that is
an excellent choice for final fairing and as a finishing putty. I mixed up
a small batch and applied a thin coat with a putty knife. I did leave a
bit of extra on the stem so that I could sand it down to the proper contour and
be done with it this time. As before, I carefully wiped off the excess
along the tape edge to prevent a lip from forming there.
|
|
 Once
the filler had a chance to cure, I sanded the area smooth, fair and flush with
the surrounding hull. Once I had the bulk of it sanded I removed the
masking tape and sanded flush the tiny ridge that had formed there, and out
slightly onto the surrounding hull. I used 320 grit paper except for where
it clogged too fast, where I switched to 220 grit for the bulk sanding and then
finished with more 320 grit. The patch is now ready for Awl-Quik
epoxy primer. Once
the filler had a chance to cure, I sanded the area smooth, fair and flush with
the surrounding hull. Once I had the bulk of it sanded I removed the
masking tape and sanded flush the tiny ridge that had formed there, and out
slightly onto the surrounding hull. I used 320 grit paper except for where
it clogged too fast, where I switched to 220 grit for the bulk sanding and then
finished with more 320 grit. The patch is now ready for Awl-Quik
epoxy primer.
|
|
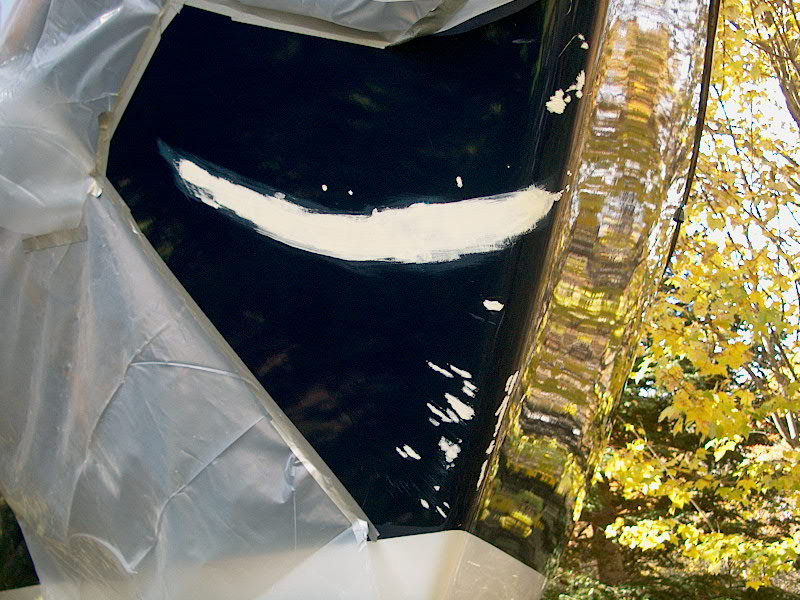
 After
an unsettled, showery Saturday, Sunday dawned clear and sunny, so I went ahead
and mixed up a small amount of primer. I applied several coats over the
course of the day, particularly on the areas that I had sanded and filled.
I also dabbed some on the smaller scratches to help the final coat blend in all
the easier. After
an unsettled, showery Saturday, Sunday dawned clear and sunny, so I went ahead
and mixed up a small amount of primer. I applied several coats over the
course of the day, particularly on the areas that I had sanded and filled.
I also dabbed some on the smaller scratches to help the final coat blend in all
the easier.
|
|
It's amazing
to me how long this silly project ended up taking. This always seems
to be the way when working against a deadline--weather, in this case. The
more you try to rush a project to completion, the less likely things are to turn
out really well. After sanding the primer, I prepared to apply my topcoats
and finish off the repair. Blending Awlgrip is a challenge--you simply
can't wetsand and buff it out the way you can with gelcoat. I suppose this
is one disadvantage of the product (minor, in my book).
To get around this (I hoped), I
planned to overspray the damaged area. What this means is that I installed
plastic and masking tape a bit away from the actual sanded and primed area, so
that when I used my mini sprayer (more on this in a minute) to spray the color
on, the edges would naturally blend more easily into the surrounding, undamaged
paint. I figured the paint would set up enough so that I could easily
spray on several thin coats during the day, finishing the job.
|
|
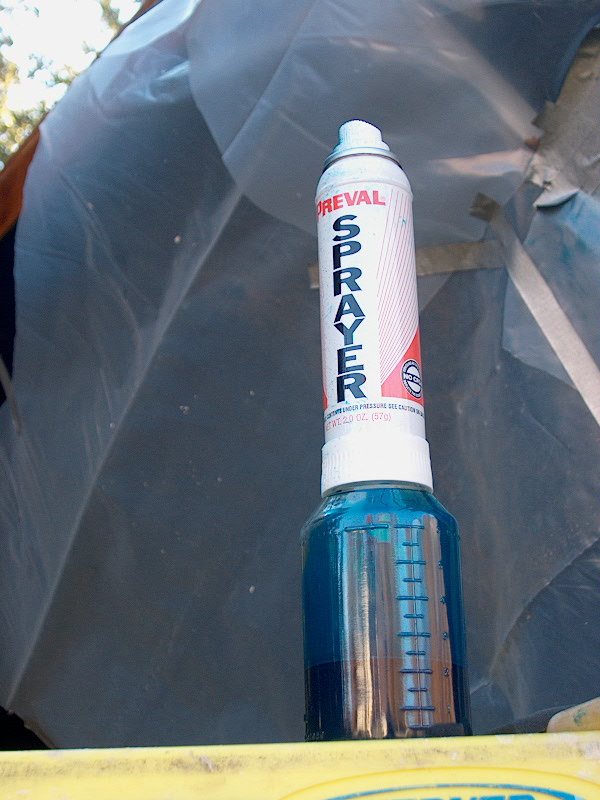
 I
used a Preval mini-sprayer, which you can buy at the marine store and probably
other places. These are great little tools--you mix whatever paint or
finish you like, thin it appropriately, and you have a pressurized sprayer all
set to go. The cartridge will spray almost anything. (Yes, it has no
CFCs.) Now, I know all about the dangers inherent with spraying linear
polyurethane paint (like Awlgrip), but I figured that spraying in such an open
area, on a small section and for a brief time would be OK with just my
respirator. I
used a Preval mini-sprayer, which you can buy at the marine store and probably
other places. These are great little tools--you mix whatever paint or
finish you like, thin it appropriately, and you have a pressurized sprayer all
set to go. The cartridge will spray almost anything. (Yes, it has no
CFCs.) Now, I know all about the dangers inherent with spraying linear
polyurethane paint (like Awlgrip), but I figured that spraying in such an open
area, on a small section and for a brief time would be OK with just my
respirator.
Unfortunately, the day I had
chosen (and was stubbornly committed to) was much colder than anticipated, with
temperatures in the high 40s in the afternoon. Not ideal, but I thought it
would be OK regardless.
I mixed up the smallest amount of
Awlgrip Flag Blue that I could (1 oz. topcoat, 1/2 oz. converter) and thinned it
till it sprayed easily. Then, I tried spraying it on the boat. It
worked fairly well, and I did only a very thin coat. On some of the
smaller gouges elsewhere on the bow (I only sprayed the "smile", I
used an artist brush to simply dab the paint on over the primer. This will
make the scracthes disappear from virtually any distance away, except for close
up. While this damage, and the less-than-perfect repair, will always
bother me, no one else will notice when the boat is in the water. I left
the new paint to cure for a while and did some other things.
Later that day, I deemed
that the paint had set up enough for a second coat, so I sprayed it on. I
continued this through the afternoon, spraying a new coat every couple hours
while I could. Unfortunately, not only did this not cover the white
primer very well, it also ended up becoming heavier than I had hoped, so I ended
up with a couple "slumps", or longitudinal drips. Finally, I
decided I was simply not going to be able to cover the primer sufficiently in
one day, so I stored the Awlgrip in the refrigerator and quit for the day.
|
|
 The
next morning, the paint had partially cured, but not completely--the
temperatures were quite cold overnight. Therefore, I wasn't able to recoat
the area, since it was too uncured to sand (I had to sand out the runs).
Then, we had to leave town on an overnight trip that afternoon, so I was a
little upset that I might have to mix up another batch of paint a couple days
later to finish the job. The
next morning, the paint had partially cured, but not completely--the
temperatures were quite cold overnight. Therefore, I wasn't able to recoat
the area, since it was too uncured to sand (I had to sand out the runs).
Then, we had to leave town on an overnight trip that afternoon, so I was a
little upset that I might have to mix up another batch of paint a couple days
later to finish the job.
Fortunately, the paint remained
fully uncured in the jar in the fridge, so I used what remained for my final
coats. I sanded the previous coats with 320 grit to remove the drips, and
finished with a green Scotchbrite pad, which worked perfectly to properly rough
up the surface. I abandoned the sprayer for my final coats, since it
just wasn't doing what I had hoped. Instead, I used a nice foam brush,
which I had previously tested (while doing the boottop) to determine that they
did not fall apart in the Awlgrip. This time, I set up a heat lamp of
sorts--I have this halogen work lamp on an extendable base that puts out a lot
of heat, so I aimed that at the patch after applying the Awlgrip. During
the course of a day, I applied 4-5 coats of Awlgrip. Each time, I had the
maddening reappearance of the white primer through the finish...I guess Awlgrip
is really one of those products, like alcohol-based finishes, that softens the
underlying finish when new is applied, so you just end up rebrushing the whole
buildup. But I persisted, applying a coat of paint and turning the heat
lamp on to speed its curing. Slowly, I got most of the white
"smile" covered until finally, only a small area that would not cover
was left. After a couple more tries, I got it almost, almost
completely covered sufficiently, but decided to leave it alone for the day and
see what happened after night to cure. I put the Awlgrip back in the
fridge.
My thoughts on this
difficulty: the cheap foam brush had something to do with the lack of
coverage. It simply doesn't brush out a fine layer of paint the way
expensive badger brushes do. I would not choose to use a foam brush for
anything but the smallest projects. I use and like them for varnish, but I
can definitely see an advantage to the pricey brushes when it comes to Awlgrip.
Also, I unquestionably thinned
the Awlgrip just a little too much. I added a splash of thinner when it
came out of the fridge without thinking...but I had thinned the stuff more than
usual when I mixed it for the sprayer. Hopefully it will thicken up just a
bit in case I need it one more time.
The next day, I decided to just
leave well enough alone for now. The patch looks good, though there is
still that hint of a thin spot. Perhaps I'll address this later, but for
now this repair is complete. Later, in the spring,
I'll polish and blend the whole area a bit. More on that when the time
comes. I'm just happy to finally be rid of the stupid "smile"
that I had to put up with since early May!
|
|
|
|