|
Installing
Jacklines
This page was last updated
on 6 July 2002.
|
|
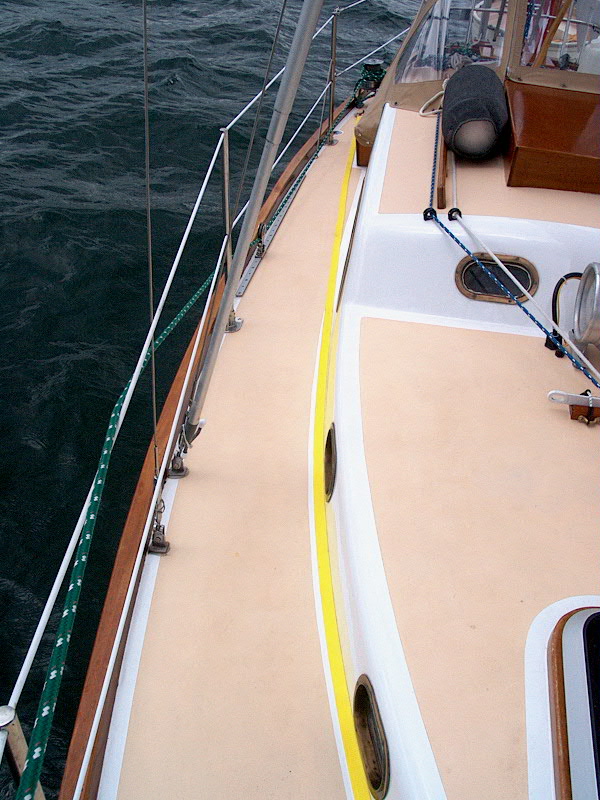
Jacklines are the very strong longitudinal cables
(or, these days, webbing) that are used to clip your safety harness to, and give
you the best freedom of movement back and forth on the boat. Because the
jacklines are continuous, you can move forward and aft without having to unclip
at any time. Over the winter, I purchased some new 25'
jacklines on Ebay. They came with a large, heavy clip on one end.
Installing the necessary padeyes to secure the jacklines was a project that kept
getting put off, but with the cruise coming up shortly I figured I'd better get
with it. We will have a rule that our inflatable PFDs (with built-in
harness) go on when sailing offshore, and at certain wind strengths, and that we
must be clipped on when moving forward of the cockpit. It will be good for
me, sailing alone as I often do, as well; I put my PFD on when I go forward when
sailing alone anyway, so one I'll be able to clip on as well. I decided
that the large bronze mooring bit on the foredeck would be of sufficient
strength to use as an attachment point for the non-clip end of the webbing
jacklines, but I needed a strong attachment point near the cockpit. Padeyes
with a high safe working load are the answer here.
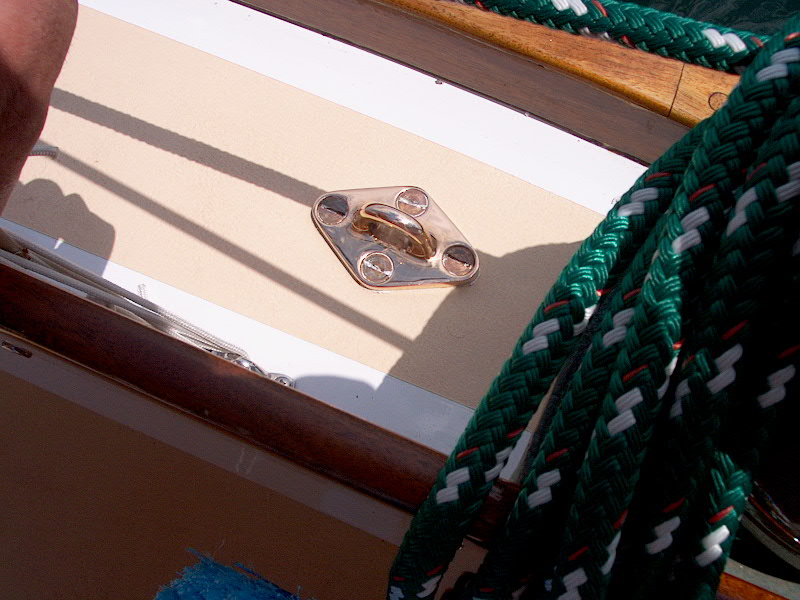
From Hamilton Marine, I purchased two heavy
bronze padeyes and some 5/16" bronze flathead machine screws (1-1/2"
long), nuts, fender washers, and lock washers. I couldn't get bronze
fender washers, so I bought stainless. For backing plates, I cut two large
pieces of seven-ply plywood, such as I had used on other projects. Because
I bought the padeyes and fasteners on separate trips, for some stupid reason I
carefully purchased six bolts, nuts, and washers. (Each padeye uses four
fasteners...I must have been stuck on "4" and bought a couple
"extras".)
With what I thought were all the materials needed
for the job, I headed to the boat. I decided on the best place for the
padeyes--it needed to be far enough aft to allow someone wearing a harness to
enter and work in the cockpit while still clipped, close to the safety of the
cockpit so that one can clip on before leaving, and in a location where a clear
run forward would be provided. In addition, I had to be able to reach the
bottom side of the deck so that I could secure the nuts.
I chose a spot on the sidedecks outboard of the
cockpit coaming, just forward of the winch pads. This location satisfied
all of the requirements. The decks in this area contain no core, so I
didn't have to worry about filling holes with epoxy and such--a time saver. Once
I determined that the underside of the deck was clear and had sufficient room
for the backing plates, I marked the locations and drilled four 5/16" holes
on the starboard side. Then, I bored a slight countersink in the top of
each hole, as always, to provide a small reservoir for additional
sealant. Then I applied masking tape over the whole area, marked the
outside edge of the padeye on the tape, and removed the tape inside the
line. This gave me a nice masked area to protect the deck from
sealant squeezeout.
Before installing the padeyes, I predrilled the
backing plates, using a 3/8" bit to give a little wiggle room to offset any
less than perfect alignment. Then I prepared to install the padeyes; it
was at this time that I discovered that I did not have enough fasteners!
Also, I had no solvent with which to clean up the polysulfide sealant. I
decided to plug ahead and install the one padeye, then go ashore and pick up the
other fasteners I needed for the other side.
|
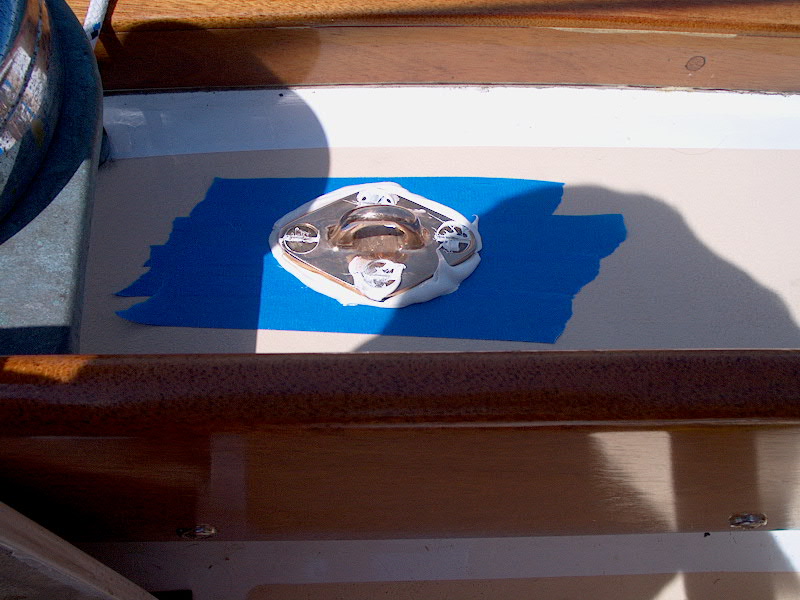 I
gobbed plenty of polysulfide caulk on the deck and around the boltholes, and
inserted one bolt through the padeye, pressing it into the caulk. Reaching
underneath through the cockpit locker, I aligned the backing plate (blind) and
willed it to sort of hang in position for a second while I collected the fender
washer, lock washer, and nut in my hand. Once I had the washers in place
and the nut started, I inserted the remaining three screws, aligning the backing
plate properly, and carefully placed the washers and nuts on those bolts,
securing everything hand tight. Finally, I cranked the nuts home with a
ratchet, holding the slotted tops with a screwdriver (being careful to keel the
slots aligned fore and aft, of course--for looks only). I
gobbed plenty of polysulfide caulk on the deck and around the boltholes, and
inserted one bolt through the padeye, pressing it into the caulk. Reaching
underneath through the cockpit locker, I aligned the backing plate (blind) and
willed it to sort of hang in position for a second while I collected the fender
washer, lock washer, and nut in my hand. Once I had the washers in place
and the nut started, I inserted the remaining three screws, aligning the backing
plate properly, and carefully placed the washers and nuts on those bolts,
securing everything hand tight. Finally, I cranked the nuts home with a
ratchet, holding the slotted tops with a screwdriver (being careful to keel the
slots aligned fore and aft, of course--for looks only).
I snapped a few pictures of the blind underside
of the installation to check out the backing plate and make sure everything
looked OK.
|
|
 |
|
With one side secured, I went
ashore to pick up additional fasteners and paint thinner, then returned and
completed the other side, after cleaning up the caulk squeezeout on the first
padeye.
|
|
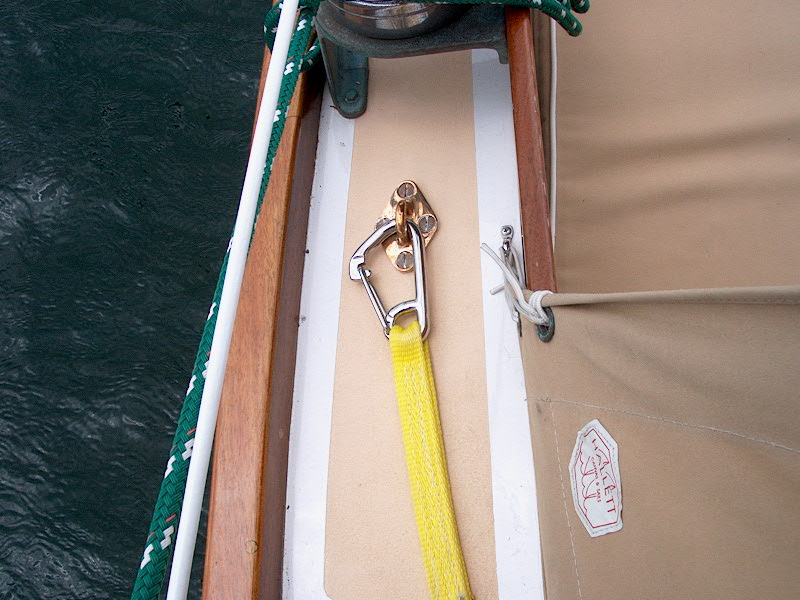
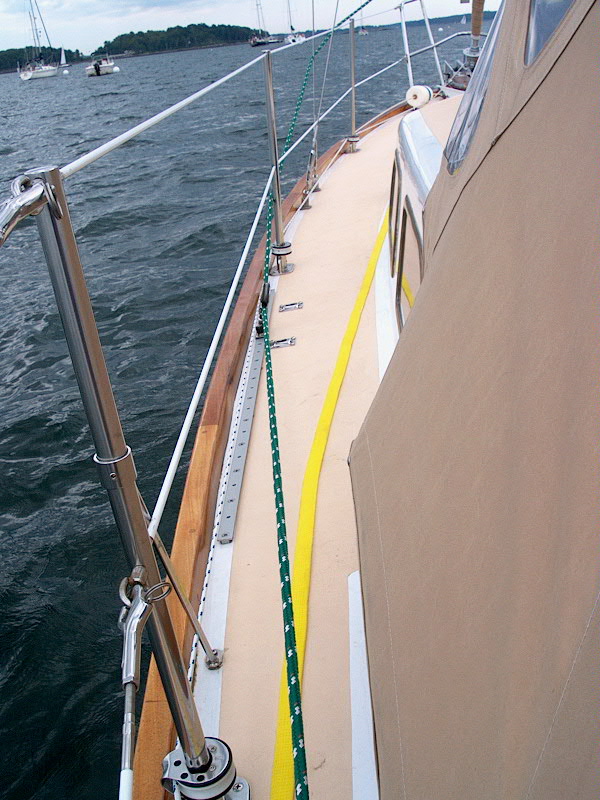
To install the webbing jacklines,
I clipped one end to the new padeyes, and ran them forward, keeping the webbing
flat and untwisted. To secure the bitter ends to the bit, I used a knot I
had read about online on the Cape Dory board that seemed to hold promise (a
so-called water knot from rock climbing). I'll get a picture of the
jacklines and this knot soon:
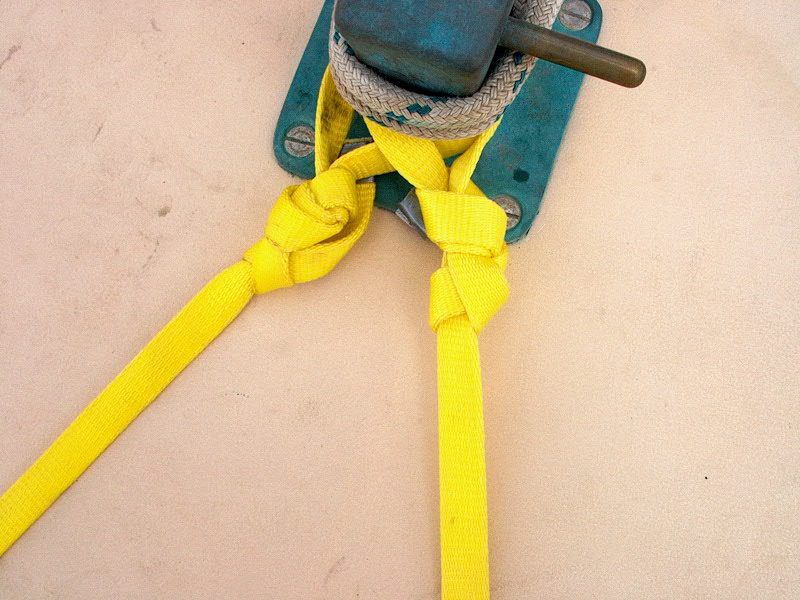 Near the end of the webbing
(about 12" from your eventual end), tie an overhand knot, adjusting the
webbing so that it lies flat throughout the knot. Near the end of the webbing
(about 12" from your eventual end), tie an overhand knot, adjusting the
webbing so that it lies flat throughout the knot.
Run the bitter end through whatever
you are securing it to (padeye or, in my case, around the bit base), then
bring the end back through the twists of the overhand knot, backwards, keeping
the webbing flat again. Pull it tight.
It certainly seemed like this
knot was strong and slip-free, and it was easy to adjust the tension on the
jacklines as needed. It began to rain as I was installing these (a
different day from when I installed the padeyes), so after cutting the excess
webbing off I was unable to burn the end of the webbing to prevent unraveling,
so I left it taped up until I could get to it. I tied a final overhand
knot with the tail to hide the excess and to provide just one more means of
security.
|
|
 It looked like the webbing
got looser when wet, so there may be some minor tension adjustments over the
next few days as I play with them. I haven't yet figured out the best
tension; too tight and they come up hard against the cabin trunk forward, but
too loose and it's just that much more play and opportunity to go
overboard. As of this writing, I have yet to run my harness leash along
the jacklines to see how it goes. I don't want to beat up the boat, but
want the jacklines to work as intended too. It looked like the webbing
got looser when wet, so there may be some minor tension adjustments over the
next few days as I play with them. I haven't yet figured out the best
tension; too tight and they come up hard against the cabin trunk forward, but
too loose and it's just that much more play and opportunity to go
overboard. As of this writing, I have yet to run my harness leash along
the jacklines to see how it goes. I don't want to beat up the boat, but
want the jacklines to work as intended too.
|
|


|
|