|
Well, I had the insulation in hand before the
boat went in the water last spring, but just couldn't find the time to get it
installed at that point. Then, I didn't want to take time away from
sailing and more critical projects during the summer of 2001. Finally, the
time has come to install my sound insulation in the engine room!
|
|
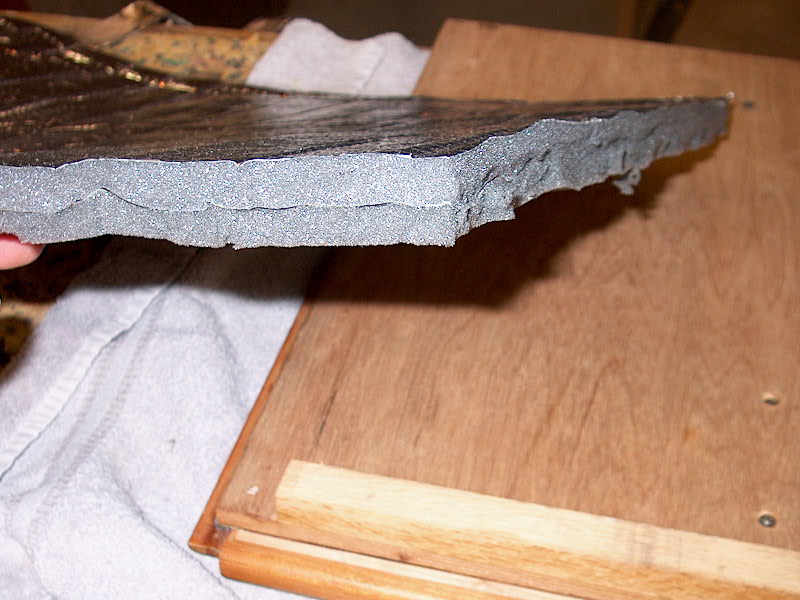 I
purchased some high quality (read: expensive!) 1" foam/lead insulation from
Hamilton Marine. This is manufactured by Sounddown and features 1/2"
of acoustic foam on each side of a lead core, with a foil/Mylar facing on one
side. This is the good stuff; the products without lead just aren't as
effective for a given thickness. It weighs 1 pound per square foot. I
purchased some high quality (read: expensive!) 1" foam/lead insulation from
Hamilton Marine. This is manufactured by Sounddown and features 1/2"
of acoustic foam on each side of a lead core, with a foil/Mylar facing on one
side. This is the good stuff; the products without lead just aren't as
effective for a given thickness. It weighs 1 pound per square foot.
Of course, the engine room itself is now full
of stuff that is attached to the side walls--fuel filters, electrical equipment,
etc. This will make installation of the insulation more difficult,
and I haven't decided how to proceed yet. However, I did remove several
pieces of my engine box that are readily transportable, and brought them to my
shop to take care of the insulation on those parts.
A short time ago, I was digging around in my
storage room for something and moved the box that the insulation was stored
in--it's a 4x8 sheet, rolled up. Well, I got hit directly in the face
above my eye by a very surprised squirrel who had taken up residence
there! Therefore, I was hardly surprised when, a week or so later, I
removed the box and found some of the foam had been chewed up to make nesting
material. Fortunately, little of the material was damaged, and I have way
too much anyway. (I had to buy the whole roll...special order.)
Back on the boat, I had marked any
obstructions on the three pieces that I removed, so I had the outlines of
where the insulation could go marked on them. To begin, I laid out the
foam on the largest piece and cut a rectangle larger than what I needed.
Then, I could move the remains of the heavy roll out of the way and get to
work. The material is easy to cut with scissors or, my choice, a utility
knife.
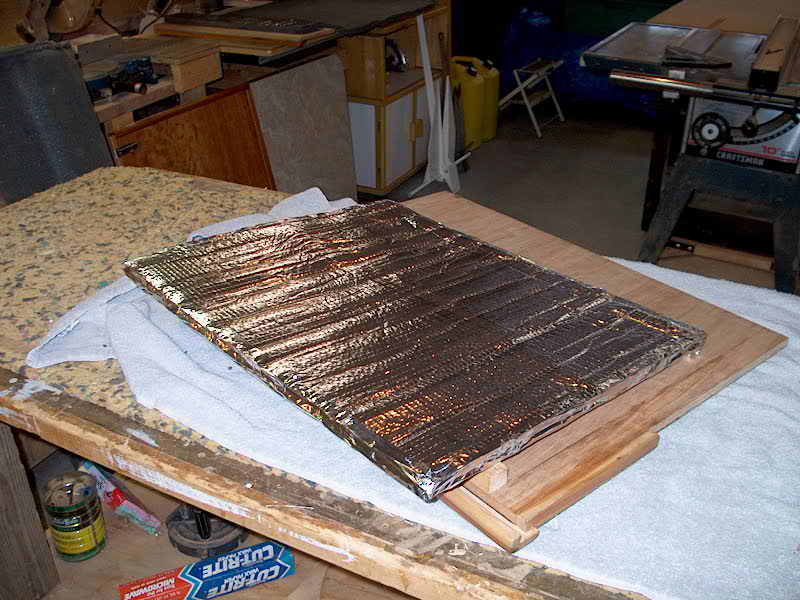
Using my predetermined lines as a rough guide,
I trimmed the insulation to fit the space available on each of the three pieces
of the engine box/steps. The Mylar/foil facing is reinforced in a criss-cross
pattern, so cutting is easy by following these lines. I cut first a shallow line
through just the facing, to give me a better guide, and then two or three deeper
cuts until the material was cut all the way through. The soft lead cuts
easily.
|
|
 With
the insulation cut to fit, I taped the exposed edges with foil tape. The
tape sticks well to the Mylar facing, but not so well to the exposed foam on the
bottom side (it does stick, though--it's not like it's flapping around or
anything). This seals the foam around the edges and will hopefully prevent
future deterioration and damage. I tried for the smoothest application
possible, but even my best efforts resulted in a few minor wrinkles here and
there. At the corners, I slit the tape so that I could lay the sides down. With
the insulation cut to fit, I taped the exposed edges with foil tape. The
tape sticks well to the Mylar facing, but not so well to the exposed foam on the
bottom side (it does stick, though--it's not like it's flapping around or
anything). This seals the foam around the edges and will hopefully prevent
future deterioration and damage. I tried for the smoothest application
possible, but even my best efforts resulted in a few minor wrinkles here and
there. At the corners, I slit the tape so that I could lay the sides down.
|
|
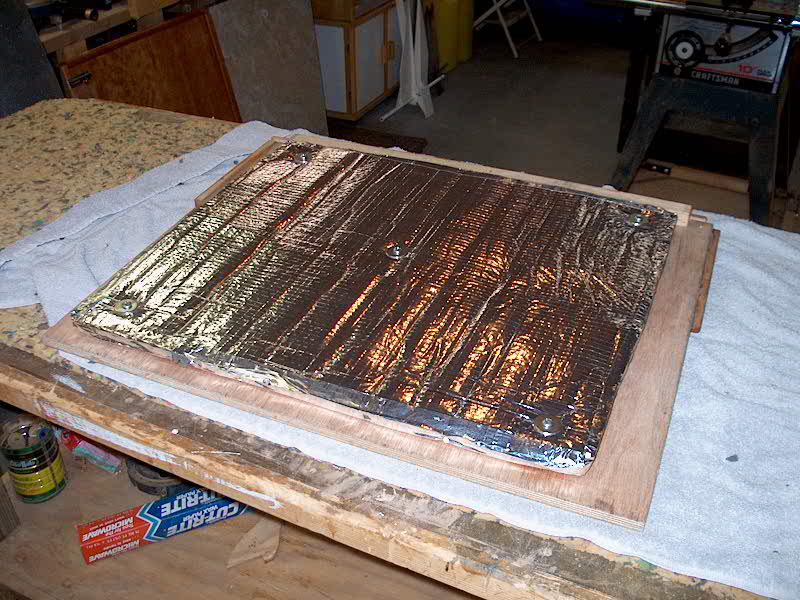
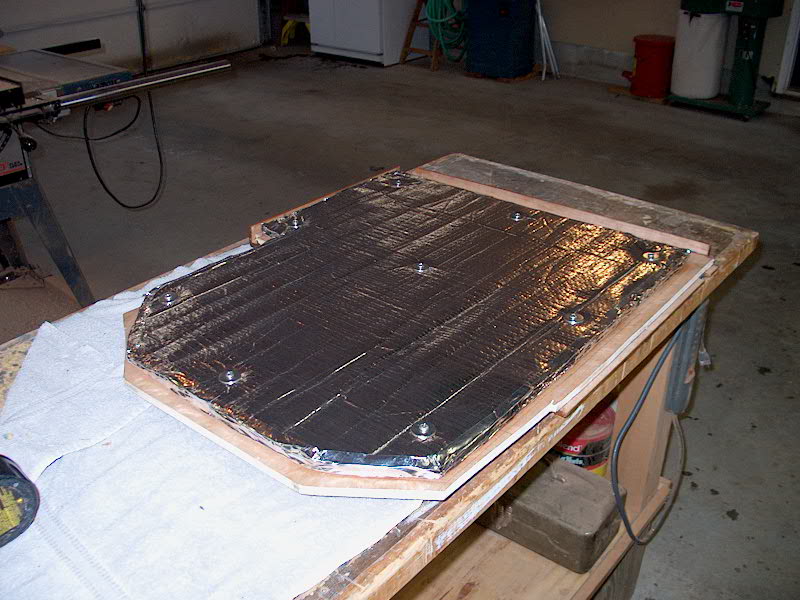
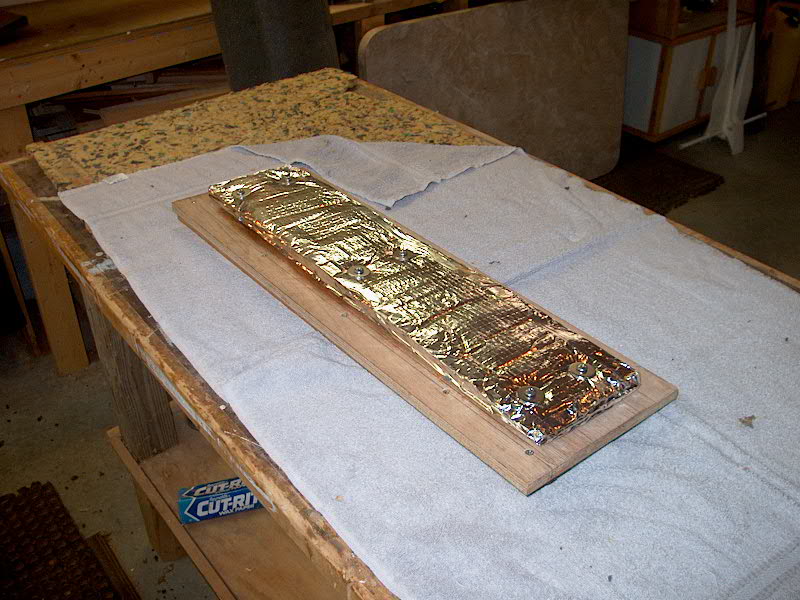
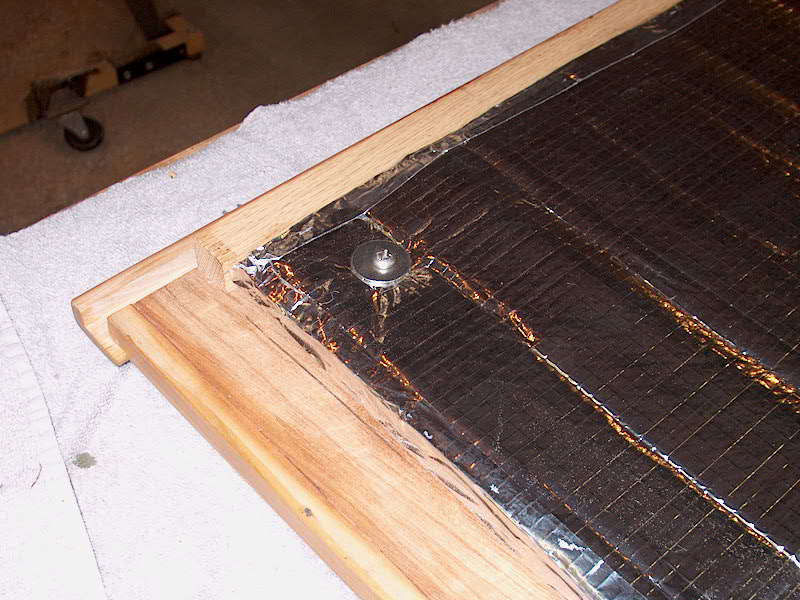 When
the insulation was taped up, I turned it over so the foam was facing up and
sprayed on a heavy coat of 3M 77 spray adhesive. Then I sprayed a similar
coat on the plywood. Carefully aligning the insulation with the markings
on the plywood, I pressed it into place, taking care not to press so hard as to
distort the lead or compress the foam. After pressing the insulation into
the adhesive all over, I further secured each piece with some #12 stainless
steel pan head screws and fender washers. I installed the screws just
tight enough to dimple the top of the Mylar facing slightly, but not to compress
the insulation. This also ensures that there's enough of the fastener
penetrating the wood to have an effective grip. The mechanical fasteners
are necessary because no adhesive will hold the heavy insulation up for any
great length of time, and, while the adhesive is important too, the fasteners
will just help hold everything tightly in place so that the adhesive is not
unduly strained--particularly on upside down pieces. I drove a number of
screws through each piece, including the middle portions. When
the insulation was taped up, I turned it over so the foam was facing up and
sprayed on a heavy coat of 3M 77 spray adhesive. Then I sprayed a similar
coat on the plywood. Carefully aligning the insulation with the markings
on the plywood, I pressed it into place, taking care not to press so hard as to
distort the lead or compress the foam. After pressing the insulation into
the adhesive all over, I further secured each piece with some #12 stainless
steel pan head screws and fender washers. I installed the screws just
tight enough to dimple the top of the Mylar facing slightly, but not to compress
the insulation. This also ensures that there's enough of the fastener
penetrating the wood to have an effective grip. The mechanical fasteners
are necessary because no adhesive will hold the heavy insulation up for any
great length of time, and, while the adhesive is important too, the fasteners
will just help hold everything tightly in place so that the adhesive is not
unduly strained--particularly on upside down pieces. I drove a number of
screws through each piece, including the middle portions.
|