|
Bookshelves
This page was last updated on 9 April 2002
Main
Salon V-Berth
|
|
Main
Salon
Cruising presents a unique opportunity for
finding time to read--a lot. Therefore, we want to carry plenty of books
on board. Last season, we just stored them in a locker behind the
settees--a temporary solution that was hardly a good way to go. This was
just a way to get us through the season, when I planned to build real
bookshelves in the salon.
 I'm
going to install at least two, possibly three, shelves in the inset nook on the
starboard side of the salon. The top shelf will be tall enough to fit the
large books like cruising guides and such, and the shelf beneath will be tall
enough for a standard hardcover book. I think there'll be room beneath for
one more shelf--maybe paperback size, possibly a general utility shelf.
I'll know more a little later; this is mostly in the planning stage, and
visualization is a little difficult in the abstract. What is determining
the lower absolute limit of the shelves is that we need to keep a comfortable
space beneath the bottom shelf to allow our feet to remain upright if we are
stretched out sitting on the starboard settee. I designed the settee so
that my wife or I could comfortably sit stretched out for reading or whatever,
so keeping a foot well is essential. I'm
going to install at least two, possibly three, shelves in the inset nook on the
starboard side of the salon. The top shelf will be tall enough to fit the
large books like cruising guides and such, and the shelf beneath will be tall
enough for a standard hardcover book. I think there'll be room beneath for
one more shelf--maybe paperback size, possibly a general utility shelf.
I'll know more a little later; this is mostly in the planning stage, and
visualization is a little difficult in the abstract. What is determining
the lower absolute limit of the shelves is that we need to keep a comfortable
space beneath the bottom shelf to allow our feet to remain upright if we are
stretched out sitting on the starboard settee. I designed the settee so
that my wife or I could comfortably sit stretched out for reading or whatever,
so keeping a foot well is essential.
After making some preliminary measurements on
board, I was able to determine the width of the shelves. To make
construction easier, and to keep the shelves looking uniform, both (all?) will
be the same depth. Should be end up with space behind smaller books, we
can always stuff little-used gear back there to take up the space.
|
|
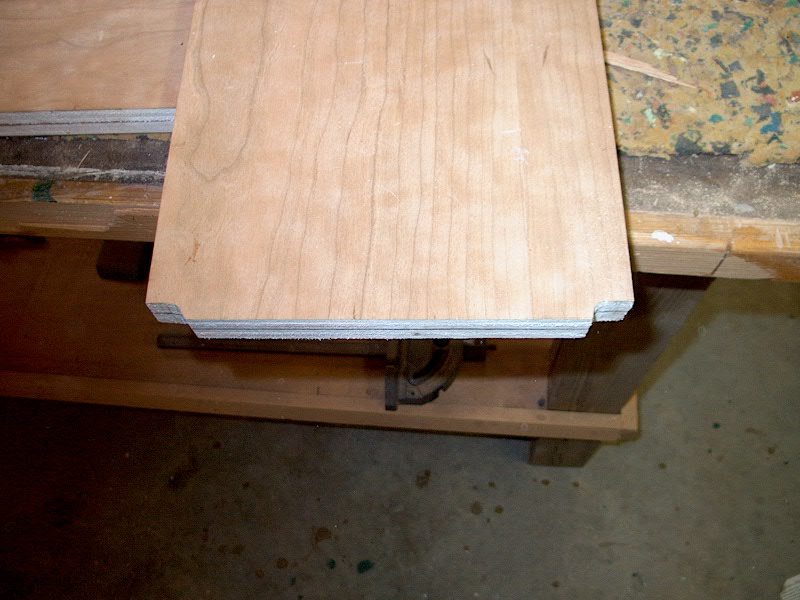
 The
shelves have to be strong to support the weight of a large number of hardcover
books over a span of up to two feet. Therefore, I decided to laminate two
pieces of plywood together to make each shelf. Because each shelf is
potentially visible from either the top or bottom side, I used two layers of
1/2" cherry plywood with the good sides both facing out. The
shelves have to be strong to support the weight of a large number of hardcover
books over a span of up to two feet. Therefore, I decided to laminate two
pieces of plywood together to make each shelf. Because each shelf is
potentially visible from either the top or bottom side, I used two layers of
1/2" cherry plywood with the good sides both facing out.
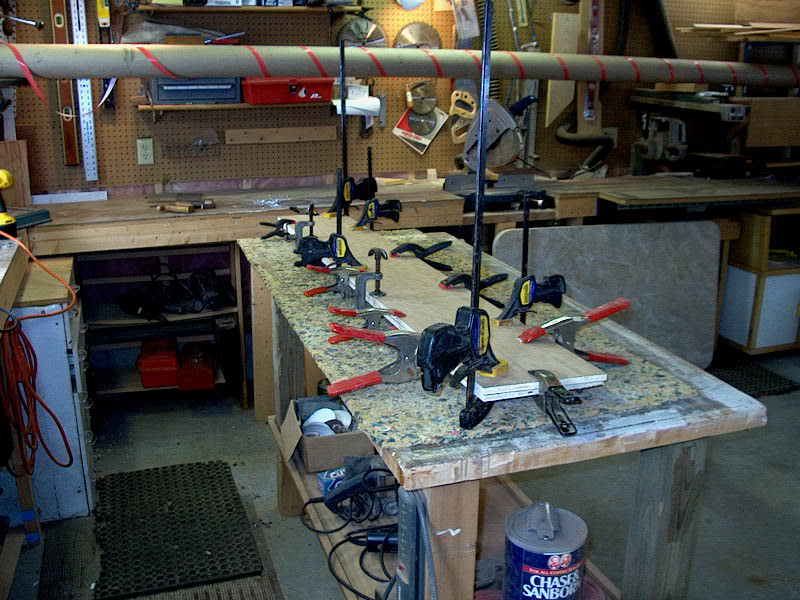
I cut enough plywood, length-wise, for up to
three shelves to a width of 8-3/4". This is wide enough, with a
little extra, for the biggest hardcover books. I cut two pieces and then
glued them together with a thickened epoxy mixture in the normal way--it's just
second nature to mix up a batch now. I used colloidal silica to thicken
the mixture till it resembled Heinz ketchup. I clamped the boards together
and let them sit overnight before continuing.
|
|
 With the glue-up complete, I spent some time
cutting the rough shelves to the proper size. This required a number of
trips up and back to the boat to check and double-check the fit. I also
worked on the fiddles, or sea rails, that will cover the fronts of the shelves
and hold the books in place. I milled strips of 3/4" (really more
like 7/8") cherry to 2-1/2" width: 1" to cover the plywood
shelves, and 1-1/2" to stick above the shelf to act as the fiddle.
These also required fitting to ensure that the finished product will be
attractive. In particular, I had to fit the shelf blanks around the small
trim pieces that are installed in the corners of the nook on the bulkhead, and
the lower shelf required a 10º angle on its outer side where it meets the
angles settee back. Getting all these cuts marked and completed properly
took a few trips. With the glue-up complete, I spent some time
cutting the rough shelves to the proper size. This required a number of
trips up and back to the boat to check and double-check the fit. I also
worked on the fiddles, or sea rails, that will cover the fronts of the shelves
and hold the books in place. I milled strips of 3/4" (really more
like 7/8") cherry to 2-1/2" width: 1" to cover the plywood
shelves, and 1-1/2" to stick above the shelf to act as the fiddle.
These also required fitting to ensure that the finished product will be
attractive. In particular, I had to fit the shelf blanks around the small
trim pieces that are installed in the corners of the nook on the bulkhead, and
the lower shelf required a 10º angle on its outer side where it meets the
angles settee back. Getting all these cuts marked and completed properly
took a few trips.
The upper shelf is set far enough below the
overhead to allow tall 11" books to stand upright--typical cruising guide
size. I also allowed an extra 1-1/2" of clearance to allow the books
to be lifted over the fiddles. The lower shelf is sized to accept a
standard mass-market hardcover book--about 9" tall. Again, I left
enough extra space to allow the books to be lifted over the rail.
|
|
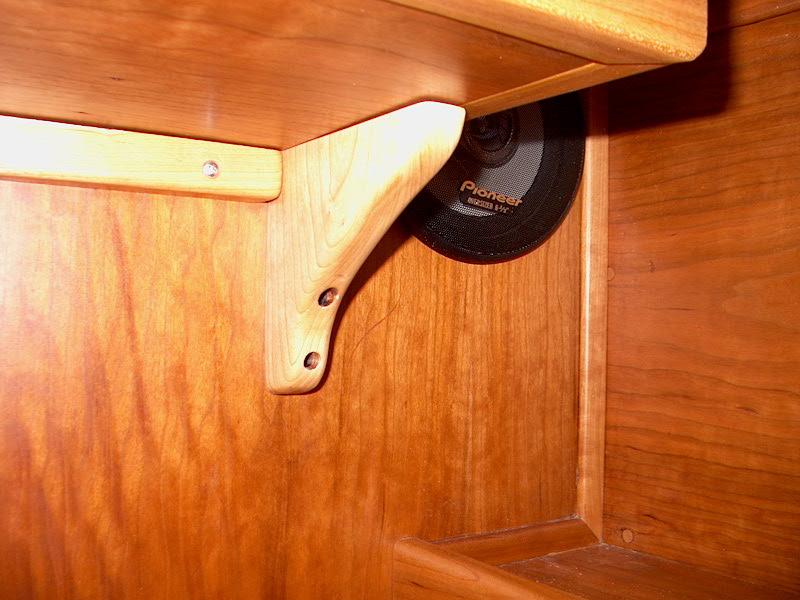
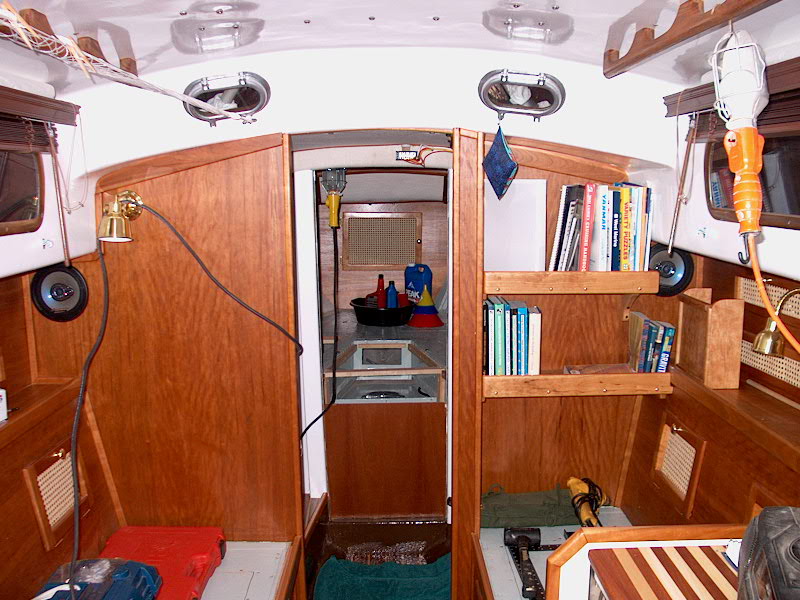
Because of the speaker installed in the
bulkhead, the top shelf ends in a vertical line projected down from the side of
the cabin trunk above. I cut a second fiddle to hold the books in place on
that edge; the top portion of the tall books will be supported by the cabin
trunk. (See the top photo on this page for reference.) The lower
shelf ends up a couple inches below the shelf behind the settees.
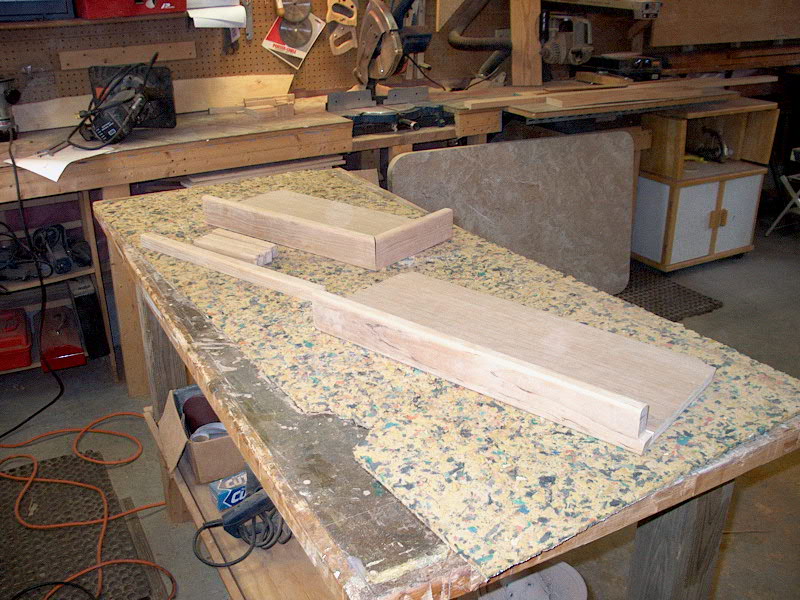 Once
I had the various pieces of wood rough cut (including the cleats that will
support the shelves), I spent some time milling rounded edges in the appropriate
places on each piece (using a router table and 1/4" roundover bit), and
then sanding all the pieces smooth from 120 through 220 grits. With this
done, I predrilled holes and countersinks for the screws that will hold the
fiddles and cleats in place when everything is assembled. This photo
(left) shows the various pieces laid out after sanding, with the shelves and
fiddles loosely mocked up for display. Once
I had the various pieces of wood rough cut (including the cleats that will
support the shelves), I spent some time milling rounded edges in the appropriate
places on each piece (using a router table and 1/4" roundover bit), and
then sanding all the pieces smooth from 120 through 220 grits. With this
done, I predrilled holes and countersinks for the screws that will hold the
fiddles and cleats in place when everything is assembled. This photo
(left) shows the various pieces laid out after sanding, with the shelves and
fiddles loosely mocked up for display.
|
|
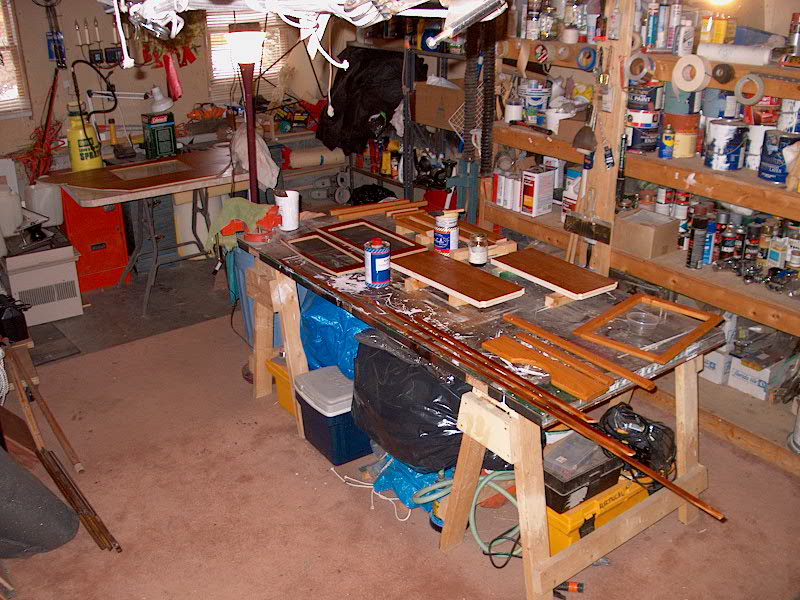
Next, I varnished the bookshelves to match the
surrounding cabinetry.
|
|
 With
the varnishing complete, I began installing the shelves on the boat. As
part of my initial layout of the shelves, I already had markings on the
bulkhead, so it was a relatively simple matter to install the cherry cleats to
the bulkhead with stainless steel screws. Of course, partway through the
process I ran out of the proper screws, so I had to hold off completing the
job. I double checked the level of each cleat as I screwed it into
place. With
the varnishing complete, I began installing the shelves on the boat. As
part of my initial layout of the shelves, I already had markings on the
bulkhead, so it was a relatively simple matter to install the cherry cleats to
the bulkhead with stainless steel screws. Of course, partway through the
process I ran out of the proper screws, so I had to hold off completing the
job. I double checked the level of each cleat as I screwed it into
place.
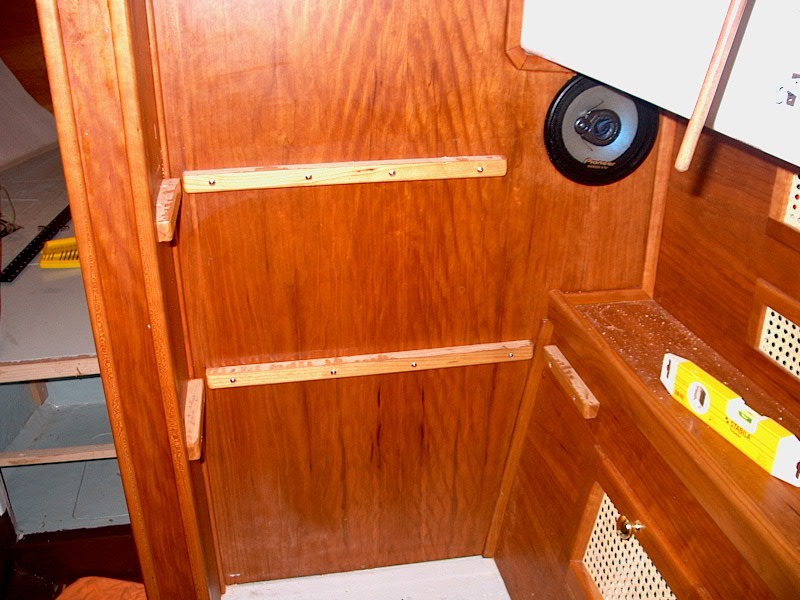
Armed with the correct screws, I completed
installing the cleats to the bulkheads. For each shelf, there is a long
cleat on the athwartships bulkhead, and a shorter one on the inside of the
transverse bulkhead in the nook. Then, on the lower shelf, there's a third
cleat on the settee back. This cleat required a 10° angle cut on the side
to accommodate the settee back angle.
I placed the shelves on top of the cleats to
check the fit, and drilled and countersunk holes for the attaching screws.
Using #10 x 1-1/2" screws, I screwed each shelf in place with three screws
across the back and two on the side (s). I'm not worried about the screw heads showing in this
instance because they should always be covered by books. The upper shelf,
since it is supported only on one side,  requires
a bracket to help support the outboard side. I milled a simple curved
bracket out of cherry stock and varnished it to match the rest of the woodwork.
Then, I installed it at the outer edge of the upper shelf with screws into the
bulkhead and down from the top of the shelf. requires
a bracket to help support the outboard side. I milled a simple curved
bracket out of cherry stock and varnished it to match the rest of the woodwork.
Then, I installed it at the outer edge of the upper shelf with screws into the
bulkhead and down from the top of the shelf.
|
|
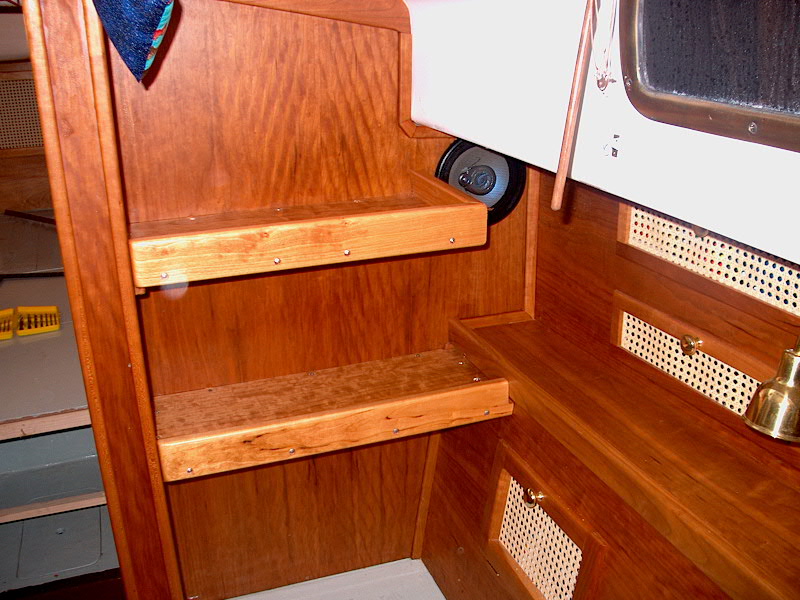 Finally,
I installed the fiddles on the fronts of the two shelves, and on the side of the
upper shelf. Because I wanted to be able to remove these, I face-screwed
them into the shelves through previously countersunk holes. Then, to
showcase my new shelves, I placed the books I already had on board from last
season on the shelves. There's a lot more room, so we will be able to take
lots of books when we go cruising. Finally,
I installed the fiddles on the fronts of the two shelves, and on the side of the
upper shelf. Because I wanted to be able to remove these, I face-screwed
them into the shelves through previously countersunk holes. Then, to
showcase my new shelves, I placed the books I already had on board from last
season on the shelves. There's a lot more room, so we will be able to take
lots of books when we go cruising.
|
|
Bookshelves complete! (Photo taken on
March 4, 2002. Please excuse the off-season mess!)
|
|
V-Berth
The shelves in the salon, nice as
they are, will simply not be enough. It's all about books. I saw an
opportunity to build a large shelf at the forward end of the vee berth, spanning
the width of the new chain locker bulkhead and resting on the two
rectangular-section hull stiffeners that are glassed to the hull about midway up
the hull sides in the forward cabin. This area would provide nearly four
feet of book space.
I built the shelf out of mahogany
plywood to match the trim in the forward cabin. I sized the width of the
shelf to accommodate the large size of mass-market paperback and the small
hardcovers--about 6" wide. Small paperbacks will also fit, of course,
and we can use the space behind them for additional books or other
storage. I cut angles on the ends of the shelf to match the taper of the
hull, and test-fit it in place. Because the hull stiffener on which I am
relying for support is angled in a fore-and-aft direction, the rear part of the
shelf (the forward end, against the bulkhead) was higher than the after end (the
"front" of the shelf, if you will). Therefore, I decided to
level the shelf using the fiddle/sea rail that I was going to attach to the
shelf anyway to hold the books in place. Leveling the shelf by eye, I
could see that that if I allowed the bottom of the sea rail to extend about
3/4" below the bottom of the shelf, it would level the shelf out as it sat
on the rail instead of on the plywood shelf itself. Because there is some
clearance above the shelf, I fabricated a tall sea rail--it extends about
3" above the shelf. This way, the books will stay in without the need
for other restraints, even in the worst weather. To help support the
forward (bulkhead) side of the shelf, I made some small cleats that it can rest
on; these will be screwed to the bulkhead.
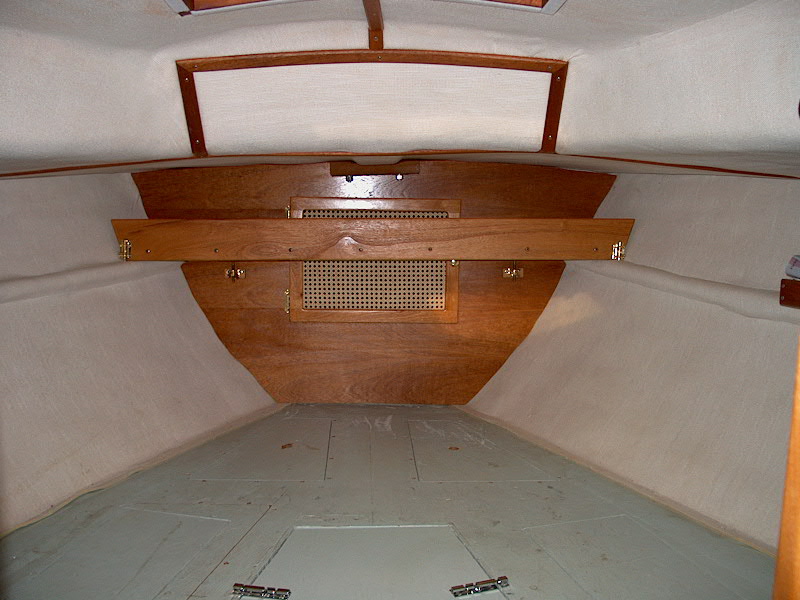
It should be noted here that for
the purposes of this shelf, the warped/out of alignment bulkheads that are
common to the Triton actually came in handy. The shelf spans the
chain locker bulkhead right across the opening door in the bulkhead (see below
for the way I made the shelf removable for access to the chain locker).
Originally, I figured I would have to create a cutout in the back of the shelf
to allow it to fig tightly around the door frame, which protrudes somewhat from
the bulkhead. When I did my first dry fit, prepared to scribe the back of
the shelf, I was surprised to see that the shelf cleared the door perfectly--the
bulkhead is curved enough off a straight line that the center portion, where the
door is, is about 1/4" farther forward than the edges. Therefore, I
did not have to modify the shelf blank at all in order for it to clear the
door. Sometimes these things work out.
After another dry fit, I sanded
everything smooth and then glued and screwed the sea rail to the shelf. I
then applied a number of coats of the tung oil that I used throughout the
forward part of the cabin on the mahogany trim.
With the shelf construction
complete, I now had to figure out how to make the whole thing easily removable
for access to the chain locker, while at the same time making it secure and
resistant to movement when it is in place. With a rough idea in mind, I
traveled to Hamilton Marine to look over their hardware section. What I
found were T-bolt clamps designed to hold two pieces tightly together, yet
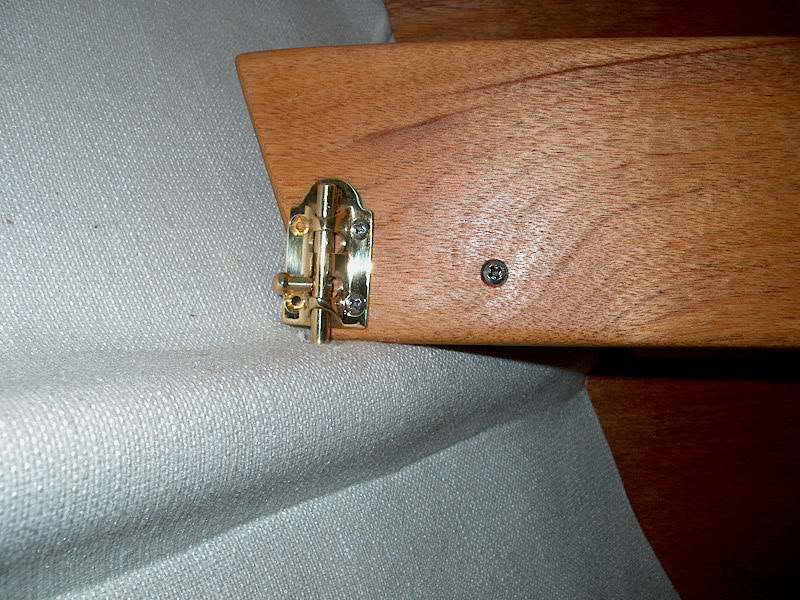
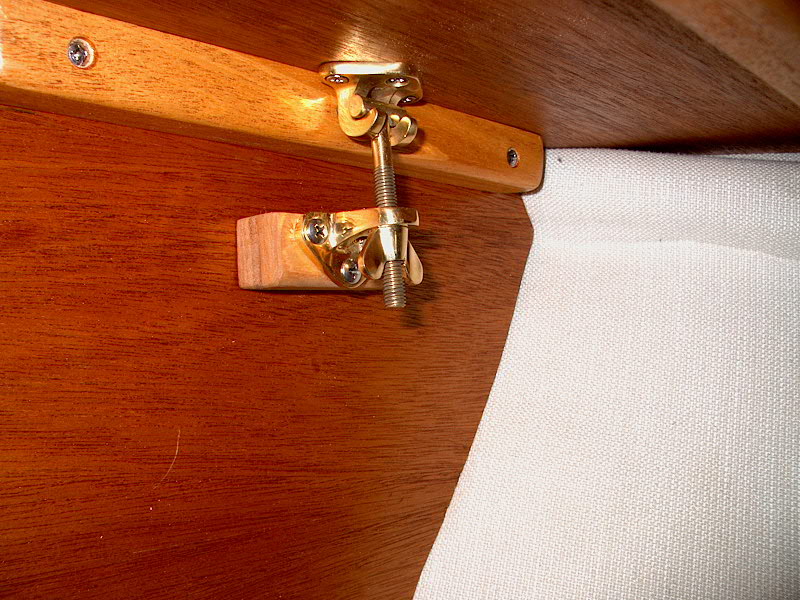
be easily released. Perfect. I also picked up two barrel bolts.
 Later,
at the boat, the first thing I did was to screw the mahogany cleats into the
bulkhead under the forward edge of the shelf. I used three #8 x
1-1/4" oval head screws in each cleat. Then, with the shelf loosely
in place, I looked things over in order to figure out where to install the
T-bolts. I chose to install one on each side of the shelf, in the center
of each supporting cleat. Installing the upper bracket was easy; three
screws into the shelf while holding the bracket in the proper position. To
install the lower section (which contains the T-bolt and adjustment nut), I had
to make a couple backer blocks to fit behind the hardware, since my initial
attempt to screw them directly to the bulkhead caused the bolt to angle too
sharply, so that the system didn't work. With the lower section out at a
level that is flush with the cleats under the shelf, everything worked
fine. At first, I thought these two T-bolts would do the trick
alone and hold the shelf properly in place. However, I noticed that
tightening them tended to make the shelf want to slide aft. Had I made my
backer blocks a little thinner, tightening the bolt would have pulled the whole
arrangement forward. Oh well--no big deal. Later,
at the boat, the first thing I did was to screw the mahogany cleats into the
bulkhead under the forward edge of the shelf. I used three #8 x
1-1/4" oval head screws in each cleat. Then, with the shelf loosely
in place, I looked things over in order to figure out where to install the
T-bolts. I chose to install one on each side of the shelf, in the center
of each supporting cleat. Installing the upper bracket was easy; three
screws into the shelf while holding the bracket in the proper position. To
install the lower section (which contains the T-bolt and adjustment nut), I had
to make a couple backer blocks to fit behind the hardware, since my initial
attempt to screw them directly to the bulkhead caused the bolt to angle too
sharply, so that the system didn't work. With the lower section out at a
level that is flush with the cleats under the shelf, everything worked
fine. At first, I thought these two T-bolts would do the trick
alone and hold the shelf properly in place. However, I noticed that
tightening them tended to make the shelf want to slide aft. Had I made my
backer blocks a little thinner, tightening the bolt would have pulled the whole
arrangement forward. Oh well--no big deal.
|
 To
deal with this issue, which I had anticipated, I installed the barrel bolts
(without their lower, female sections) on the face side of the sea rail.
To secure the bolt, I drilled 1/4" holes into the rectangular hull
stiffeners on which the shelf sits using my right angle drill attachment, since
there is not enough clearance above for a regular drill. All these barrel
bolts do is prevent the shelf from sliding when the T-bolts are tightened. To
deal with this issue, which I had anticipated, I installed the barrel bolts
(without their lower, female sections) on the face side of the sea rail.
To secure the bolt, I drilled 1/4" holes into the rectangular hull
stiffeners on which the shelf sits using my right angle drill attachment, since
there is not enough clearance above for a regular drill. All these barrel
bolts do is prevent the shelf from sliding when the T-bolts are tightened. |
|
With that, the project was
complete! Now we have a huge amount of space for books.
|
|