|
Mast Work and Rigging:
Details
|
|
Mast
Step | Standing
Rigging | Jumper Struts | Mast Wiring
| Windex | Radar Reflector
|
|
Mast
Step
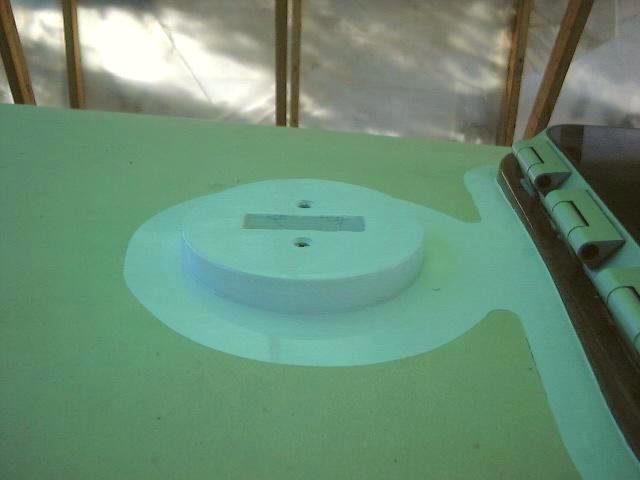
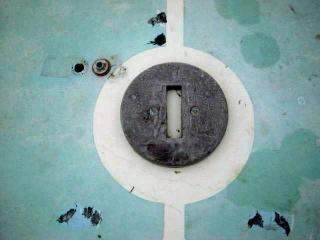 The
original mast step looked like this (photo, right)
It was in
basically good condition, but there were a few chips in the plywood laminations,
and it was ugly! The
original mast step looked like this (photo, right)
It was in
basically good condition, but there were a few chips in the plywood laminations,
and it was ugly!
I sanded the
piece down, and mixed up a cake-frosting like batch of epoxy, which I used to
fill the minor lamination chips and other surface flaws. When the epoxy
cured, I sanded it smooth, primed with Brightside primer, and painted the step
with three coats of Brightside white.
|
|
 I
reinstalled the mast step with stainless steel wood screws in the original
location, in a bed of polysulfide. There were no signs of mast beam damage
or deck compression in #381, so I didn't do any work to those areas.
Should any signs show up in the future, I'll deal with it at that time. I
reinstalled the mast step with stainless steel wood screws in the original
location, in a bed of polysulfide. There were no signs of mast beam damage
or deck compression in #381, so I didn't do any work to those areas.
Should any signs show up in the future, I'll deal with it at that time.
|
|
Rigging
Inspection and Replacement
 All
of the original stays appeared to be in fair condition, with the exception of
the headstay. An old, decrepit roller furler was installed, and it had
badly untwisted the upper portion of the stay. Total trash. The
remaining stays require a complete inspection, which I am going to have a rigger
do, and I will replace as necessary. All
of the original stays appeared to be in fair condition, with the exception of
the headstay. An old, decrepit roller furler was installed, and it had
badly untwisted the upper portion of the stay. Total trash. The
remaining stays require a complete inspection, which I am going to have a rigger
do, and I will replace as necessary.
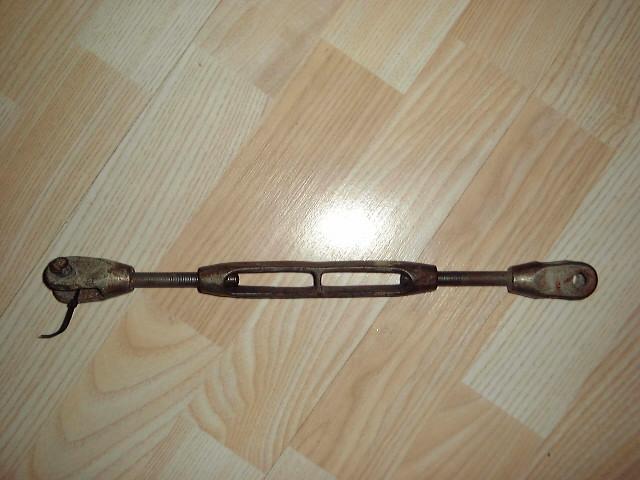
The original
bronze turnbuckles were in pretty sad shape, with many bent threads and other
problems. I am going to replace them all with new.
I sent the old
running rigging off to a local rigger for inspection and, if necessary,
replacement. At the very least, I am replacing the headstay--which was
completely unlaid at the top--and reconfiguring the jumper stay adjustment,
adding a turnbuckle at the lower end for easier adjustment. A bent jumper
is slated for repair or replacement as well.
After several
weeks, I received my new rigging. I ended up replacing all the
rigging. The rigger found a couple suspect swages, and I decided that the
time was right to start fresh. Where have you heard that before? The
new rigging is the same size as the original--3/16", except for the
headstay, which is 1/4". The turnbuckles and all related hardware are
also new.
|
|
Update: Winter
2008
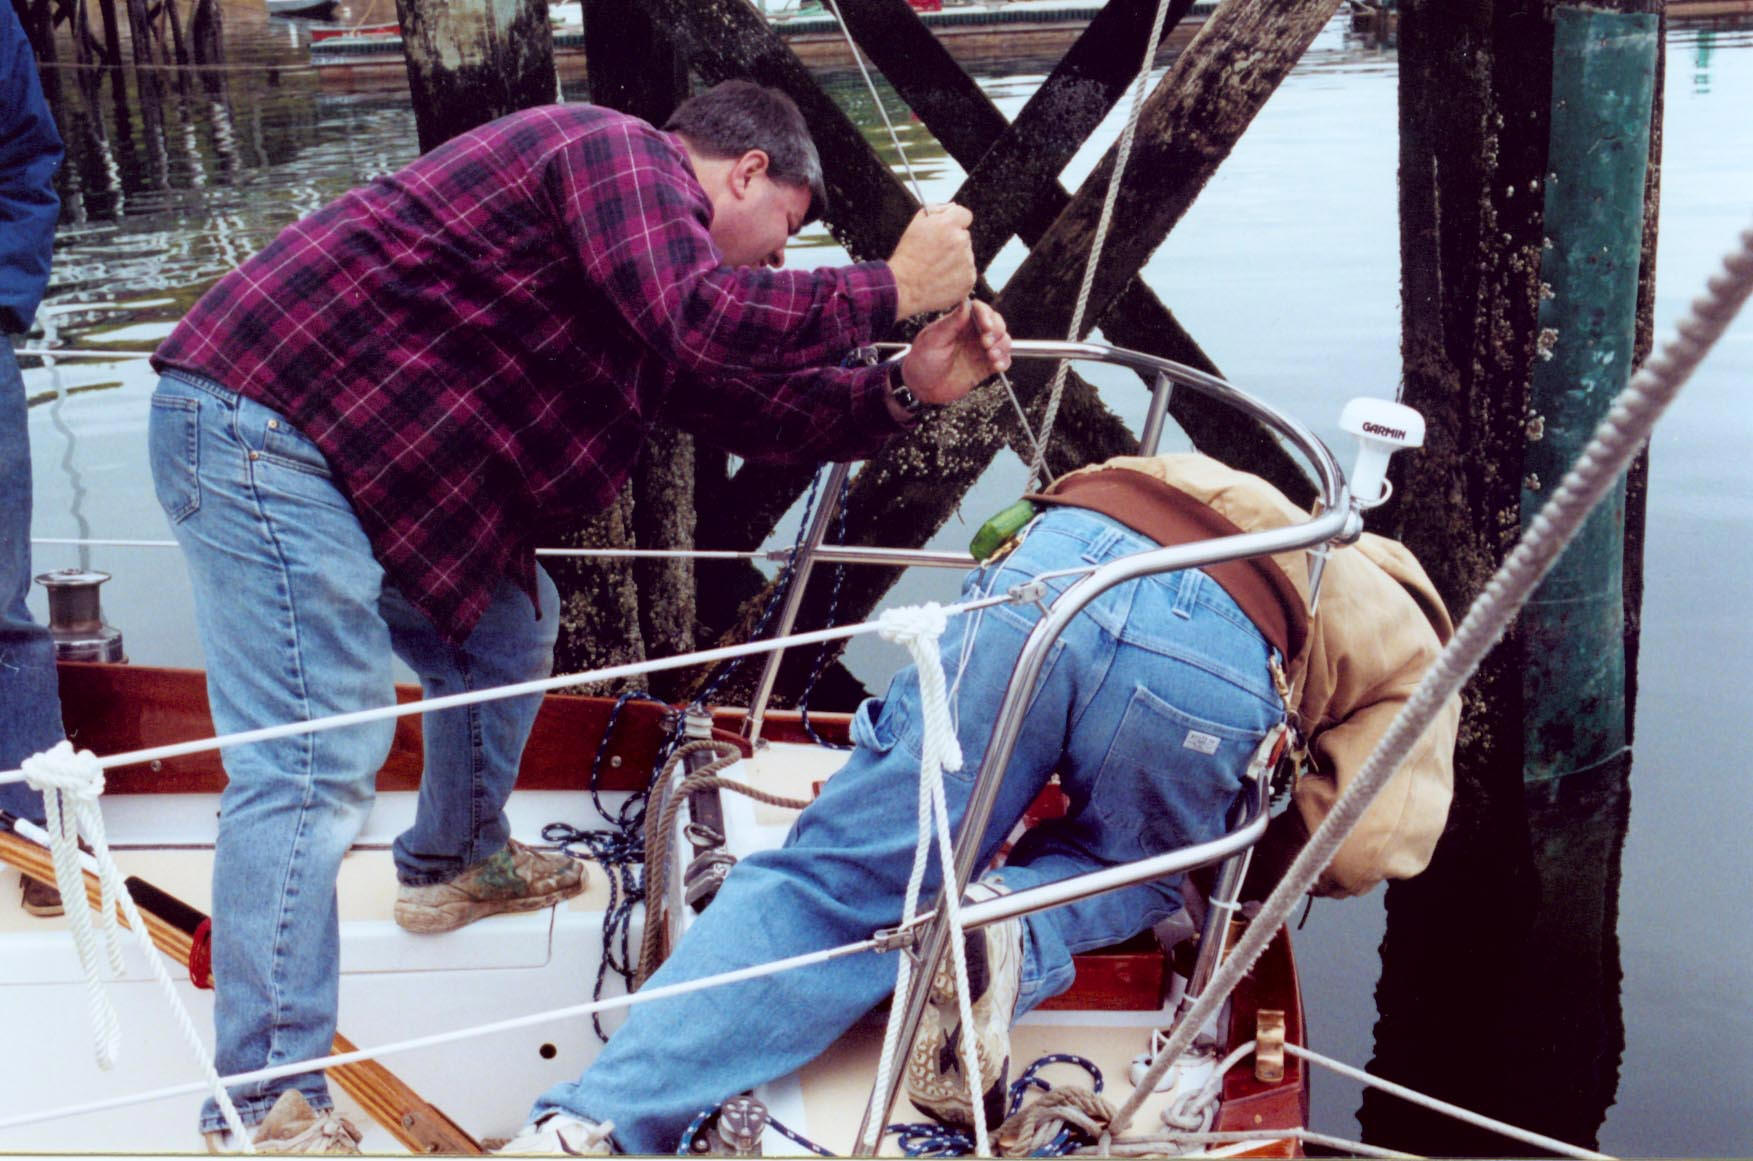
From the getgo, the backstay
had been a bit too short. When we first launched in 2001, we struggled to
connect the backstay. Here we are trying to secure the backstay that
first year.
|
|

|
For a season or two, I made do with the backstay as is; I must have used an
additional toggle to aid in the process. Then, one year I changed the
headstay setup and installed an additional toggle there, which not only helped
connect the headstay but also bought a couple inches for the backstay.
This worked adequately, though attaching the backstay was always a hassle.
Things came to a head in 2007. After missing
a season with the boat while I built my house, my brain was rusty, and I forgot
to add the extra toggle to the headstay when I was getting the mast stepped.
I didn't realize my mistake till later, but the end result was that it was
impossible to attach the backstay. Fortunately, I had some additional
rigging gear on board, and by attaching every spare toggle I had on board
(bringing the total on the backstay to four), we got the thing attached.
Some time later in the season, I realized that I'd forgotten the toggle on the
headstay, but didn't bother to reconfigure it at the time. |
|

|
Clearly, though, it was time to deal with the backstay. Even accounting
for the additional toggle required on the headstay, which would gain 2" (each
toggle is 2" from pin to pin), the backstay was just too short. As seen
the photo above, the threads on the turnbuckle were about where I wanted
them--only without all the additional toggles. I still wanted one toggle
on the backstay, and would properly install a toggle on the headstay for the
next season. But that still left two full toggles' worth of distance, or
4", that the backstay came up short. Therefore, I decided to have a new
stay made 4" longer than the old to make up the difference and allow appropriate
adjustment room in either direction on the backstay turnbuckle.
As before, I subbed this work out to
Maloney Marine
Rigging, as I'd long ago determined that it was more efficient and less
costly to have the pros take care of the job than to do it myself. My new
backstay was identical to the original, and reused the old turnbuckle and lower
end, but was 4" longer overall. I looked forward to an easier
mast-stepping in the spring.
Now, back to the original page content, dating
to 2001.
|
|
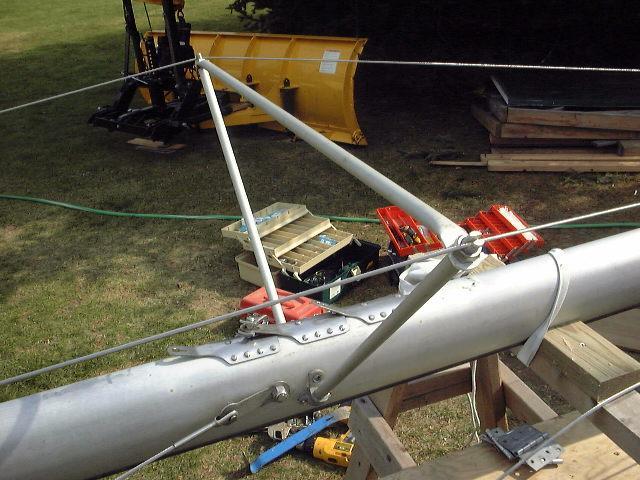 We also have new
jumper struts. Both side tubes and the cross piece were replaced in
kind. The original adjustment setup was retained--there are threaded rods
that simply insert in the end of the tubes, with an adjustment nut to increase
or decrease the amount that protrudes from the end. However, we also added
turnbuckles to the lower end of the new jumper stays, which will allow more
convenient tuning from spreader level. This way, the tension can be
tweaked We also have new
jumper struts. Both side tubes and the cross piece were replaced in
kind. The original adjustment setup was retained--there are threaded rods
that simply insert in the end of the tubes, with an adjustment nut to increase
or decrease the amount that protrudes from the end. However, we also added
turnbuckles to the lower end of the new jumper stays, which will allow more
convenient tuning from spreader level. This way, the tension can be
tweaked  much more easily once the mast is up, rather than having to go all the
way up and fuss with the little nuts. much more easily once the mast is up, rather than having to go all the
way up and fuss with the little nuts.
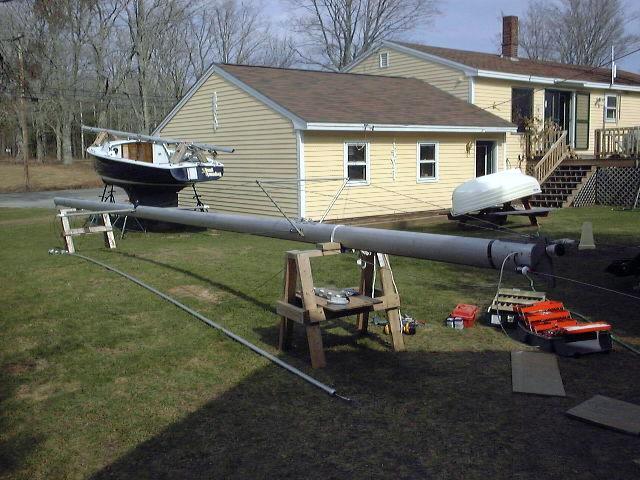
I
spent some time working on rerigging the mast. I began after I had run
wires through the mast for the VHF, masthead light and steaming light, as
running these wires required that the masthead and mast base fittings remain
removed. With the wiring installed, I reinstalled the two fittings and
moved on to rerigging. The job is not yet complete, but I pick away at it
when I don't feel like doing anything else. On a nice day, when I don't
want to be inside the boat shed, working on the mast is just the ticket.
|
|
 Rerigging is
pretty straightforward and doesn't require much in the way of description.
Basically, it only involves installing the new stays and shrouds with clevis
pins...boring stuff. I temporarily reinstalled the spreaders so I could
mouse the stays onto the spreader tips with monel wire, and I added rubber
spreader boots, which I taped in place with rigging tape. Later, I'll add
some flag halyards to the spreaders, one on each side. Rerigging is
pretty straightforward and doesn't require much in the way of description.
Basically, it only involves installing the new stays and shrouds with clevis
pins...boring stuff. I temporarily reinstalled the spreaders so I could
mouse the stays onto the spreader tips with monel wire, and I added rubber
spreader boots, which I taped in place with rigging tape. Later, I'll add
some flag halyards to the spreaders, one on each side.
|
|
Mast
Wiring
 We've made
efforts to keep things relatively simple, but there are still several wires that
are required inside the mast. There are two wires for the masthead/anchor
light (all-round white), and three wires for a combination steaming light (225º
white) and foredeck light (a downward halogen bulb). There is also the VHF
antenna cable to the top of the mast. To run the wires, I ran a snake
through the mast and pulled them through. Then, I installed foam copper
pipe insulation over the wires to keep them quiet inside the mast. We've made
efforts to keep things relatively simple, but there are still several wires that
are required inside the mast. There are two wires for the masthead/anchor
light (all-round white), and three wires for a combination steaming light (225º
white) and foredeck light (a downward halogen bulb). There is also the VHF
antenna cable to the top of the mast. To run the wires, I ran a snake
through the mast and pulled them through. Then, I installed foam copper
pipe insulation over the wires to keep them quiet inside the mast.
|
 |
|
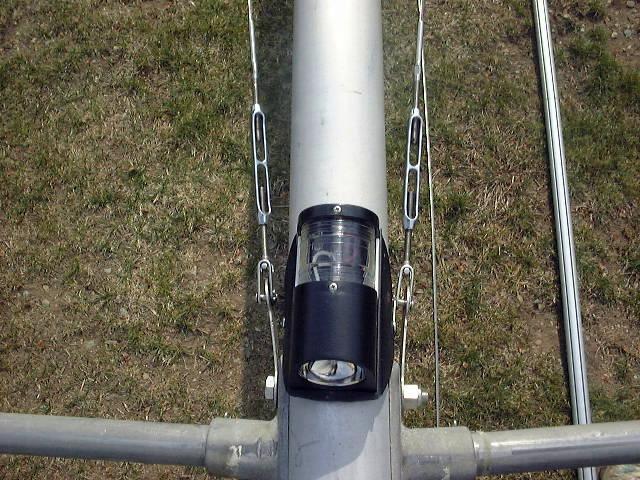
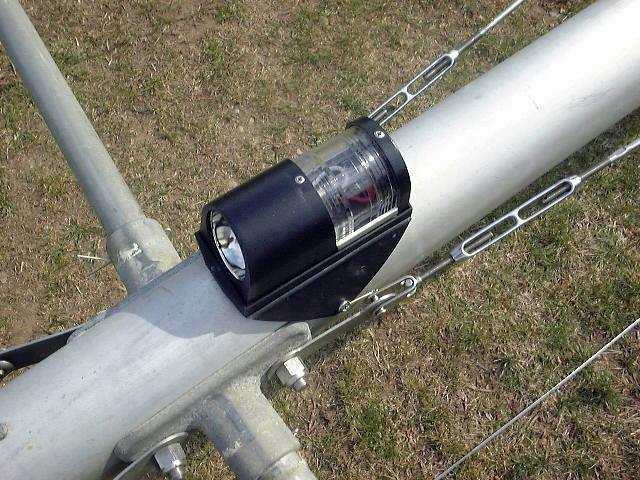
 I installed
the VHF antenna bracket at the top of the mast with three self tapping
screws, one of which doubles for securing the masthead fitting. The
antenna is a standard Metz. At the top of the coax cable, I installed one
of the new Shakespeare PL-259 EX connectors, which do not require the
complicated stripping and soldering of the traditional PL-259s. I have not
yet tested the performance, but installation was a breeze. Time will tell. I installed
the VHF antenna bracket at the top of the mast with three self tapping
screws, one of which doubles for securing the masthead fitting. The
antenna is a standard Metz. At the top of the coax cable, I installed one
of the new Shakespeare PL-259 EX connectors, which do not require the
complicated stripping and soldering of the traditional PL-259s. I have not
yet tested the performance, but installation was a breeze. Time will tell.
|
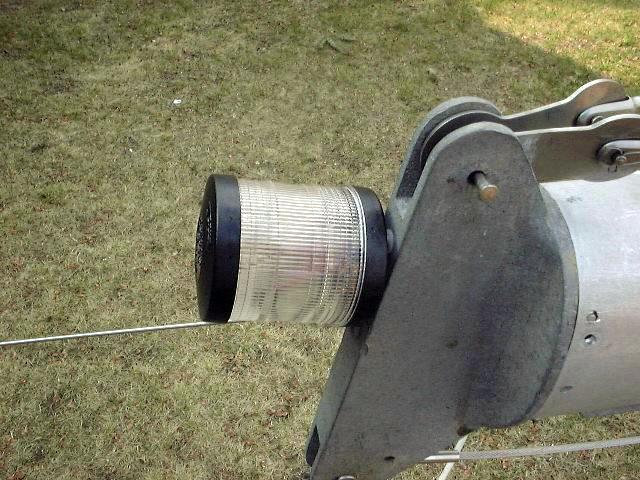
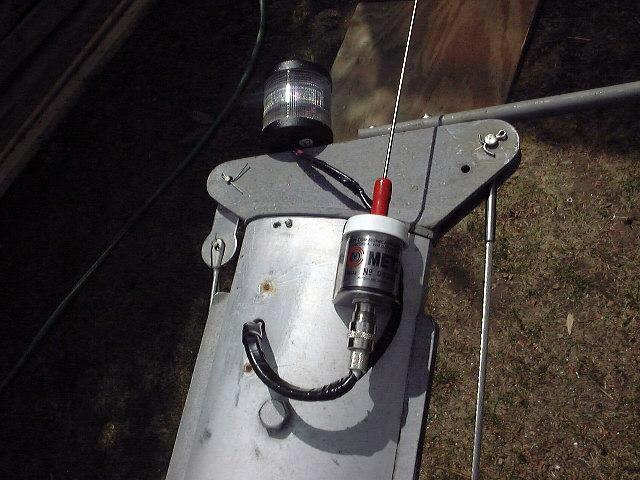
A necessary
sailing "instrument" is the Windex. I bought the standard Windex
15 and set forth to install it on the top of the mast. Here I ran into a
small problem--I could not mount it without the vane hitting the VHF
antenna. There is a version of the Windex available that mounts on the VHF
antenna, but I didn't particularly feel like swapping--I wanted it on the
centerline anyway. There is also a universal extension mount  available--for
$20. Upon looking at the photo in the catalog, I realized that the old
center span from my jumper struts would serve very nicely when cut down to
size--it even has a flattened area with a hole. I cut the span more or
less in half for the proper length, and screwed it to the very top of the
masthead fitting; the Windex mounts on the flattened end well aft of the
mast. available--for
$20. Upon looking at the photo in the catalog, I realized that the old
center span from my jumper struts would serve very nicely when cut down to
size--it even has a flattened area with a hole. I cut the span more or
less in half for the proper length, and screwed it to the very top of the
masthead fitting; the Windex mounts on the flattened end well aft of the
mast. |
I also installed
a neat Mobri radar reflector (available from Defender). I have seen them
in the past, and really  liked
the unobtrusive design. They work, too, and, because they're so
unobtrusive, you leave them up all the time, which guarantees that they will
work better than the traditional type that everyone forgets to put up at night
or in the fog. I installed it on the front of the mast above the headstay,
secured to two eye straps screwed to the mast. liked
the unobtrusive design. They work, too, and, because they're so
unobtrusive, you leave them up all the time, which guarantees that they will
work better than the traditional type that everyone forgets to put up at night
or in the fog. I installed it on the front of the mast above the headstay,
secured to two eye straps screwed to the mast. |
|