|
Repairs to the
"False Keel"
This page was last updated on 25 April 2002
|
|
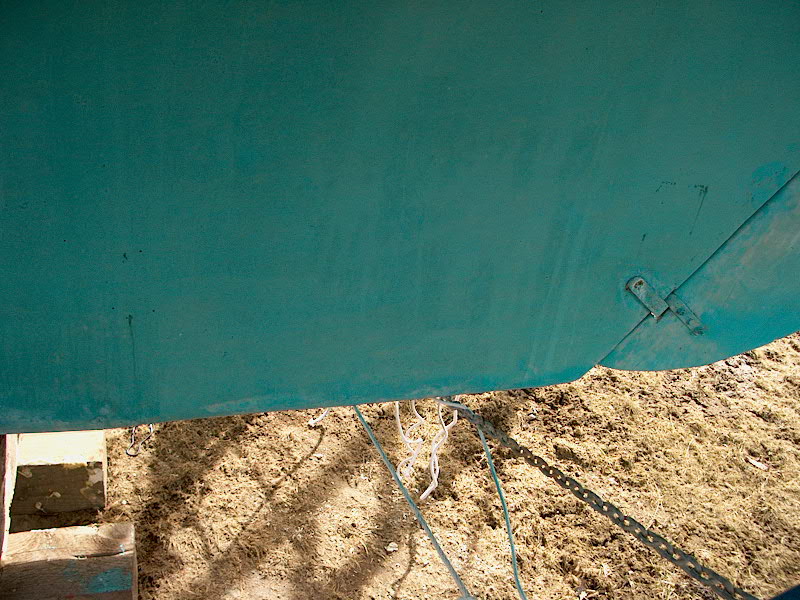
 The
first several years of Rhode Island-built Tritons have an added-on section at
the aft end of the keel. The hull and most of the keel were molded in one
piece, but a section running from the aft end of the external ballast diagonally
upwards to the upper rudder gudgeon was molded separately and fiberglassed in
place after the hull was removed from the mold. The reason for this, as I
understand it, was that the original Alberg design--which, rumor has it, was
originally slated for wood construction--featured a keel profile at the trailing
edge that was too marrow to lay up from inside a female mold. You can see
the line of the boundary between the false keel and the hull in the photo,
right. Later production versions of the Triton--beginning shortly after Glissando
was built (I have heard hull # 381 was the last built this way, but this is
unconfirmed)--feature a slightly different keel profile, with a wider, deeper
aft end that allowed molding in one piece. The
first several years of Rhode Island-built Tritons have an added-on section at
the aft end of the keel. The hull and most of the keel were molded in one
piece, but a section running from the aft end of the external ballast diagonally
upwards to the upper rudder gudgeon was molded separately and fiberglassed in
place after the hull was removed from the mold. The reason for this, as I
understand it, was that the original Alberg design--which, rumor has it, was
originally slated for wood construction--featured a keel profile at the trailing
edge that was too marrow to lay up from inside a female mold. You can see
the line of the boundary between the false keel and the hull in the photo,
right. Later production versions of the Triton--beginning shortly after Glissando
was built (I have heard hull # 381 was the last built this way, but this is
unconfirmed)--feature a slightly different keel profile, with a wider, deeper
aft end that allowed molding in one piece.
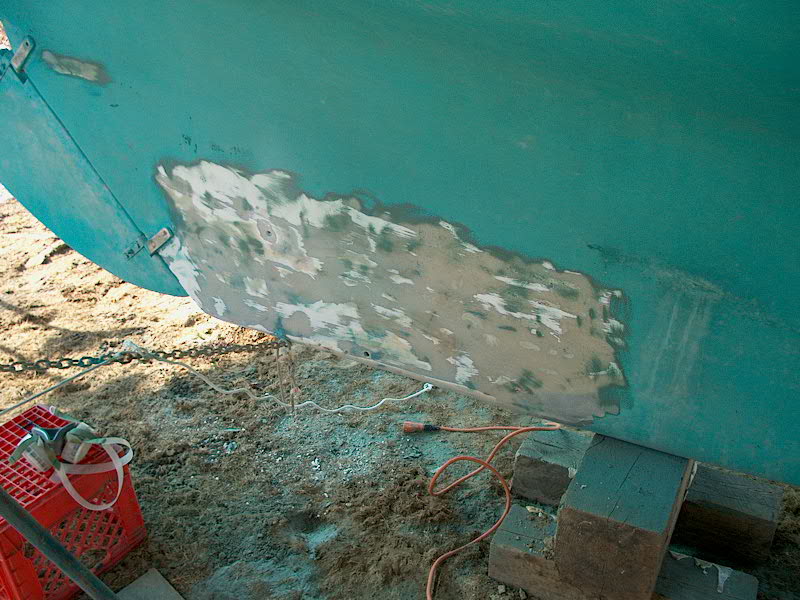
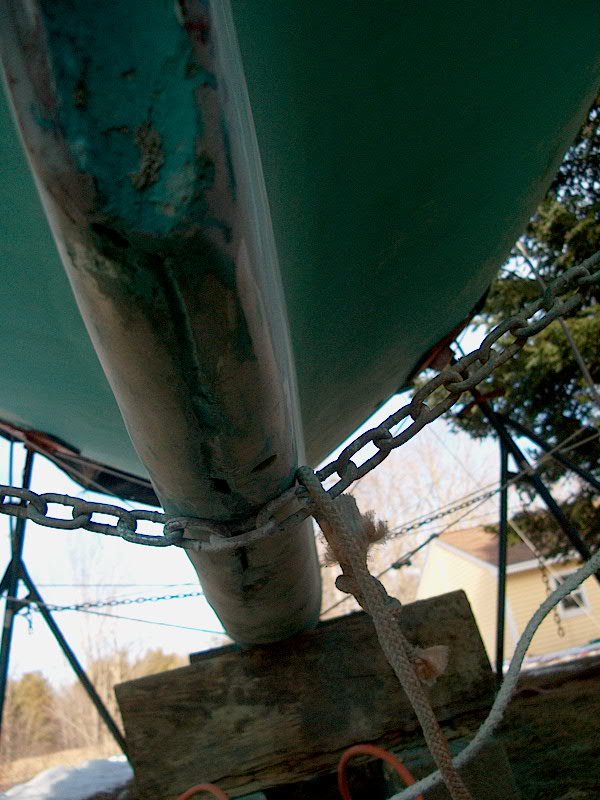
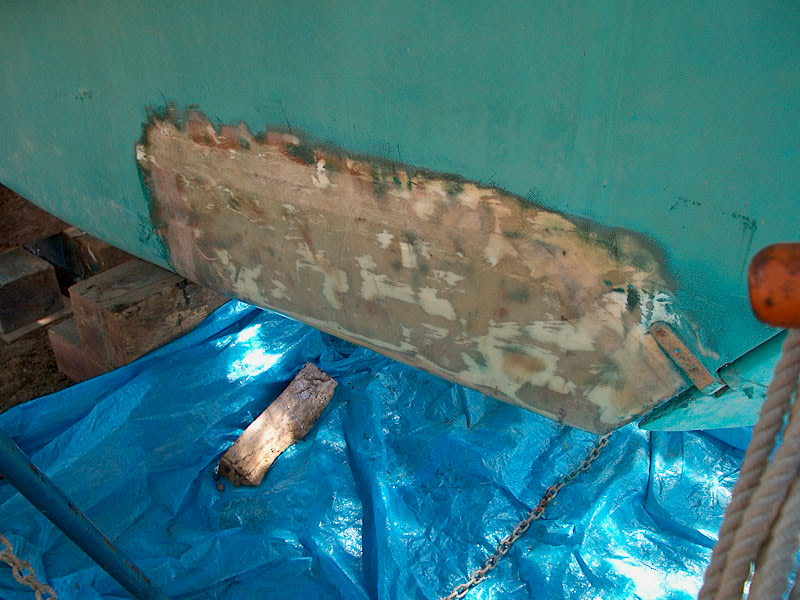
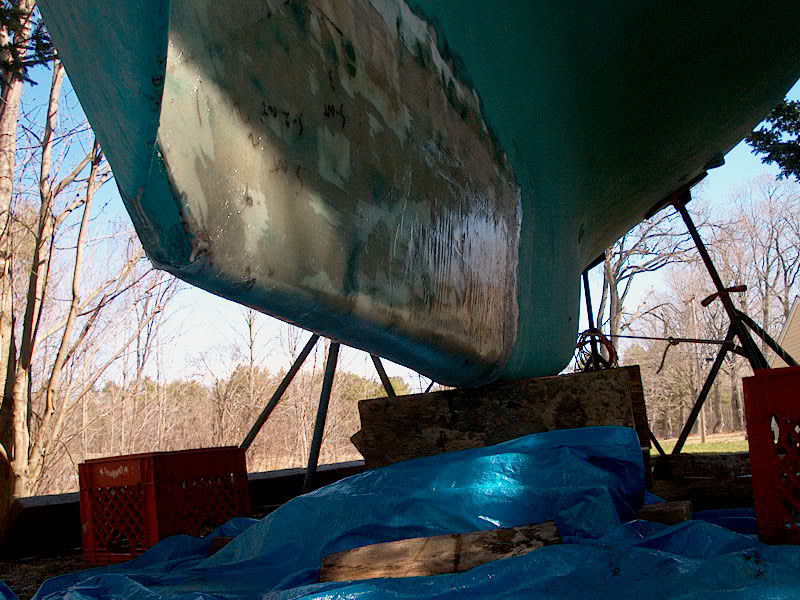
Because of the unconventional construction,
there are often problems with cracks forming and water entering this semi-void
space. Glissando had a crack along the bottom of the keel, running
from the trailing edge forward to about 6" forward of the aftermost
blocking, seen in the photo above. I had originally planned to effect a
proper repair to this area, but postponed the project in favor of more
interesting and rewarding things. Plus, I was thwarted by the fact that
the blocking was smack dab in the middle of where I needed to repair, and didn't
really have the inclination to figure out how to move the blocking. At the
time I purchased the boat (and brought her home) I was unaware of the unique
keel construction, so didn't know any better to avoid blocking in that
area. The blocking did not create additional damage in my case, but
did effectively prevent me from doing the proper repairs.
|
|
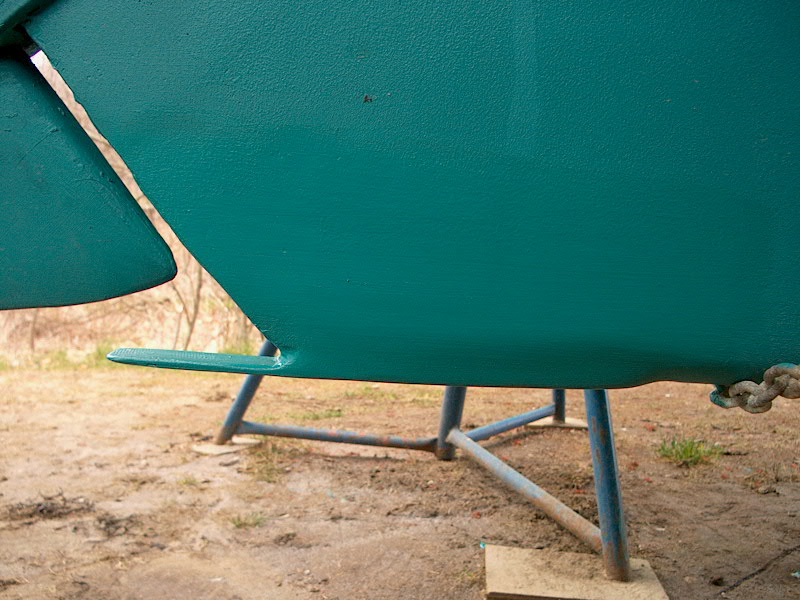
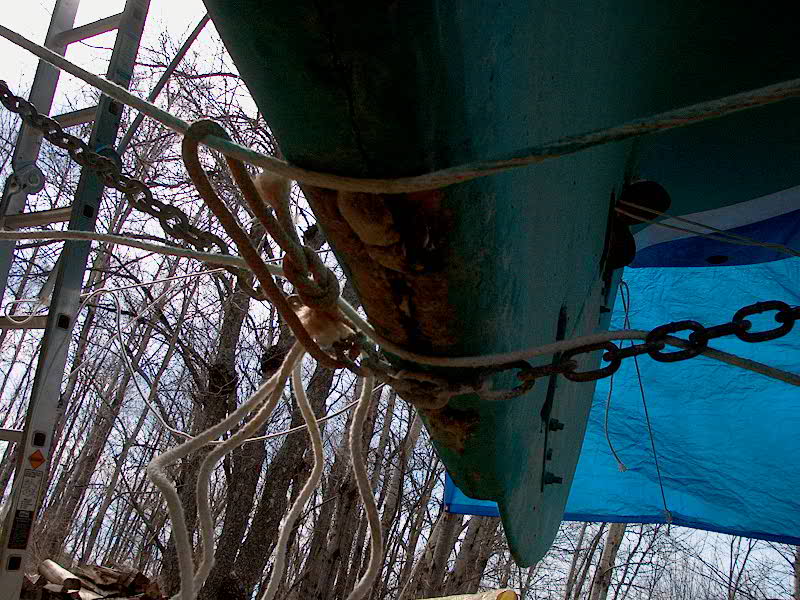 With no time left before launch, I undertook a
temporary repair to the crack at the bottom of the "false keel".
Using a thickened epoxy goop, I filled the crack as much as possible around the
blocking. This actually worked pretty well. Then, when the truck
came to move the boat for launching, I filled the remaining crack with some of
that underwater-curing emergency epoxy putty that you buy in a tube. I
thought that by the end of the season the boat looked heavier in the stern than
she had when first launched, but who knows, really? When I hauled the boat
in the fall, the crack was pretty much reopened, and the epoxy putty was loose
and ineffective. I drilled a couple holes in the bottom of the keel and in
the side, and a little water came out--but not torrents. There was a crack
running from nearly the end of the keel to a couple feet aft of the ballast
keel. The photo above shows it pretty much the way it was--you can see
some of the gray epoxy putty junk that I stuck in there. With no time left before launch, I undertook a
temporary repair to the crack at the bottom of the "false keel".
Using a thickened epoxy goop, I filled the crack as much as possible around the
blocking. This actually worked pretty well. Then, when the truck
came to move the boat for launching, I filled the remaining crack with some of
that underwater-curing emergency epoxy putty that you buy in a tube. I
thought that by the end of the season the boat looked heavier in the stern than
she had when first launched, but who knows, really? When I hauled the boat
in the fall, the crack was pretty much reopened, and the epoxy putty was loose
and ineffective. I drilled a couple holes in the bottom of the keel and in
the side, and a little water came out--but not torrents. There was a crack
running from nearly the end of the keel to a couple feet aft of the ballast
keel. The photo above shows it pretty much the way it was--you can see
some of the gray epoxy putty junk that I stuck in there.
|
|
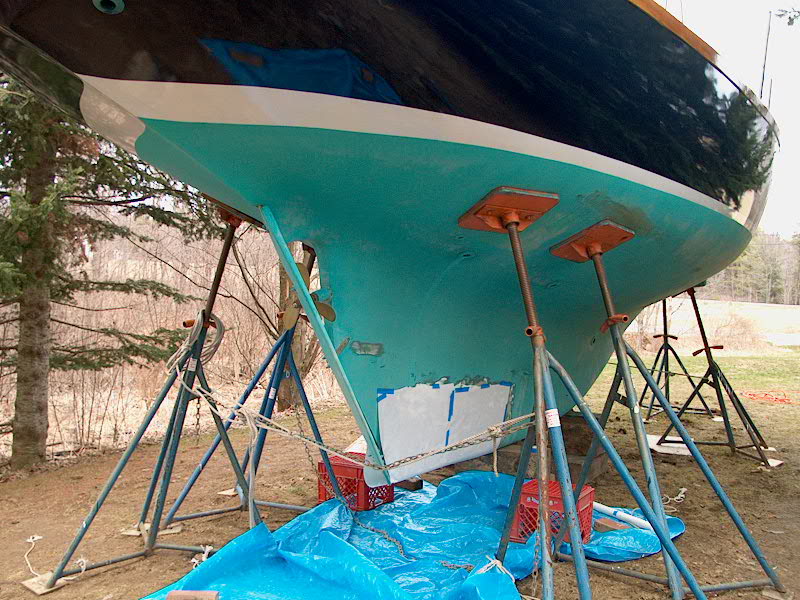
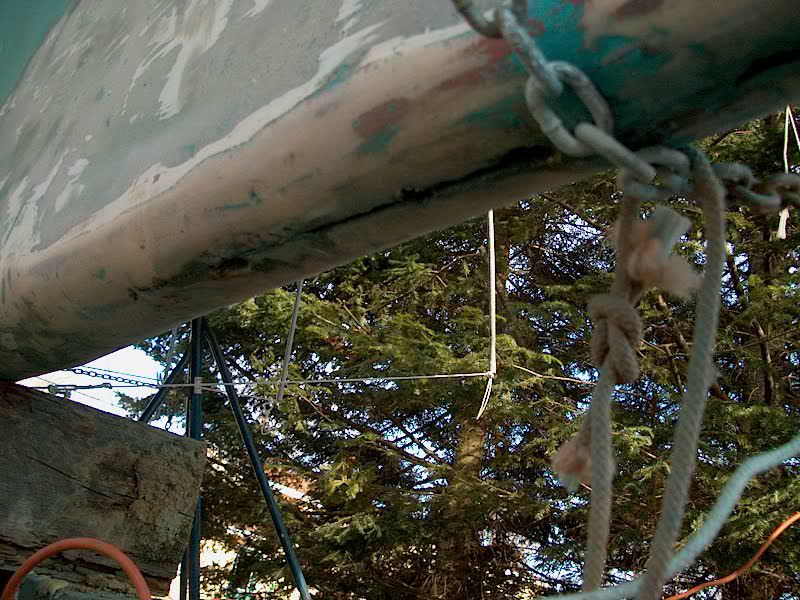
 I
had the hauler block the boat so that the entire false keel section was free and
unsupported--both sets of blocks are under the ballast keel. This not only
will prevent damage to the false keel from crushing, but also will allow me to
do complete a proper repair. I
had the hauler block the boat so that the entire false keel section was free and
unsupported--both sets of blocks are under the ballast keel. This not only
will prevent damage to the false keel from crushing, but also will allow me to
do complete a proper repair.
|
|
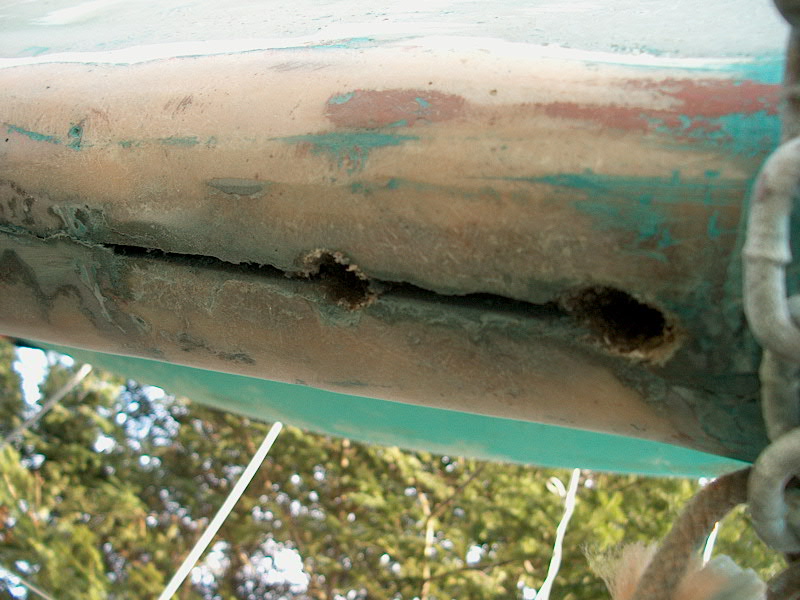
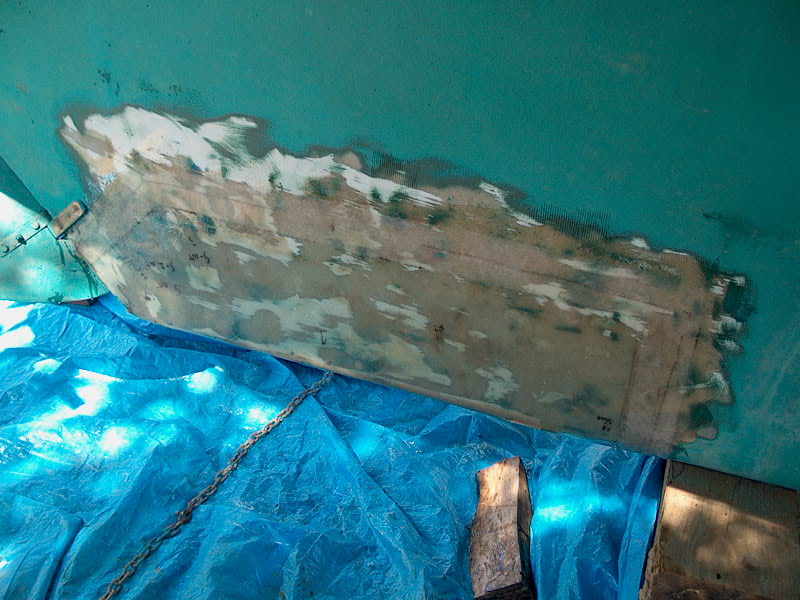
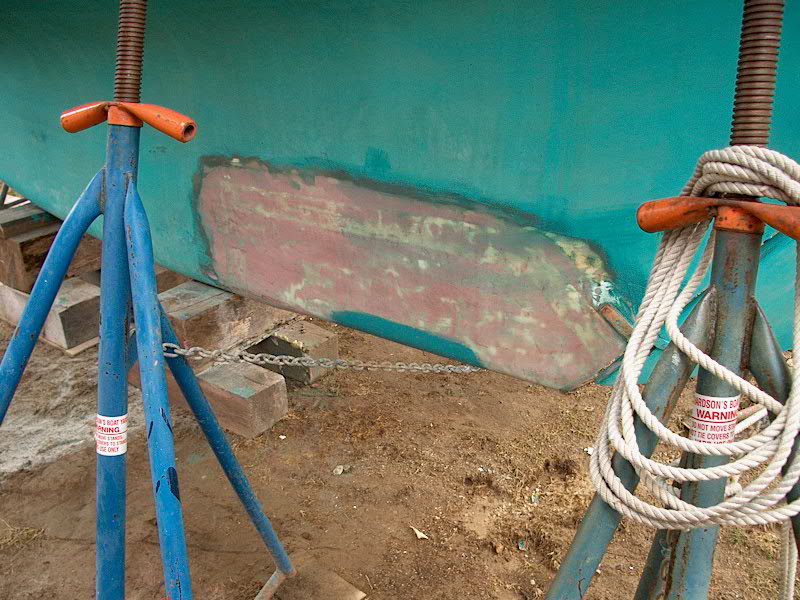
 In
March, I continued work on the false keel project. The first thing I did
was grind off the bottom paint in an area around the after portion of the keel,
so that any new fiberglass I install will have a good surface on which to
stick. I used my 8" grinder to remove most of the paint on the flat
areas, then switched to my Porter Cable DA for the bottom and curved
portion--and also to finish up parts of the keel after the big grinder started
throwing discs off. I made sure I got all the loose and junky stuff out of
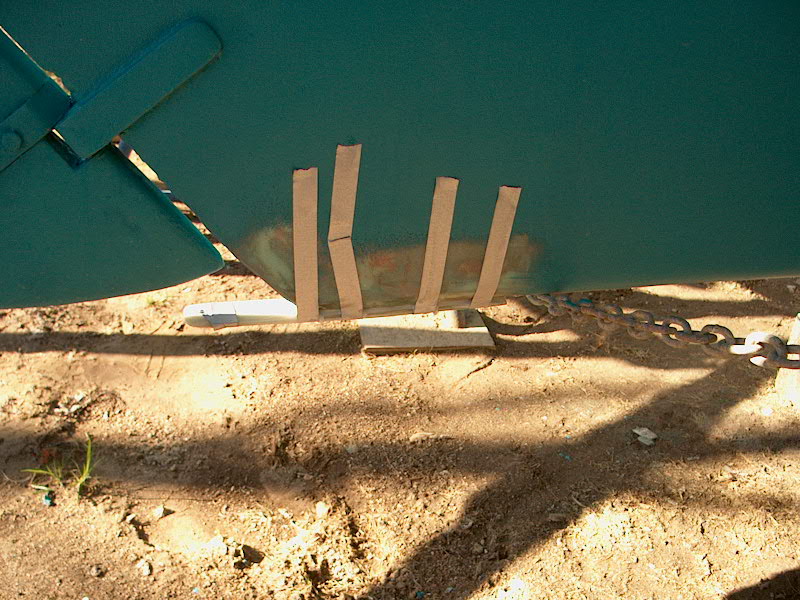
the crack at the bottom of the keel; the crack was quite wide in In
March, I continued work on the false keel project. The first thing I did
was grind off the bottom paint in an area around the after portion of the keel,
so that any new fiberglass I install will have a good surface on which to
stick. I used my 8" grinder to remove most of the paint on the flat
areas, then switched to my Porter Cable DA for the bottom and curved
portion--and also to finish up parts of the keel after the big grinder started
throwing discs off. I made sure I got all the loose and junky stuff out of
the crack at the bottom of the keel; the crack was quite wide in  some
areas, but the fill I had put in other parts was still sound. Towards the
mid-forward part, I noticed some moisture spilling out as I ground the
previously filled crack. The wider parts of the crack in the photos are
where I drilled some holes earlier. (I'll remove the chain running between
the stands when I do the actual repair later.) some
areas, but the fill I had put in other parts was still sound. Towards the
mid-forward part, I noticed some moisture spilling out as I ground the
previously filled crack. The wider parts of the crack in the photos are
where I drilled some holes earlier. (I'll remove the chain running between
the stands when I do the actual repair later.)
|
|
|
|
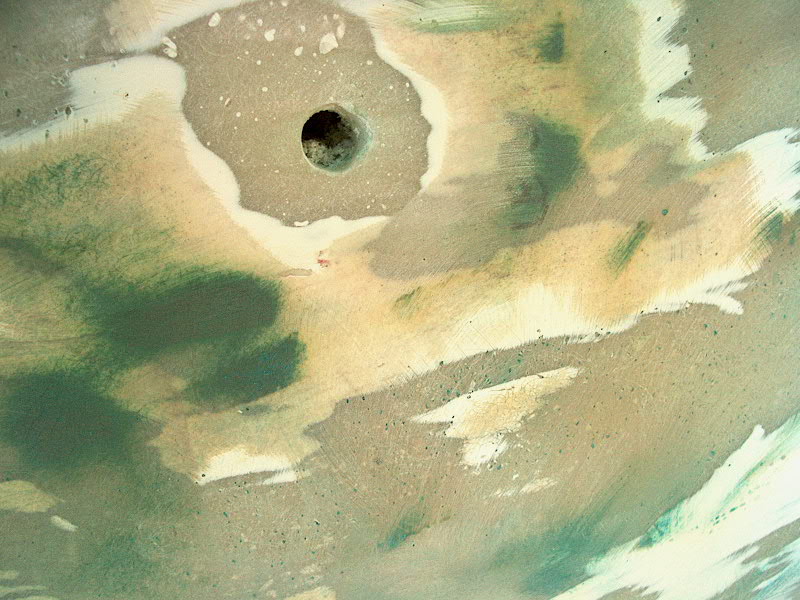
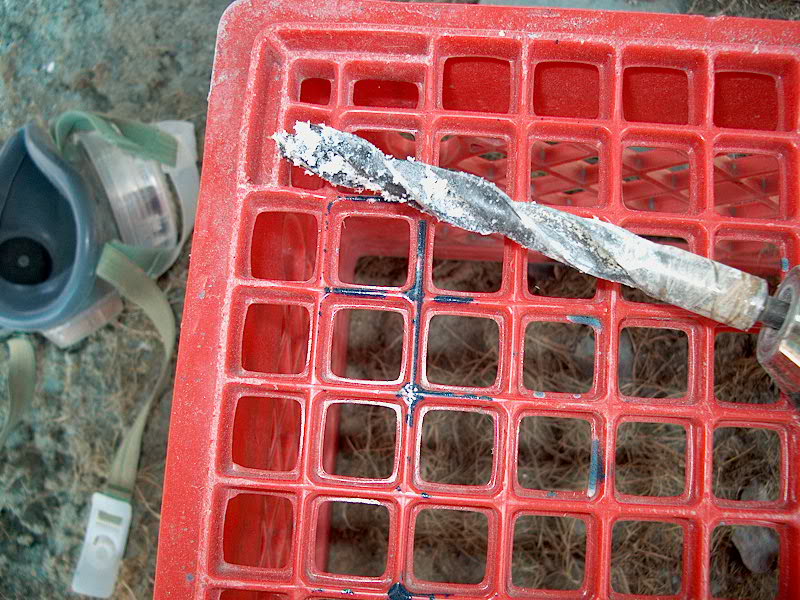
 When
I was done grinding the area smooth, and all the paint was off, I did a little
exploratory surgery. I drilled a hole higher up in the false keel,
extending the hole all the way through to the other side. If you look
carefully at the photo (left) you can tell that you're looking straight through
the keel at the scenery on the other side of the boat. (Squint and
imagine...) The interior of the keel is filled with an open cell foam; at
the upper hole I drilled, the foam appeared to be dry. I sounded the
entire area, which results were consistent with one another and seemed to
support the contention that the foam was essentially dry. When
I was done grinding the area smooth, and all the paint was off, I did a little
exploratory surgery. I drilled a hole higher up in the false keel,
extending the hole all the way through to the other side. If you look
carefully at the photo (left) you can tell that you're looking straight through
the keel at the scenery on the other side of the boat. (Squint and
imagine...) The interior of the keel is filled with an open cell foam; at
the upper hole I drilled, the foam appeared to be dry. I sounded the
entire area, which results were consistent with one another and seemed to
support the contention that the foam was essentially dry.
|
|
|
|
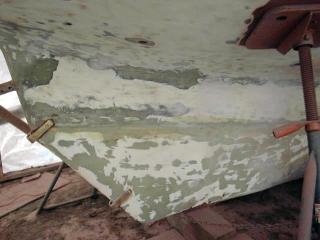
 Some
of the foam near the bottom of the keel seemed to hold a little moisture, as
evidenced by the wetness that appeared as I ground the forward portion of the
crack, approximately a foot aft of the ballast keel. With a scraper and
file, I removed the loose material that seemed to be holding the moisture.
Then, I used a putty knife and a slim bastard file in the wider portions
of the crack to ream out a little bit of the foam through the gap at the bottom
of the keel, but the foam appeared to be in surprisingly good shape, and the
whole false keel certainly wasn't saturated with water. At least there was
no stagnant styrene-filled nastiness inside the keel, or any compounds forming
that could have been doing damage all this time. That, to paraphrase our
"favorite" part-time Maine resident, Martha Stewart, is a good thing. Some
of the foam near the bottom of the keel seemed to hold a little moisture, as
evidenced by the wetness that appeared as I ground the forward portion of the
crack, approximately a foot aft of the ballast keel. With a scraper and
file, I removed the loose material that seemed to be holding the moisture.
Then, I used a putty knife and a slim bastard file in the wider portions
of the crack to ream out a little bit of the foam through the gap at the bottom
of the keel, but the foam appeared to be in surprisingly good shape, and the
whole false keel certainly wasn't saturated with water. At least there was
no stagnant styrene-filled nastiness inside the keel, or any compounds forming
that could have been doing damage all this time. That, to paraphrase our
"favorite" part-time Maine resident, Martha Stewart, is a good thing.
|
 This
was as far as I could go at this point. I left the crack open to air
out and weep for a while; one day, while I was mixing epoxy for some other use,
I applied some thickened epoxy into the drilled holes and the crack at the
bottom to seal it in preparation for the glasswork. When the epoxy cured,
I did a quick sand to remove any sharp edges or high spots that could affect the
fiberglassing; I'll do an amine blush scrub before I do any more glass. This
was as far as I could go at this point. I left the crack open to air
out and weep for a while; one day, while I was mixing epoxy for some other use,
I applied some thickened epoxy into the drilled holes and the crack at the
bottom to seal it in preparation for the glasswork. When the epoxy cured,
I did a quick sand to remove any sharp edges or high spots that could affect the
fiberglassing; I'll do an amine blush scrub before I do any more glass. |
 Shortly
thereafter, I made preparations to get the fiberglass work done. The
weather forecast indicated warm weather and no precipitation for a several-day
stretch, so I decided to take advantage of it and get it done; this is the last
project (save for painting the bottom) that stands in the way of
launching. The first thing I had to do was release the chain that ran
beneath the after portion of the keel, between the two jackstands. Now,
this chain is important, and, while I'm not afraid to move stands, I don't
exactly take it lightly. Plus, the ground has seemed particularly slippery
this spring, and I didn't want to take any chances. Fortunately, I have
some smaller stands left over from my last boat, and I was able to use two of
them to replace the centerline V-stand at the bow and one of the forward stands,
freeing up two of the large stands for use at the stern. I set up the two
new stands aft of the existing ones and secured a chain tightly between
them. Then, I lowered one of the original stands and moved it in to
release the chain under the keel. No big deal; I left the original stands
in place as well as the new ones. Shortly
thereafter, I made preparations to get the fiberglass work done. The
weather forecast indicated warm weather and no precipitation for a several-day
stretch, so I decided to take advantage of it and get it done; this is the last
project (save for painting the bottom) that stands in the way of
launching. The first thing I had to do was release the chain that ran
beneath the after portion of the keel, between the two jackstands. Now,
this chain is important, and, while I'm not afraid to move stands, I don't
exactly take it lightly. Plus, the ground has seemed particularly slippery
this spring, and I didn't want to take any chances. Fortunately, I have
some smaller stands left over from my last boat, and I was able to use two of
them to replace the centerline V-stand at the bow and one of the forward stands,
freeing up two of the large stands for use at the stern. I set up the two
new stands aft of the existing ones and secured a chain tightly between
them. Then, I lowered one of the original stands and moved it in to
release the chain under the keel. No big deal; I left the original stands
in place as well as the new ones. |
|
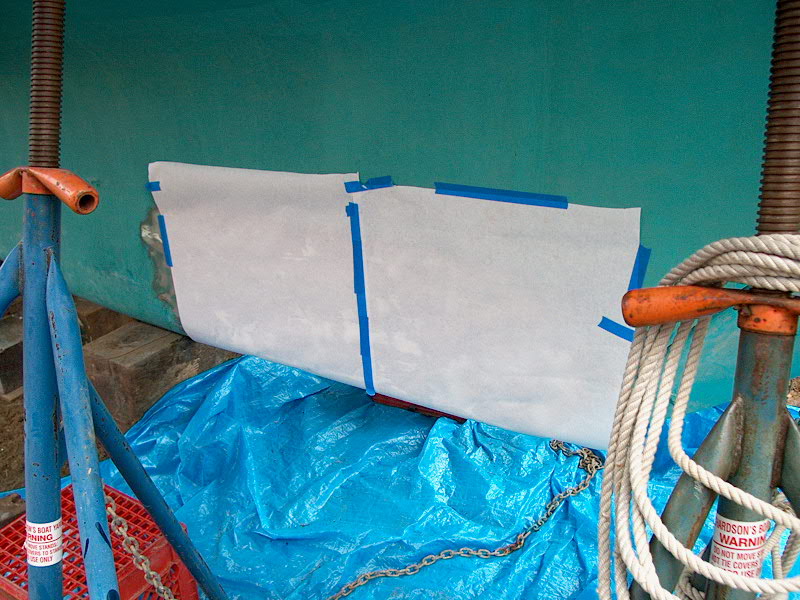
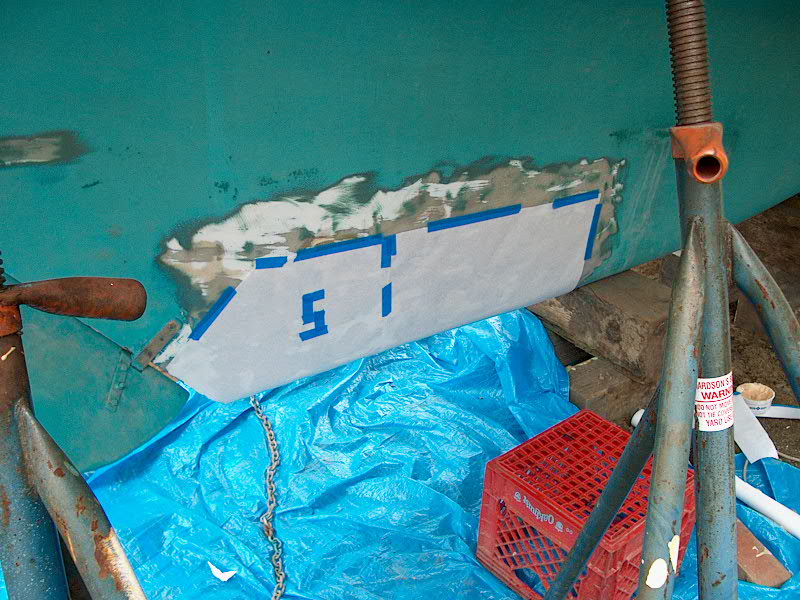
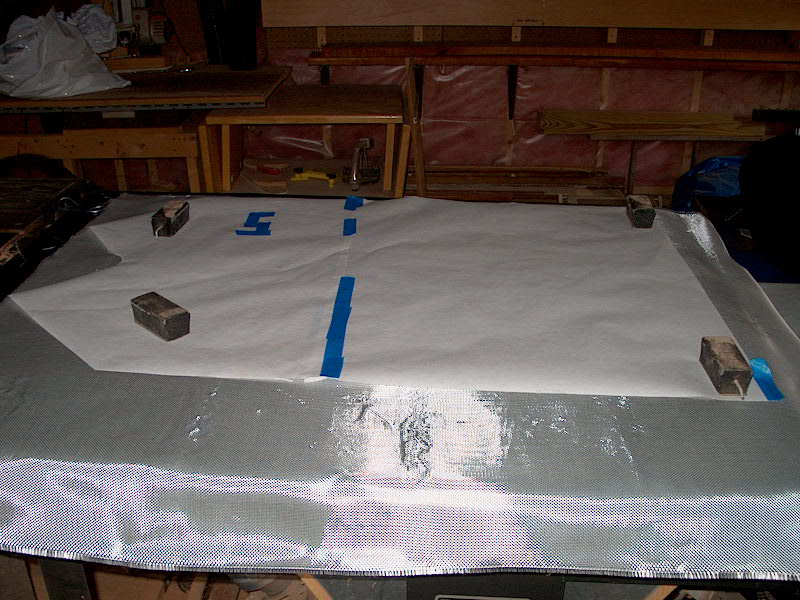
 Next,
I made a paper pattern of the area to be glassed, to help me cut the fabric to
the right size and shape. This makes life much easier. Using a
roll of white pattern paper, I started on one side of the keel and, leaving more
than I needed, taped it in place and rolled the paper around to the other
side. I taped the other side in place as well. I repeated this to
cover the after section of the keel as well. With both pieces roughly
taped in place and smoothed, I marked out and cut the actual size of the
pattern. I chose an arbitrary measurement of 13" up from the bottom
of the keel to cut the top of the pattern off; this is plenty of overlap for a
good glass job. I also made cutouts around the lower gudgeon and the
trailing edge of the keel as necessary. I marked the outline of the
pattern for later use in aligning the glass when I put it on the keel. Next,
I made a paper pattern of the area to be glassed, to help me cut the fabric to
the right size and shape. This makes life much easier. Using a
roll of white pattern paper, I started on one side of the keel and, leaving more
than I needed, taped it in place and rolled the paper around to the other
side. I taped the other side in place as well. I repeated this to
cover the after section of the keel as well. With both pieces roughly
taped in place and smoothed, I marked out and cut the actual size of the
pattern. I chose an arbitrary measurement of 13" up from the bottom
of the keel to cut the top of the pattern off; this is plenty of overlap for a
good glass job. I also made cutouts around the lower gudgeon and the
trailing edge of the keel as necessary. I marked the outline of the
pattern for later use in aligning the glass when I put it on the keel.
|
|
|
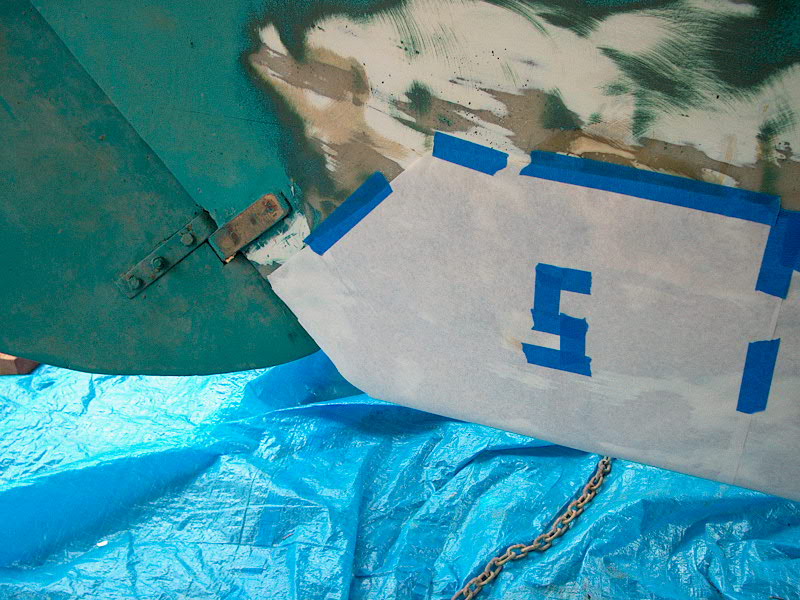
 This
picture shows the cutout around the gudgeon and the trailing edge of the keel. I
left space for a strip of mat that I like to use to provide a smooth transition
between the new glass and the existing material. More on this later. This
picture shows the cutout around the gudgeon and the trailing edge of the keel. I
left space for a strip of mat that I like to use to provide a smooth transition
between the new glass and the existing material. More on this later. |
|
 Once
I had cut the whole pattern (note that the forward edge of the pattern is
designed so that the glass will overlap the trailing edge of the lead ballast),
I carefully removed it and cut out three layers of heavy fiberglass cloth in the
shop. Each layer is slightly larger (3") than the one beneath, with
the final layer being the exact size of the paper pattern. I don't think
there will be any reason to add any more glass than this, but I'll reserve
judgment till the material is in place. I also cut some 3" wide
strips of epoxy-compatible mat for use on the edges. I'll get into this
more once I start the glasswork. Once
I had cut the whole pattern (note that the forward edge of the pattern is
designed so that the glass will overlap the trailing edge of the lead ballast),
I carefully removed it and cut out three layers of heavy fiberglass cloth in the
shop. Each layer is slightly larger (3") than the one beneath, with
the final layer being the exact size of the paper pattern. I don't think
there will be any reason to add any more glass than this, but I'll reserve
judgment till the material is in place. I also cut some 3" wide
strips of epoxy-compatible mat for use on the edges. I'll get into this
more once I start the glasswork.
The next day, I installed the
three layers of glass on the keel. After gathering my tools (air rollers,
squeegees, cheap brushes, buckets, bucket of acetone), I mixed up a batch of
unthickened epoxy. Because I needed a large amount, I didn't use the mini
pumps; instead, I mixed the epoxy in a bucket by using some plastic margarine
tubs as measuring devices: five filled with resin to one filled with
hardener. After mixing the epoxy thoroughly, I wet out the keel area with
epoxy, and then prepared my three layers of glass on a sheet of cardboard laid
out on the ground. Wherever possible, I like to wet out the material
first, then apply it to the surface in question. Starting with the outside
(largest) layer, I wet it out thoroughly, then laid the second layer on top,
properly aligned it, and wet that out too. Finally, I added the third
(innermost) layer and wet it out.
|
|
 Picking up the whole sloppy mess
(fortunately, epoxy resin doesn't bother my skin) and being careful not to
wrinkle the fabric (the multiple layers stick together in the proper alignment
pretty well), I started on the starboard side of the keel, aligning the edge of
the fabric with the marks I made earlier and hurriedly rolling it into place as
much as possible. When I had the starboard side pretty much adhered, I
went over to the other side and, wrapping the cloth around the bottom of the
keel as I went, stuck that side on as well.
This pretty much held the material in place so that it wouldn't fall off, and
with that done I set forth to properly align the material on each side; it had
slipped somewhat during the initial, semi-panicked adhesion. Once the
stuff was in more or less the right place, I spent some time with my plastic air
rollers carefully rolling out the cloth, paying particular attention
to the curve at the bottom of the keel to Picking up the whole sloppy mess
(fortunately, epoxy resin doesn't bother my skin) and being careful not to
wrinkle the fabric (the multiple layers stick together in the proper alignment
pretty well), I started on the starboard side of the keel, aligning the edge of
the fabric with the marks I made earlier and hurriedly rolling it into place as
much as possible. When I had the starboard side pretty much adhered, I
went over to the other side and, wrapping the cloth around the bottom of the
keel as I went, stuck that side on as well.
This pretty much held the material in place so that it wouldn't fall off, and
with that done I set forth to properly align the material on each side; it had
slipped somewhat during the initial, semi-panicked adhesion. Once the
stuff was in more or less the right place, I spent some time with my plastic air
rollers carefully rolling out the cloth, paying particular attention
to the curve at the bottom of the keel to  ensure that
the cloth was smoothly
adhered with no air pockets. Alternating from side to side, I spent about
10 minutes rolling out till I was satisfied that there was no air
remaining. Then, I laid my strips of mat along the edges, overlapping from
the cloth onto the surrounding fiberglass, and wet it out. This helps make
for a smoother transition between the repair and the existing keel, and makes
for a clean installation that is easy to sand and fair. ensure that
the cloth was smoothly
adhered with no air pockets. Alternating from side to side, I spent about
10 minutes rolling out till I was satisfied that there was no air
remaining. Then, I laid my strips of mat along the edges, overlapping from
the cloth onto the surrounding fiberglass, and wet it out. This helps make
for a smoother transition between the repair and the existing keel, and makes
for a clean installation that is easy to sand and fair.
|
|
|
| After giving the epoxy more than
a day to fully cure, I washed it with water and a Scotch-Brite pad to remove the
amine blush from the surface. When everything dried, I gave the patch an
initial sanding with 80 grit paper on my trusty Porter Cable 5"
sander. After washing the surface again, this time with acetone to remove
the sanding dust, I mixed up a batch of epoxy resin thickened with 407
low-density filler and 406 colloidal silica (West System again). When it
had the proper thick consistency, I troweled it onto the boat, fairing in the
seams between the repair and the existing material and filling in any low
spots. I used a 4" and 6" knife for fairing the edges, to
provide a nice smooth transition between the old and new work. I left the
epoxy filler to cure overnight before continuing; it looks like one application
will be enough. |
|


|
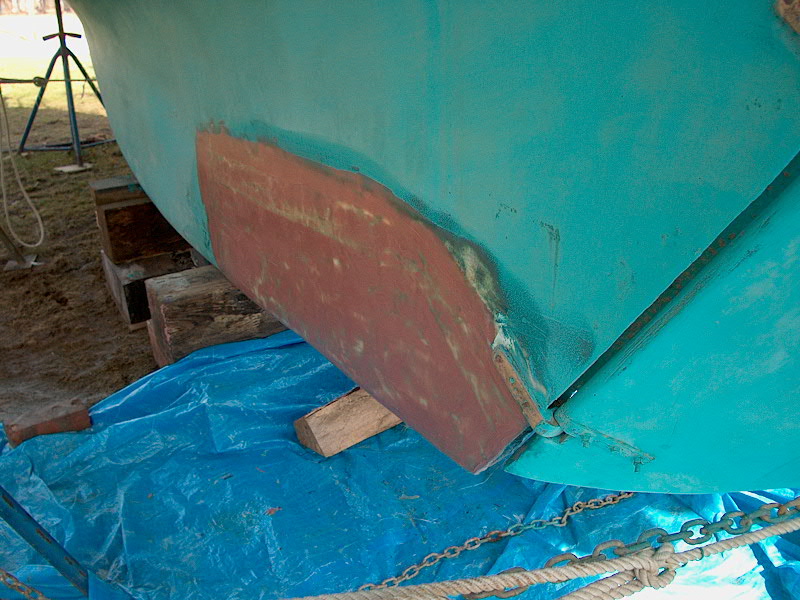
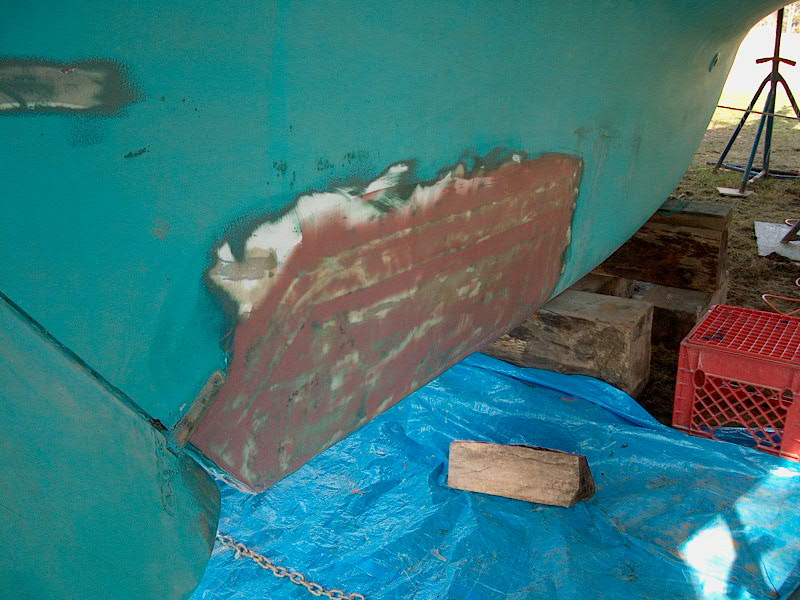
| The following day I sanded the
whole area smooth. The results were good enough to leave alone without needing another coat of fairing compound, which is the result I had been hoping
for. Before grinding, I washed the whole area with water and a
Scotch-Brite pad again. When I was done, I painted a small area at the
bottom of the keel with bottom paint (Micron CSC) where the chain between the
two main stands runs, so that when I tighten the chain back up and remove the
two auxiliary stands I won't have to worry about painting that area. (I barely
got the right area though...but the chain just sits on the paint!) Before
removing the extra stands, I lowered the two main stands and painted the area
under them also. Now I just have to juggle the forward stands when I paint
the bottom, which is no problem. |
|
|
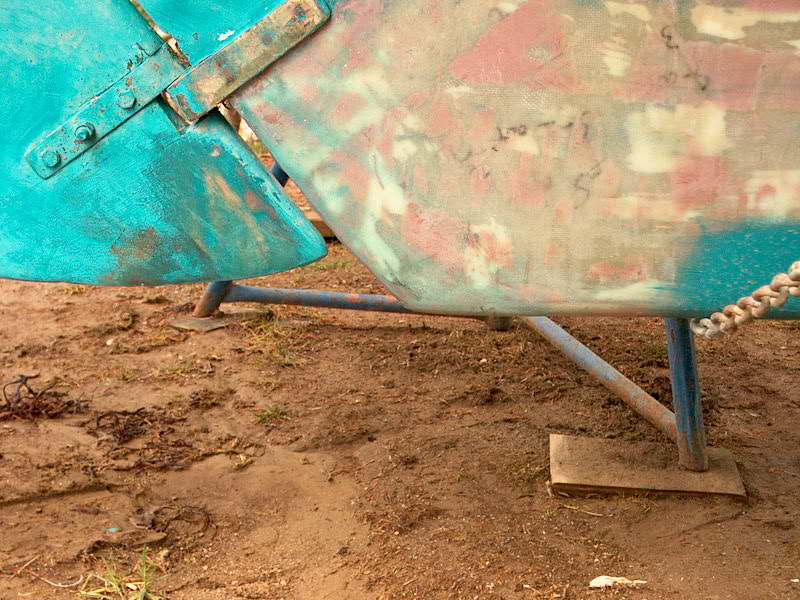
| Next, I moved
on to the final
consideration: installing some sort of tab at the end of the keel that
will project to cover the gap between the keel and rudder. This is the
only place that a line could get caught as it slips beneath the keel; otherwise,
the full keel and attached rudder provide little opportunity for snagging lobster
pots (our chief consideration) or other lines. |
|
|
 I
decided to build a
fiberglass tab that will get epoxied in place beneath the keel. This
avoids the need for any fasteners to penetrate the newly-glassed and sealed
false keel, which can only be a good thing. I determined
that the tab needed to be about 9" long, to provide a mounting surface on
the keel and extend the proper distance beneath the rudder. I cut some
strips of fiberglass cloth slightly longer and wider than needed and laminated
them in epoxy resin. To make a flat, smooth lamination, I covered a piece
of plywood in wax paper for release and rolled out the glass on top. I
used 8 layers of lightweight cloth. I
decided to build a
fiberglass tab that will get epoxied in place beneath the keel. This
avoids the need for any fasteners to penetrate the newly-glassed and sealed
false keel, which can only be a good thing. I determined
that the tab needed to be about 9" long, to provide a mounting surface on
the keel and extend the proper distance beneath the rudder. I cut some
strips of fiberglass cloth slightly longer and wider than needed and laminated
them in epoxy resin. To make a flat, smooth lamination, I covered a piece
of plywood in wax paper for release and rolled out the glass on top. I
used 8 layers of lightweight cloth. |
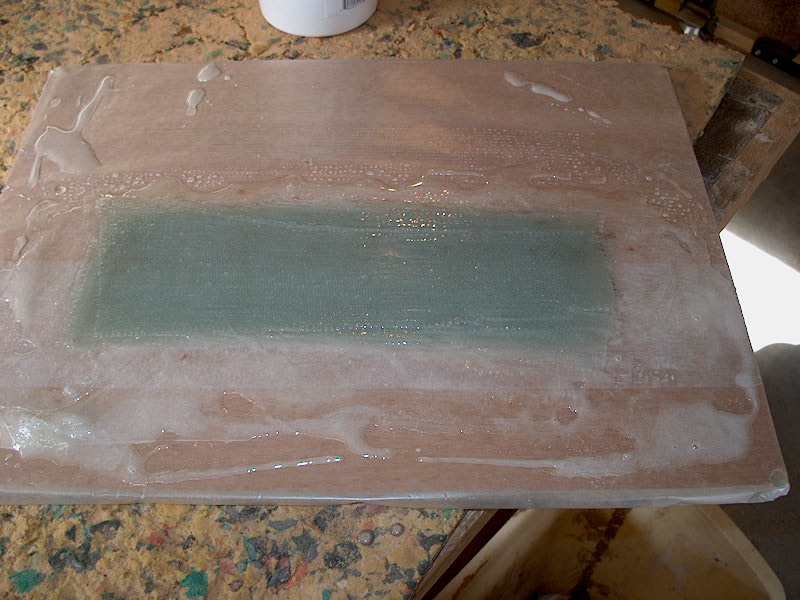
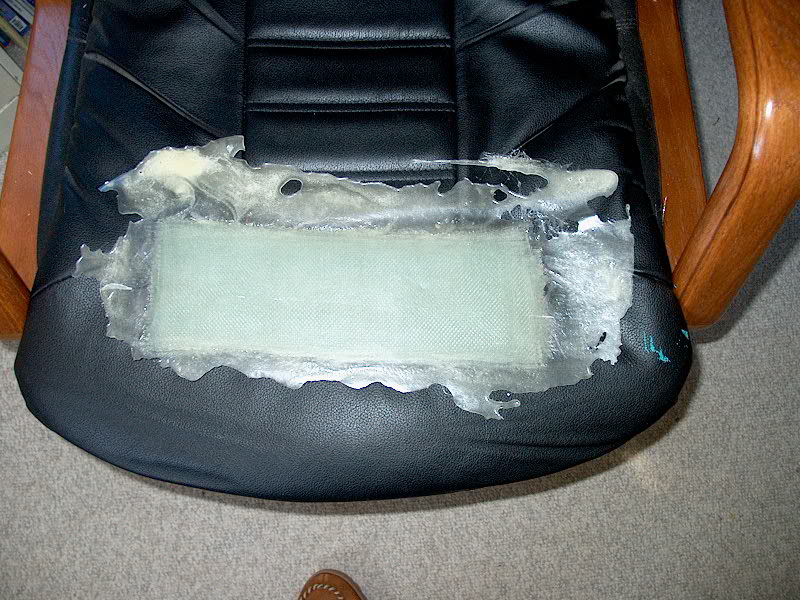
 When the epoxy cured, I removed the
solid strip from the wax paper, which provided a nice smooth surface on one
side. It looks like someone made a mess on my chair in the photo...but
that's just excess spilled resin that cured along with the glass itself.
These are raw, up-to-the minute photos, folks...I do it, you see it--just like
that! When the epoxy cured, I removed the
solid strip from the wax paper, which provided a nice smooth surface on one
side. It looks like someone made a mess on my chair in the photo...but
that's just excess spilled resin that cured along with the glass itself.
These are raw, up-to-the minute photos, folks...I do it, you see it--just like
that! |
 I
cut the blank into two strips 1-1/2" wide by about 9" long, cleaned
the amine blush with water, and sanded both sides, as well as a slight radius on
the aft end. Then, I mixed up a small batch of thickened epoxy and
laminated the two strips together, wrapping tape around the aft end to hold them
in place, and then epoxied the strips to the bottom of the keel, leaving the end
to project a few inches. I held the tab in place on the keel with tape
while the epoxy cured. I
cut the blank into two strips 1-1/2" wide by about 9" long, cleaned
the amine blush with water, and sanded both sides, as well as a slight radius on
the aft end. Then, I mixed up a small batch of thickened epoxy and
laminated the two strips together, wrapping tape around the aft end to hold them
in place, and then epoxied the strips to the bottom of the keel, leaving the end
to project a few inches. I held the tab in place on the keel with tape
while the epoxy cured. |
| After the epoxy cured, I sanded the
whole area smooth, concentrating on the forward end where the keel tab must make
a fair transition to the keel. Then, I painted it with a few coats of
bottom paint to match the rest, and the project was complete. |
|
|
|