|
Yanmar SB12
Installation: Initial Engine Placement
This page
was last updated
on 5 June 2000
|
|
With the engine foundation
work complete, it was time to move on to the initial engine installation.
I call it initial because it is really just the placement of the engine in the
boat in its designated location; there is much work associated with finalizing
the installation, including electrical, plumbing and fuel connections and fine
tuning the engine alignment. However, all that is important at this stage
of the game is to get it in place; this will allow me to begin working on
rebuilding the interior and laying out some of the ship's systems.
The first steps after
completing the fiberglass work were to lightly sand and then paint the new
foundation and surrounding areas, which I had left unpainted earlier. This
took two coats to properly cover.
Once this was done, I
positioned my engine template one last time on the foundation, and marked the
locations of the engine mounts. After removing the template, I drilled
holes for the 4" lags screws that secure the mounts, and installed the
mounts on the foundation.
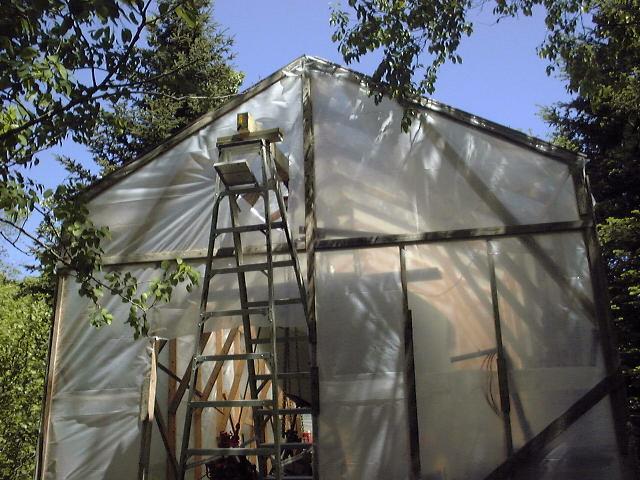
A couple days later, I was
ready to get the darn thing up into the boat, finally. To get the engine
into the boat shed and, thus, into the boat, I had to do a little
modification. I had already opened up a portion of the back gable, and all
I had to do was remove a single stud and cut an opening in the sill plate (so to
speak). This would allow me to back my little garden trailer into the shed
from behind the boat.
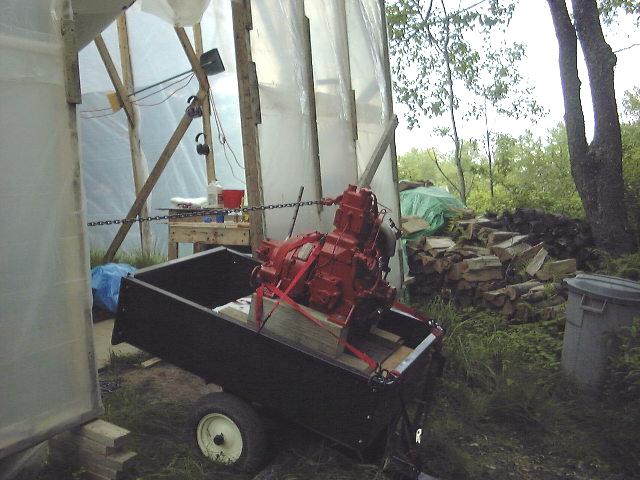
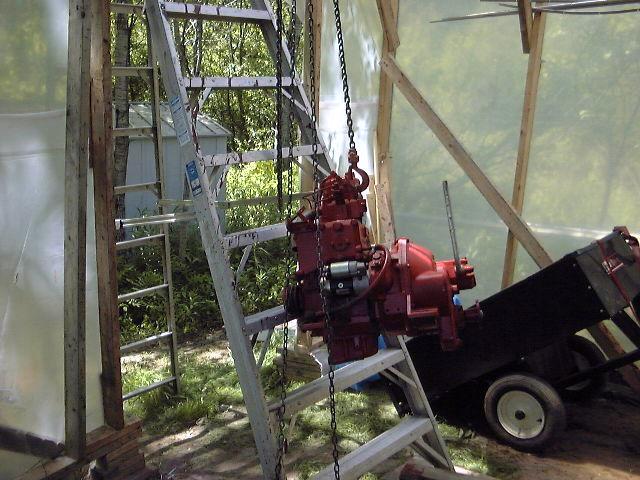
Using two ladders, my chain
hoist and a 4x6 pressure treated beam I had, I raised the engine in the garage
and loaded it into my trailer. Using my tractor, I pulled the trailer into
the backyard and down the narrow passageway next to the boat shed, with the
ultimate goal of getting the trailer and engine to the rear of the shed where my
new opening awaited. Unfortunately, there is a pretty good slope there, and
after progressing partway I realized that the trailer was never going to make it
without tipping over. Yikes! I couldn't back up, so I was
pretty stuck. I decided to unhook the trailer from the tractor and, after
moving the tractor out of the way, I proceeded to--by hand--pull the trailer
with engine loaded down the little slope a little at a time, being sure to keep
some pressure on the low side to keep the thing from tipping over.
|
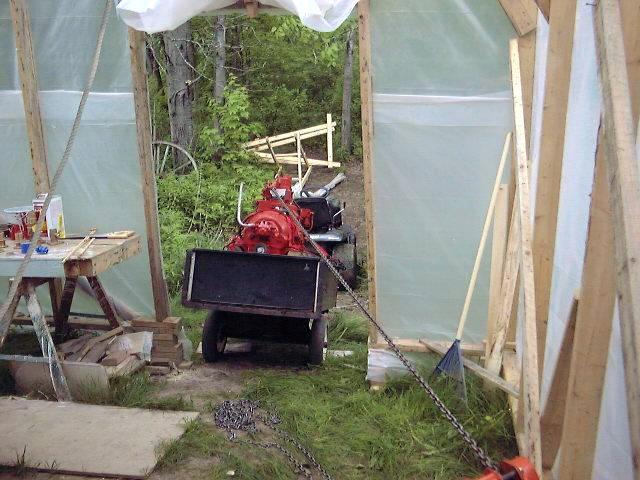
 With
the trailer behind the shed, I rehooked the tractor so I could, hopefully, back
it up the slope into the shed. I only made it partway before traction gave
out on the slippery slope. Locking the brake, I reconnoitered. With
the trailer behind the shed, I rehooked the tractor so I could, hopefully, back
it up the slope into the shed. I only made it partway before traction gave
out on the slippery slope. Locking the brake, I reconnoitered. |
|
 The
trailer and engine were too heavy for me to physically push up the slope, so I hooked
my chain hoist to one of the shed studs, hooked it to the engine ring and slowly
pulled the whole thing up the slope and into the shed. As it was growing
late, I called it quits for the day. The
trailer and engine were too heavy for me to physically push up the slope, so I hooked
my chain hoist to one of the shed studs, hooked it to the engine ring and slowly
pulled the whole thing up the slope and into the shed. As it was growing
late, I called it quits for the day.
|
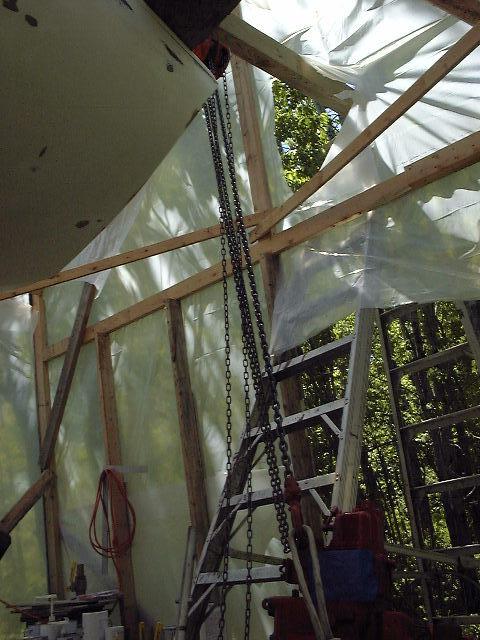
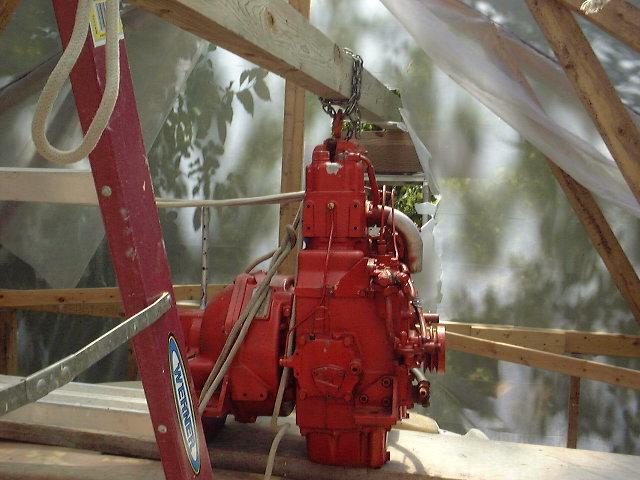
 The
next day, with the trailer now inside the shed, I set up a couple ladders to be
used to place my beam on--one in the cockpit (a 6' stepladder) and my huge
aluminum stepladder outside the shed, with one side partially in the shed.
Placing the beam necessitated cutting a hole in the plastic gable. I
blocked up the rear end to get the beam as high as possible, as I knew clearance The
next day, with the trailer now inside the shed, I set up a couple ladders to be
used to place my beam on--one in the cockpit (a 6' stepladder) and my huge
aluminum stepladder outside the shed, with one side partially in the shed.
Placing the beam necessitated cutting a hole in the plastic gable. I
blocked up the rear end to get the beam as high as possible, as I knew clearance
 would
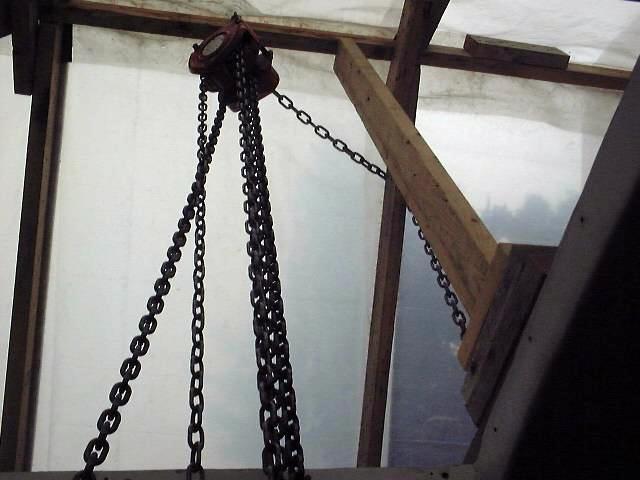
be a problem otherwise. With the beam in place, I wrapped a chain around
the middle and lifted the chain hoist into place just behind the
transom. Ready to lift! would
be a problem otherwise. With the beam in place, I wrapped a chain around
the middle and lifted the chain hoist into place just behind the
transom. Ready to lift!
Here I made a stupid
mistake--which, fortunately, ended up causing no real harm, but could have... |
| The engine was slightly to the
port side of the boat, where I had dragged it the night before, still in the
trailer. With the hoist now installed on the beam, I figured I would just
lift the engine from its current location--it would be pulled towards the ladder
and then upwards. Wrong! As I began raising the engine, at first
things seemed to be going well. However, all of a sudden I (who was
standing off to the other side, prudently) was surrounded by a hailstorm of
heavy objects--a staging plank, which had been placed on the poop deck in
preparation for the engine; a 4x6 PT 10' beam, and a chain hoist all came
crashing down unexpectedly, the beam just grazing my hand and everything
narrowly missing the engine. Yikes! What had happened was, as the
hoist had taken a load at an off angle, the ladder in the cockpit tipped over,
spilling its contents--the beam and hoist. Close call, and how
stupid. I knew better than that. |
|
 After
regaining my pride a little bit, I set everything back up, this time tying the
boat ladder very securely in four directions and chocking the legs in place in
the cockpit. I also clamped the beam in place to give it a little added
stability. Then, I moved the trailer, by hand, directly under the hoist
for a better angle--what I should have done in the first place. I unbolted
it from the palate, and raised it until it cleared the trailer, which I moved
out of the way. After
regaining my pride a little bit, I set everything back up, this time tying the
boat ladder very securely in four directions and chocking the legs in place in
the cockpit. I also clamped the beam in place to give it a little added
stability. Then, I moved the trailer, by hand, directly under the hoist
for a better angle--what I should have done in the first place. I unbolted
it from the palate, and raised it until it cleared the trailer, which I moved
out of the way.
|
|
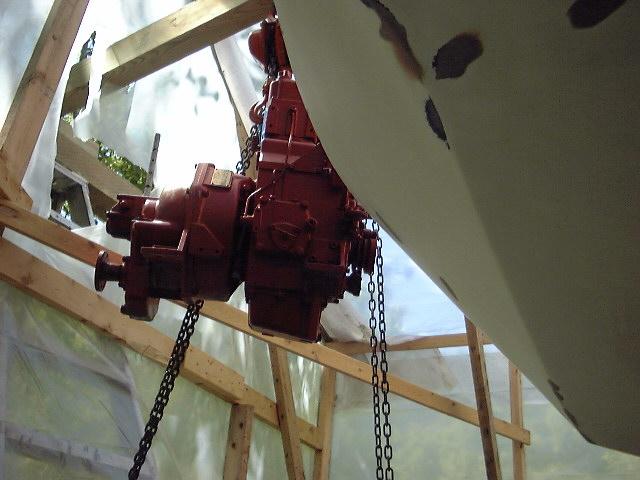
 Then,
slowly, I began raising the engine the seemingly terrifying 8 or 10 feet to deck
level. Because of the angle of the ladder I was using to support the beam,
I had to pull the engine forward (toward the boat) in order to clear the first
several steps, a real pain. Finally, though, it hung clear, and I raised
it until the hoist was two-blocked. It didn't look like quite
enough... Then,
slowly, I began raising the engine the seemingly terrifying 8 or 10 feet to deck
level. Because of the angle of the ladder I was using to support the beam,
I had to pull the engine forward (toward the boat) in order to clear the first
several steps, a real pain. Finally, though, it hung clear, and I raised
it until the hoist was two-blocked. It didn't look like quite
enough...
|
|
Moving on deck, I could see
how close the height was! I had to make it! The thought or lowering
the thing to the ground, somehow safely raising the beam and rehoisting was
inconceivable. I would win!
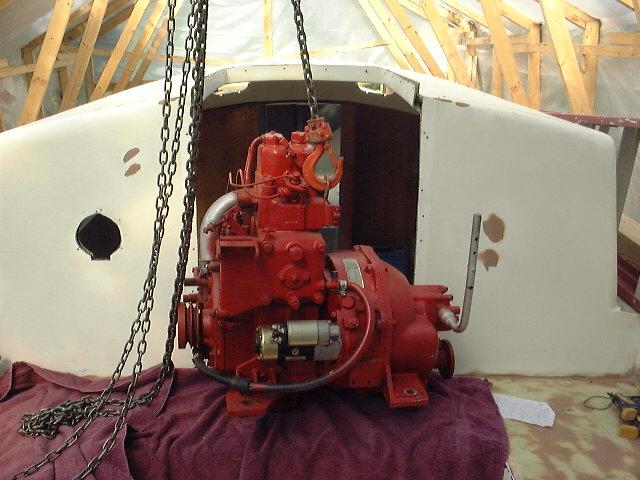
 Grabbing
the engine, I pulled it towards the boat, slowly letting out the hoist as
needed. By doing this, I was able to just scrape it over the transom and,
with great difficulty and a lot of huffing and puffing, get it onto the plank I
had on the poop deck. Setting it on its oil pan and transmission housing,
I felt a flush of success...or was that the heat and exertion? Because it
was kind of precarious, I tied it in place as best as possible and went for a
break. I needed one! This had taken several hours, all told, to this
point. Grabbing
the engine, I pulled it towards the boat, slowly letting out the hoist as
needed. By doing this, I was able to just scrape it over the transom and,
with great difficulty and a lot of huffing and puffing, get it onto the plank I
had on the poop deck. Setting it on its oil pan and transmission housing,
I felt a flush of success...or was that the heat and exertion? Because it
was kind of precarious, I tied it in place as best as possible and went for a
break. I needed one! This had taken several hours, all told, to this
point.
|
|
 I
couldn't leave the engine where it was and, although I was tired, I decided to
move it into the cockpit for the night. This was a two-step process.
First, after removing the cockpit ladder and beam, and repositioning the hoist
more or less above the engine by hanging it from the shed's ridgepole, I moved
it off the poop deck and into the cockpit well. Much better. I
couldn't leave the engine where it was and, although I was tired, I decided to
move it into the cockpit for the night. This was a two-step process.
First, after removing the cockpit ladder and beam, and repositioning the hoist
more or less above the engine by hanging it from the shed's ridgepole, I moved
it off the poop deck and into the cockpit well. Much better.
|
|
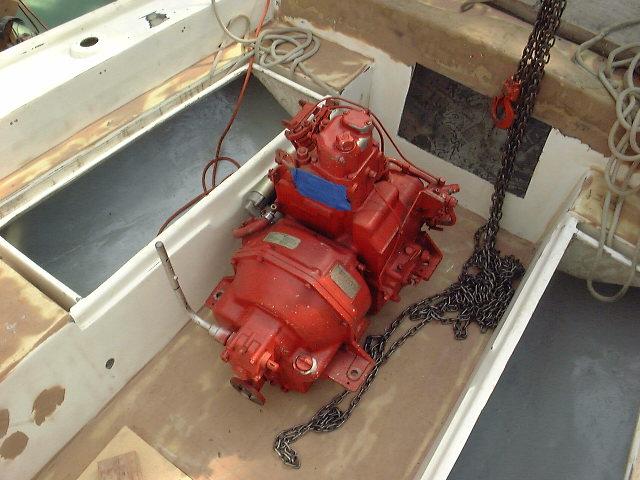
 From
there, one more repositioning of the hoist on the ridgepole enabled me to set
the engine down right next to the companionway, where I left it for the
night. Enough! From
there, one more repositioning of the hoist on the ridgepole enabled me to set
the engine down right next to the companionway, where I left it for the
night. Enough!
|
|
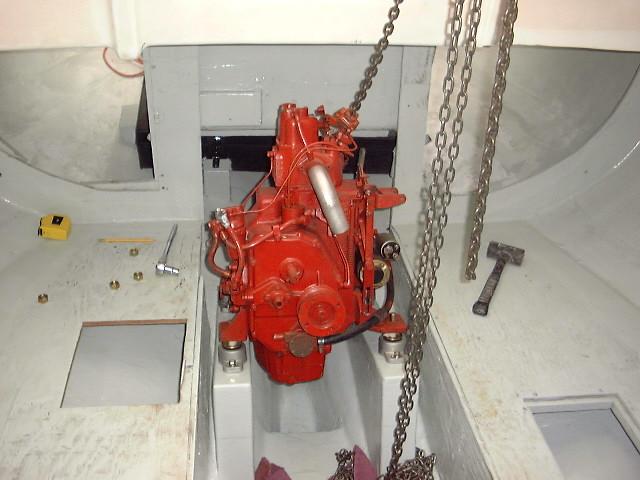
 The
next day, it was a relatively simple matter to move the engine one more time,
from the cockpit and down onto its mounts in the cabin. I repositioned the
hoist, again on the ridge, and supported the ridge with some additional
bracing--just in case. One more time, I raised the engine, guided it
through the hatch and lowered it into place on the mounts. This was fairly
easy. I had loosened the lags before, so the mounts could be adjusted as
needed to line up with the engine mount holes on the engine. The forward
two went in quite easily, then some minor up and down and side-to-side The
next day, it was a relatively simple matter to move the engine one more time,
from the cockpit and down onto its mounts in the cabin. I repositioned the
hoist, again on the ridge, and supported the ridge with some additional
bracing--just in case. One more time, I raised the engine, guided it
through the hatch and lowered it into place on the mounts. This was fairly
easy. I had loosened the lags before, so the mounts could be adjusted as
needed to line up with the engine mount holes on the engine. The forward
two went in quite easily, then some minor up and down and side-to-side  finagling
convinced the two rear mounts to cooperate. The location of the engine,
fairly far forward, made it an easy lower without too much rearward travel
necessary. Once the engine was on all four mounting studs, the job was
complete! Well, not really complete. Just started, really...there's
the alignment, electrical, fuel and plumbing hookups, filters, sea strainers,
stuffing box, exhaust...the list goes on and on. These projects will all
come later, however. With the engine firmly in place on its mounts, I can
move on to interior rebuilding projects, and keep Glissando moving
towards her launch date! finagling
convinced the two rear mounts to cooperate. The location of the engine,
fairly far forward, made it an easy lower without too much rearward travel
necessary. Once the engine was on all four mounting studs, the job was
complete! Well, not really complete. Just started, really...there's
the alignment, electrical, fuel and plumbing hookups, filters, sea strainers,
stuffing box, exhaust...the list goes on and on. These projects will all
come later, however. With the engine firmly in place on its mounts, I can
move on to interior rebuilding projects, and keep Glissando moving
towards her launch date!
|
|
|
|
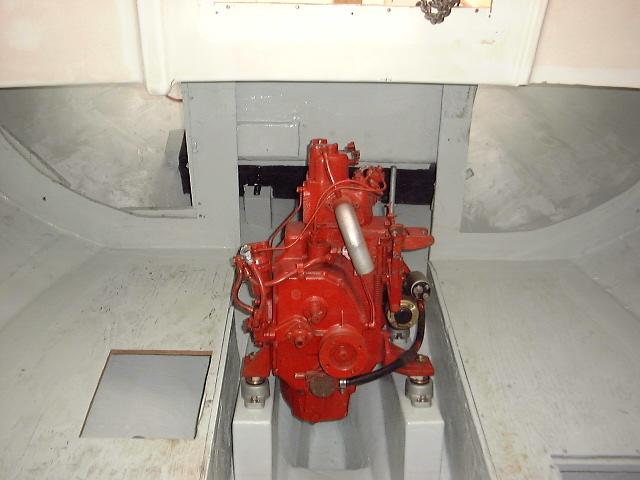
After the engine was in place,
I checked its rough positioning with much trepidation. After all, I've
never done this before, so why should it be right? It was a little hard to
tell from inside the boat whether the shaft coupling was in alignment and on the
proper angle with the shaft log. However, when peering through the shaft
log from outside, all I could see was the nut at the center of the transmission
coupling--bingo! The rough alignment looks right on, thanks to the engine
template and all the work I put into foundation preparation and layout.
Inserting the propeller shaft that came with the engine through the shaft
log--backwards, since the coupling is frozen on--further pointed to a successful
rough alignment. A triumph for first timers everywhere!
Still to come: final
hookups and out-of water alignment.
|
|