|
 We
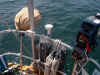
store the teak daggerboard and rudder assembly in the starboard cockpit locker;
the sail fits in the lazarette, and we're storing the mast sections and boom on
the deck of the boat, at least for now. They're securely lashed in place. We
store the teak daggerboard and rudder assembly in the starboard cockpit locker;
the sail fits in the lazarette, and we're storing the mast sections and boom on
the deck of the boat, at least for now. They're securely lashed in place.
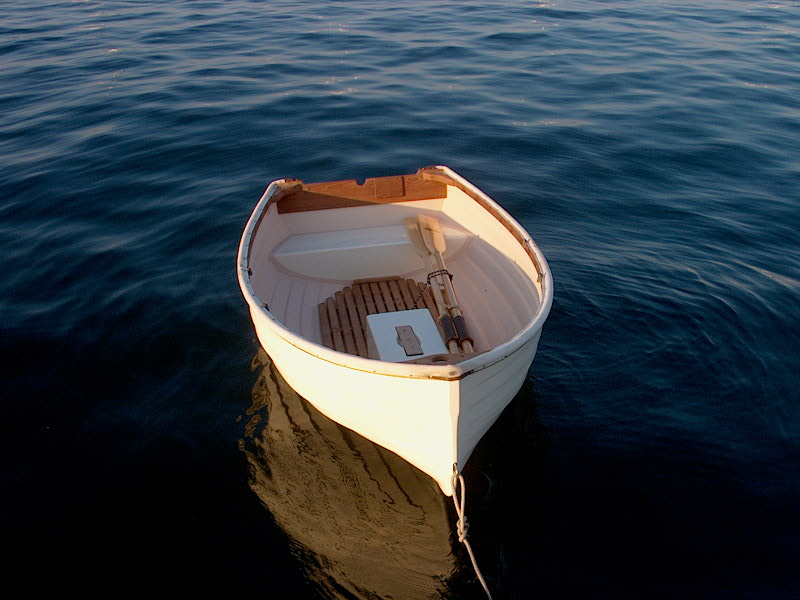
For a while, I left the dinghy tied up behind
the boat at the mooring. Not only would this be convenient for the
multiple weekend cruises we were hoping for (that didn't really ever
materialize), but it would also leave a waterline on the dinghy that would help
in painting the bottom.
After a month or so, the bottom was pretty
heavily fouled--it all seemed to happen at once. I took the dinghy home
and turned it upside down on some sawhorses. After letting the growth dry
for a couple days, I masked off around the outer edges--it wasn't a perfect,
distinct line, so I evened things up by eye and did a little guesstimation as
well. Then, I cleaned, sanded, and painted the bottom with some leftover
antifouling paint from Glissando.
|
|
Sailing
the Dinghy
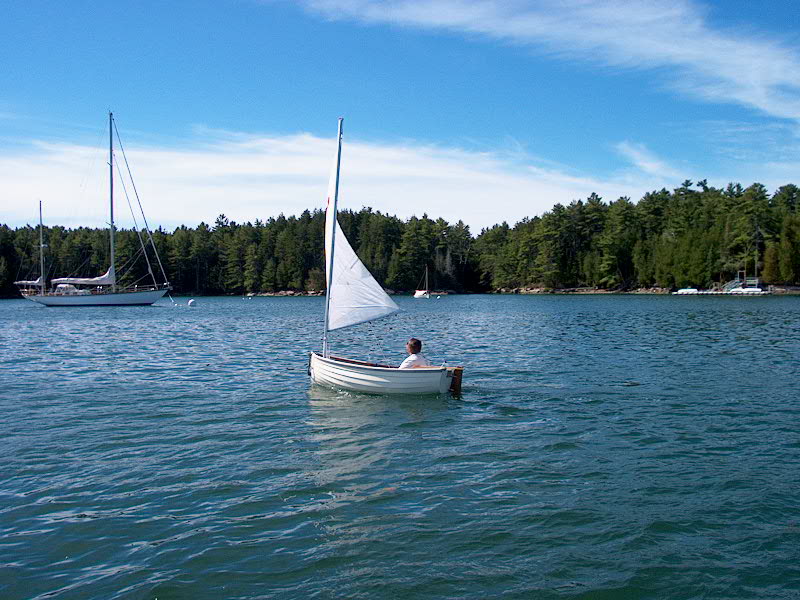
 Finally,
on our cruise over Labor Day the opportunity to sail the dinghy presented
itself. We were ensconced in a lovely anchorage on an equally lovely day,
with no plans to go anywhere. Why not play around with the dinghy for a
while? Finally,
on our cruise over Labor Day the opportunity to sail the dinghy presented
itself. We were ensconced in a lovely anchorage on an equally lovely day,
with no plans to go anywhere. Why not play around with the dinghy for a
while?
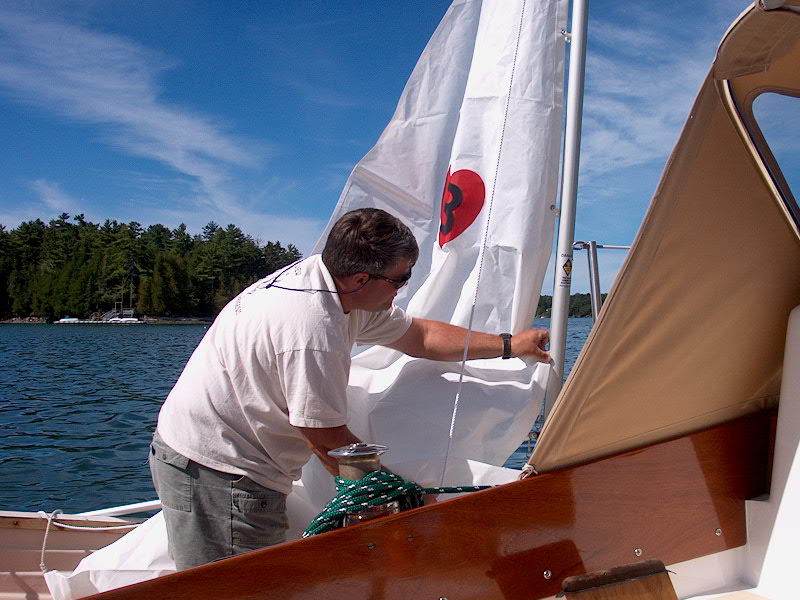
Rigging the sailing gear took a little while,
partially because I had never done it before, but also because the dinghy,
despite its robust nature and size, is still a little boat, and moving
about--especially at the bow--makes it move a little bit more than a Triton
might! However, it was easy to slip the two halves of the mast
together--after reeving the halyard through the sheaves at the masthead--and the
boom easily pinned into place. I installed the daggerboard in its slot,
and lined up the pintles and gudgeons on the transom--always a little
interesting with a rudder that floats, since the inherent buoyancy tends to work
against you. I rigged the "traveler" across the transom, then I
raised the sail--it has real slugs, and is not simply loose-luffed like
some. I'm not sure I rigged up the tack attachment right--I may try
something different the next time.
|
|
Outboard Engine
We made a conscious
choice to purchase a rowing dinghy, since that's what I prefer--and I
happen to like rowing. Most of the time, rowing is absolutely the
mode of choice for me.
However, our long cruise
in 2002 highlighted a few situations where it could have been nice to
have a small outboard for the dinghy. In particular, chore days
(laundry, provisioning, etc), where many trips back and forth to shore
in a busy harbor are required, call out for the help of an outboard.
Also, though I vastly
prefer to explore harbors and coves under rowing power, there were a few
places we visited where there was simply too much to see by oars alone;
I just couldn't get around to everything. Winter Harbor, on
Vinalhaven, was the best example of this. With numerous nooks,
crannies, estuaries, passages, etc., I couldn't even scratch the surface
by rowing.
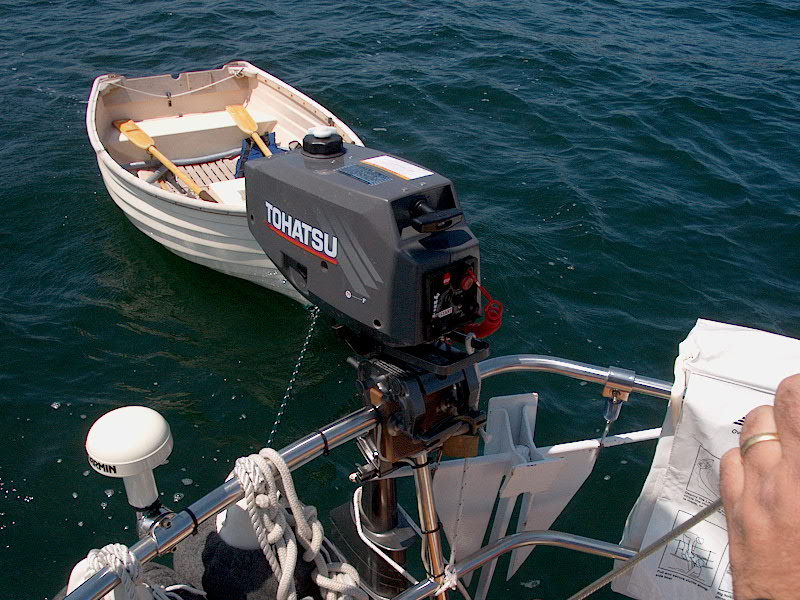
Given these experiences,
we made the decision to purchase an outboard to have on hand for the
future. I expect it will live on the pulpit most of the time, but
when we want it, it will be there.
During the winter, I did
some research on outboards. It turns out that the most popular
small outboards (5 HP and under) are all the same thing, regardless of
their brand name. Nissan, Mercury, and Tohatsu are all the same
exact motor beneath their cowlings (yes, folks, even the small
Mercs). Prices between various retailers for these three major
engine brands were widely disparate, as one would expect.
One thing I wanted was a
neutral gear option. With a rigid dinghy, it seemed to make sense,
as they are less forgiving to the inevitable bumps caused by
forward-only outboards. This meant that I needed at least a 3.5 HP
engine. Technically, the Fatty Knees is rated for a 2.5.
Shhh...don't tell anyone. Anyway, the only difference that I could
see between the 2.5 and the 3.5 was that the smaller engine features a
governor that limits top engine speed--and therefore horsepower.
Again--they are the same basic engine. I think I'm responsible
enough to know whether or not to limit my engine revolutions.
Armed with all this
information, I eventually found a place through Ebay that seemed like
the best price: Online
Outboards, located somewhere in Tennessee or something. They
sell both Nissan and Tohatsu, and their prices were the lowest I found,
far lower than West Marine, Boat/US, or others. Finally, in the
spring, I made the leap and bought a Tohatsu 3.5B engine (long shaft
with forward and neutral gears) for less than it would have cost for a
forward-only 3.5 at one of the other stores, even with the shipping
charge. The engine was delivered right to my door in short order,
and arrived in good condition.
After a couple weeks, the
boat was in the water and I decided to try out the engine. There's
an arduous break in procedure that entails lots of boring low-speed
running, so as of this writing I have little performance
information. One thing I quickly discovered is that I really need
a tiller extension for using the engine in the boat alone; the stern is
not buoyant enough to enable sitting back there to operate the boat, so
I have to sit more forward--all well and good, except that the tiller is
so short that it's nearly impossible to reach! Other than this
minor issue (which I really expected), it works great, and is
lightweight enough to make its transport and transfer as easy as
possible.
Click
here to see the tiller extension that I made.
I worried for a time
about where I was going to store the outboard on Glissando. My
stern pulpit seemed full already, with the notable exception of the
starboard side, which I choose to leave open since the launch comes
alongside there, and people in the launch tend to grab onto
whatever is there to "help" as you board. Plus,
Glissando's topsides are low enough that the outboard could easily be
damaged by the launch if it was stored here. So that was
out. And everything else that was already on the pulpit needed to
stay where it was, for one reason or another.
I considered installing
my cheap-o outboard bracket on the centerline of the pulpit, but the
design of it is such that it was a loose fit on the rail when it wasn't
clamped over a vertical support as well, as it is designed to do.
 I
finally settled on the port juncture between the top rail and vertical
support. Installing the bracket here involved a fair bit of work,
since the GPS antenna was installed there and had to be moved to
accommodate, and the stern anchor nearby also had to be moved a
bit. I moved the GPS antenna to the rail centerline, carefully
securing its cable along the way, and moved the hanging anchor brackets
over until the plastic outboard pad would fit. I
finally settled on the port juncture between the top rail and vertical
support. Installing the bracket here involved a fair bit of work,
since the GPS antenna was installed there and had to be moved to
accommodate, and the stern anchor nearby also had to be moved a
bit. I moved the GPS antenna to the rail centerline, carefully
securing its cable along the way, and moved the hanging anchor brackets
over until the plastic outboard pad would fit.
|

 Here are a couple photos of our new
 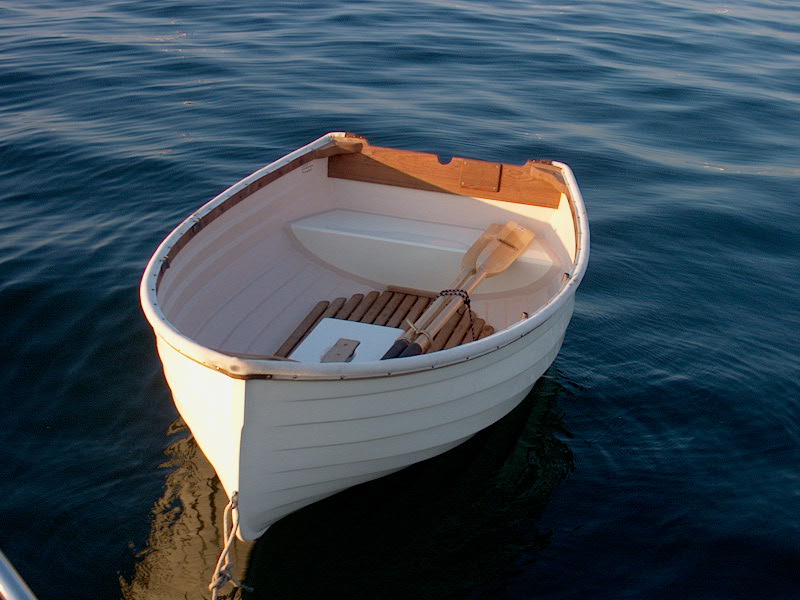 If you read
 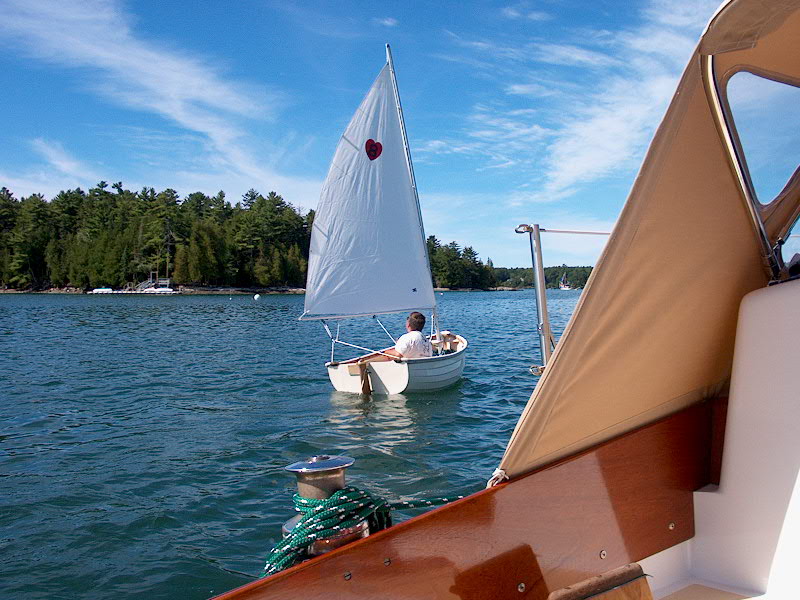 Of
course, as soon as I pushed away from Glissando and started sailing, a gust of
wind hit, leaving me and the dinghy a bit strewn about as I struggled to find
the best position to sit inside the boat. After a few minutes, I settled
on sitting on the teak floor, steering with an arm behind me and my
forward-facing arm handling the mainsheet. All I had to do after a tack
was reposition so I faced the other way. This allowed me to easily adjust
my weight as necessary to account for changes in wind speed or direction.
It was fun, once I got used to the seating arrangement--but at first it was awkward,
to say the least.
Of
course, as soon as I pushed away from Glissando and started sailing, a gust of
wind hit, leaving me and the dinghy a bit strewn about as I struggled to find
the best position to sit inside the boat. After a few minutes, I settled
on sitting on the teak floor, steering with an arm behind me and my
forward-facing arm handling the mainsheet. All I had to do after a tack
was reposition so I faced the other way. This allowed me to easily adjust
my weight as necessary to account for changes in wind speed or direction.
It was fun, once I got used to the seating arrangement--but at first it was awkward,
to say the least.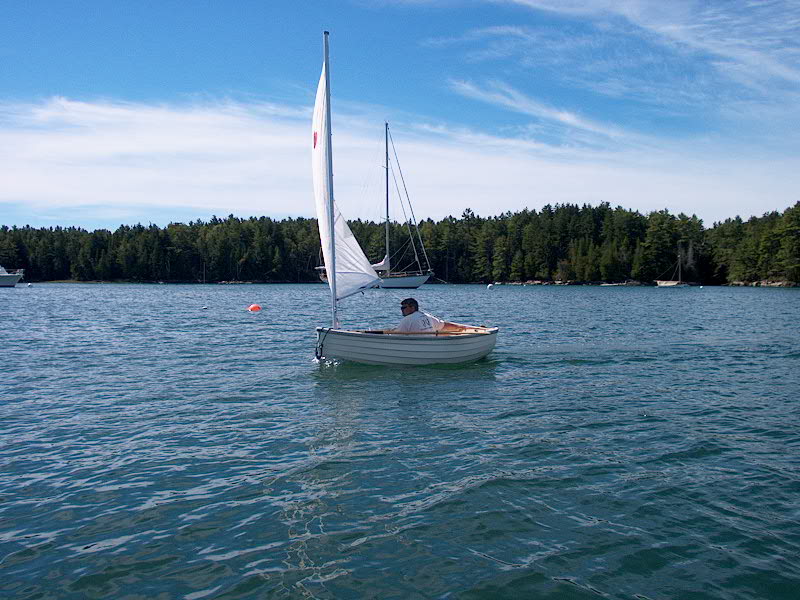 The boat sailed very nicely--it was a
pleasure. I sailed around the cove for a while, testing windward tacking
angles, performance on a reach, and downwind. Obviously, the boat's a
little tippy--it's an 8' dinghy, after all--but is less so than most, including
Dyers that I have sailed in the past. Light air performance was fine--but
it's nice knowing that there are oars to provide backup if you get too far away
and the wind dies! Speaking of the oars, I found that I had trouble
finding a good place for them to go inside the boat that would still leave me
enough room to move around. This was part of my problem when I first set
out. I ended up putting in the rowlocks, and sort of wedging the oars in
place on top of the gunwales. I
suppose taking them along isn't entirely necessary, but with fluky and light
winds it seemed to be a smart move. (I didn't end up needing them.)
I can tell that this will be a fun boat to sail around in as time allows--and
rigging it should go a little quicker in the future!
The boat sailed very nicely--it was a
pleasure. I sailed around the cove for a while, testing windward tacking
angles, performance on a reach, and downwind. Obviously, the boat's a
little tippy--it's an 8' dinghy, after all--but is less so than most, including
Dyers that I have sailed in the past. Light air performance was fine--but
it's nice knowing that there are oars to provide backup if you get too far away
and the wind dies! Speaking of the oars, I found that I had trouble
finding a good place for them to go inside the boat that would still leave me
enough room to move around. This was part of my problem when I first set
out. I ended up putting in the rowlocks, and sort of wedging the oars in
place on top of the gunwales. I
suppose taking them along isn't entirely necessary, but with fluky and light
winds it seemed to be a smart move. (I didn't end up needing them.)
I can tell that this will be a fun boat to sail around in as time allows--and
rigging it should go a little quicker in the future!