|
Storm Damage Page 2
This page was last updated on 31 May 2002
Return
to Page 1
Rebuilding
the Anchor Platform Repairs
to the Foredeck
|
|
Rebuilding the Anchor Platform
I decided to more or less
recreate the old platform, size-wise, since I could find no inherent flaw in the
basic design or the way the anchors overhung the bow. As I looked around
at boat after boat throughout my anchorage and in the boatyards, the way my
anchors had been installed was no different than any other boat--in fact, many
seem to be more susceptible to the type of occurrence that led to the
demise of my original platform. It would seem that the apparent hooking of
the mooring line over the fluke of the CQR anchor was--ahem--a fluke. (Pun
intended.)
Since I lost one of the original
anchor rollers, I ordered a new one for deliver in a few days, after making sure
that it was still the best choice for the CQR. It's a Windline Marine
URM-1.
I did decide to make the new
platform stronger, as I'd always harbored worries over the ultimate strength of
the old one. I debated several courses of action, including staying with a
glued-up platform built entirely of mahogany, much like the original.
Whatever plan of attack I followed, though, I knew that the top surface of the
platform would be varnished mahogany to match the rest of the boat and to
replicate what was there before. So, with that in mind, I figured I could
at least get started...and let the rest of the plan fall into place as I went,
as it is wont to do. I can only theorize and plan so much before I have to
get my hands dirty and solve the problems on the go.
|
|
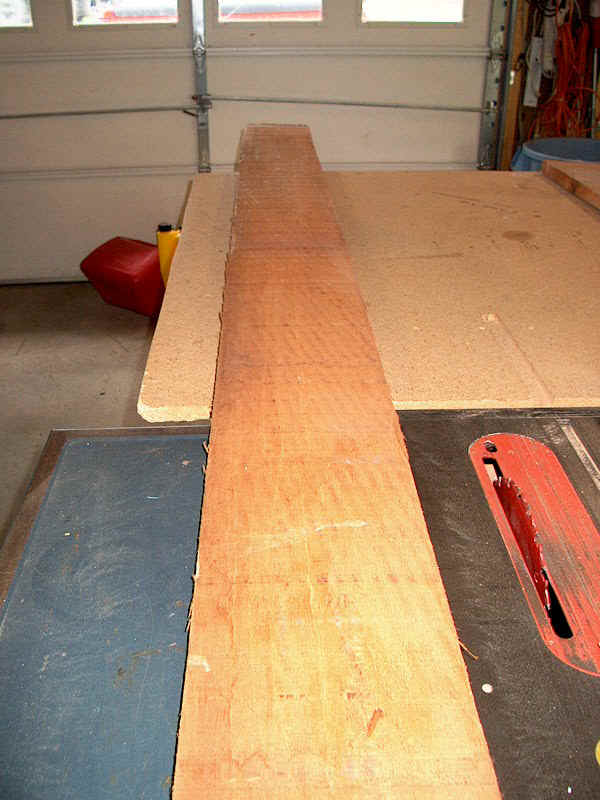 I
began building the new platform with a length of rough mahogany that I had on
hand. The edges are straight, if rough, so I used the straightest one
against my tablesaw fence to mill a nice straight edge on the opposite side;
then, end-for-ending the board, I milled the other side straight and
parallel. This technique may not be perfect, but it beats messing around
with the silly jointer. The board I had, unlike my old stock (left over
from cockpit coamings) was something around 8" in width, so I will have to
glue up a blank in order to create the desired 12" width of the new
platform. With the long board's edges smoothed and straightened, I cut two
pieces to 41" in length, more or less the same as the old platform; this
length is slightly overlong to allow for a fudge factor. I have to decide
whether I will install trim over the end grain, as I did before, or if I will
just leave the end grain exposed--the direction I am leaning at this
point. One reason for skewing my thinking in this direction was that,
despite being glued with epoxy and screwed, the inevitable wood shrinkage had
managed to leave some unevenness around the trim detail on the end of the old
platform, and I think for the long haul it might be better to avoid this
structurally-unnecessary joint. I
began building the new platform with a length of rough mahogany that I had on
hand. The edges are straight, if rough, so I used the straightest one
against my tablesaw fence to mill a nice straight edge on the opposite side;
then, end-for-ending the board, I milled the other side straight and
parallel. This technique may not be perfect, but it beats messing around
with the silly jointer. The board I had, unlike my old stock (left over
from cockpit coamings) was something around 8" in width, so I will have to
glue up a blank in order to create the desired 12" width of the new
platform. With the long board's edges smoothed and straightened, I cut two
pieces to 41" in length, more or less the same as the old platform; this
length is slightly overlong to allow for a fudge factor. I have to decide
whether I will install trim over the end grain, as I did before, or if I will
just leave the end grain exposed--the direction I am leaning at this
point. One reason for skewing my thinking in this direction was that,
despite being glued with epoxy and screwed, the inevitable wood shrinkage had
managed to leave some unevenness around the trim detail on the end of the old
platform, and I think for the long haul it might be better to avoid this
structurally-unnecessary joint.
|
|
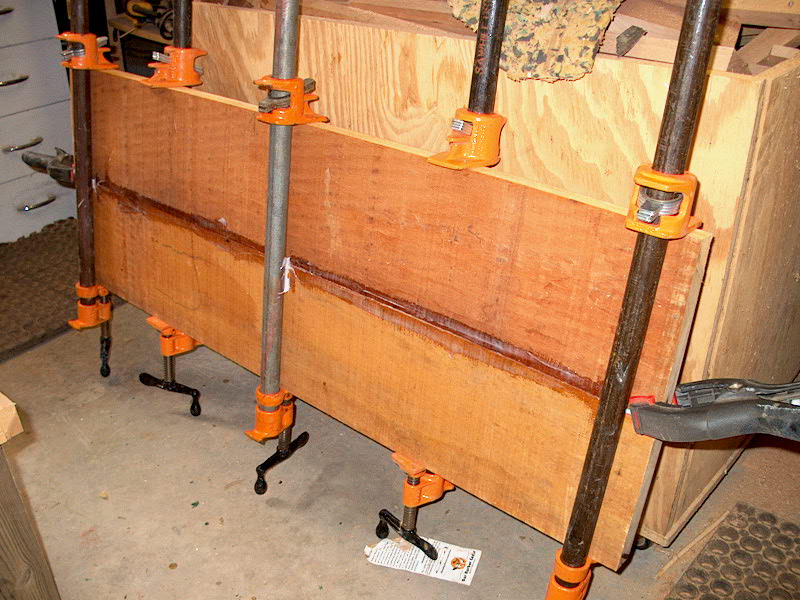 Anyway,
once I had the two pieces cut to length, I set up my pipe clamps and mixed a
small batch of thickened epoxy--a fairly loose mixture, but thick enough not to
run too easily. I spread some on one edge of each board, after determining
which two edges were the best matched, and clamped the pieces together. I
left the faces of the boards rough for now, as I'll have to do some sanding at
the seam anyway to even things out, and it'll be easier to just clean up the
roughness later. I've found that a belt sander makes easy work smoothing
this soft mahogany in the absence of a real tool like a thickness planer.
I cleaned up some of the excess epoxy and set the blank aside for the epoxy to
cure. The blank is about 15" wide and 41" long in the rough; I'll trim
it down later; the board is about a true inch in thickness. Anyway,
once I had the two pieces cut to length, I set up my pipe clamps and mixed a
small batch of thickened epoxy--a fairly loose mixture, but thick enough not to
run too easily. I spread some on one edge of each board, after determining
which two edges were the best matched, and clamped the pieces together. I
left the faces of the boards rough for now, as I'll have to do some sanding at
the seam anyway to even things out, and it'll be easier to just clean up the
roughness later. I've found that a belt sander makes easy work smoothing
this soft mahogany in the absence of a real tool like a thickness planer.
I cleaned up some of the excess epoxy and set the blank aside for the epoxy to
cure. The blank is about 15" wide and 41" long in the rough; I'll trim
it down later; the board is about a true inch in thickness.
The old anchor platform was made
from two layers of 3/4" mahogany, for a total thickness of
1-1/2". I had enough wood to do a second layer to create a thicker
platform--I could glue up another two boards into a similar blank, then, later,
laminate the two blanks together to form a thicker, laminated platform--but I
decided to forgo that idea and create something better, and stronger.
Stainless steel was an obvious choice. Where would I go to obtain a piece
of stainless steel like this, though? I could probably find a local metal
supplier...but I don't really have the time, nor the inclination, to chase down
supplies at this point. Frankly, this is an unwelcome project at this
time.
I turned to my old friend, McMaster-Carr.
Of course they'd have something that would work out. They have everything,
and their service is so spectacular that, if I ordered now, I'd have the product
the next day. By ground shipping...no rush charges necessary with these
guys for overnight service. Searching their website, I was initially
intrigued by the prospect of aluminum instead of stainless steel. Lighter,
strong, easy to machine...it seemed an interesting choice. However, I was
stunned by the price of the size and thickness I needed...after making the
mistake of misreading the website and thinking how reasonable a large piece of
0.050" aluminum plate was ($27 or something). Yes, I know...that's an
extra "0" in there, so it's not 1/2" aluminum, like I
thought. 1/2" plate, once I found the real stuff, was
staggeringly expensive. Forget aluminum.
I did have a little fun
contemplating something exotic like a carbon fiber panel, or even an
all-aluminum honeycomb panel product. But I decided that these were too
expensive, too unproven, and, in the case of the aluminum honeycomb, not really
strong enough for what I was attempting (based on their supplied deflection
numbers and weight ratings). But it was fun to play with the idea, and to
file away the thought of another interesting product.
I ended up ordering a piece of
3/8" 316L stainless steel plate, 12" wide by 24" long. This
will be about perfect--it's over half the length of the platform, the exact
width, and will support the oh-so important forward part of the platform, the
overhanging part. The stainless will go on the bottom and is strong enough
to do all the work itself, with the mahogany secured on top mainly for
looks. Having the stainless beneath will make an automatic, built-in
backing plate for the bolts securing the anchor rollers, adding even more
strength to their installation. And the overall thickness of the platform
will end up just a bit thinner than before, which will give a little more
clearance around the roller furling drum and a fairer lead for the mooring
lines.
The only possible stumbling point
for my plan will be cutting out the stainless steel to go around the stem
casting and headstay...that will not be fun. Whether I can do it myself or
not remains to be seen. Stay tuned for that!
|
|
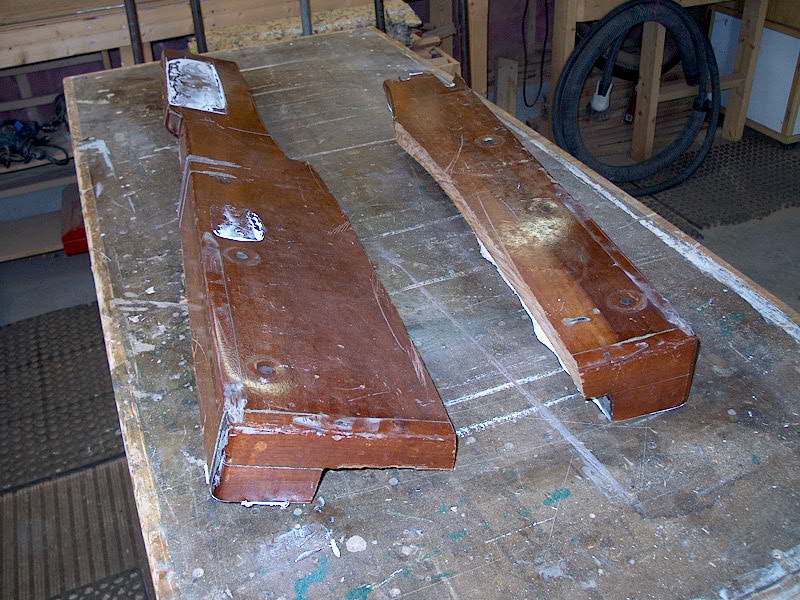
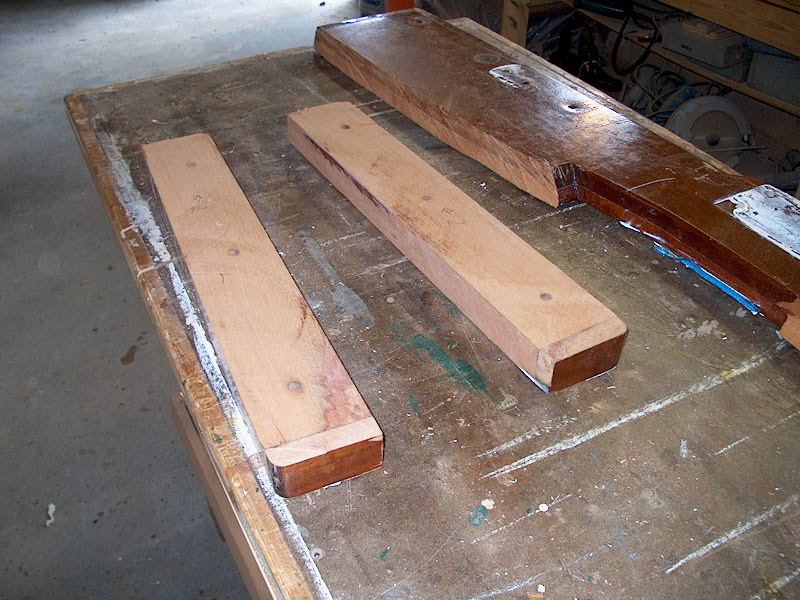 I
decided to salvage the solid mahogany after supports from the old
platform. These are necessary to make up the space between the deck and
the platform caused by the raised flat area on the stem, where the toerails
meet. Carefully setting the fence on my tablesaw, I cut these blocks,
which were intact and in good condition, off the bottom of the old platform,
cutting so that the full 1-1/2" thickness remained. Then I set the
fence again and trimmed off the junk from the bottoms of the supports--5200 and,
in one area, some fiberglass from my deck. I'll reuse these
supports on the new platform, pretty much as is. They have the added
benefit of having the proper bolt hole locations already set, so I can reuse the
plywood backer plates that are still attached beneath the foredeck. One
less thing to have to redo. I
decided to salvage the solid mahogany after supports from the old
platform. These are necessary to make up the space between the deck and
the platform caused by the raised flat area on the stem, where the toerails
meet. Carefully setting the fence on my tablesaw, I cut these blocks,
which were intact and in good condition, off the bottom of the old platform,
cutting so that the full 1-1/2" thickness remained. Then I set the
fence again and trimmed off the junk from the bottoms of the supports--5200 and,
in one area, some fiberglass from my deck. I'll reuse these
supports on the new platform, pretty much as is. They have the added
benefit of having the proper bolt hole locations already set, so I can reuse the
plywood backer plates that are still attached beneath the foredeck. One
less thing to have to redo.
|
|
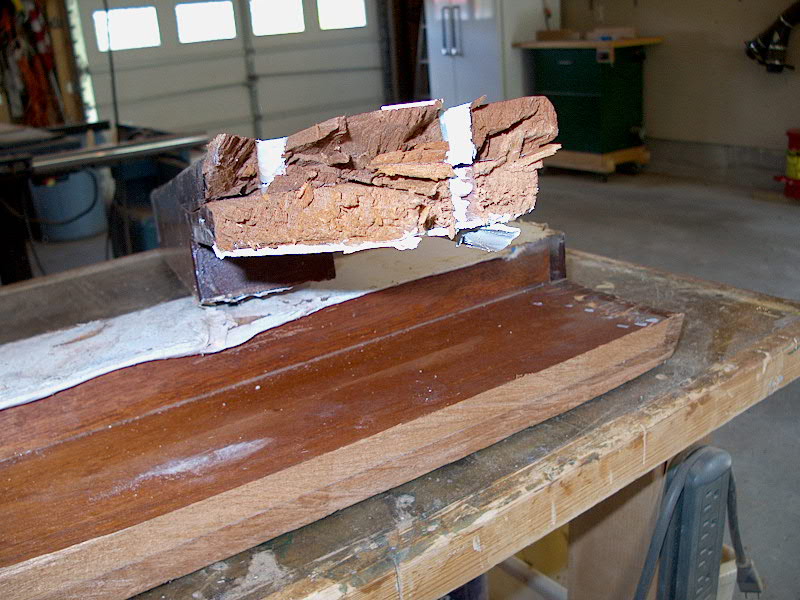
  The
old platform, despite missing a piece from the forward end on one side and being
cut in half, will be retained throughout the duration of the new platform
construction for reference and to ensure that everything ends up in the same
place--bolt holes, the cutout for the headstay, what have you. Then it
will be sent to the scrap heap, where it will eventually find a new life
integrated into some other project. There's still plenty of good wood
there...it was too bad to have to saw it down the middle in order to remove it,
but I'll sacrifice wood any day when the whole deck is in jeopardy.
That was enough for the day--it was late. The
old platform, despite missing a piece from the forward end on one side and being
cut in half, will be retained throughout the duration of the new platform
construction for reference and to ensure that everything ends up in the same
place--bolt holes, the cutout for the headstay, what have you. Then it
will be sent to the scrap heap, where it will eventually find a new life
integrated into some other project. There's still plenty of good wood
there...it was too bad to have to saw it down the middle in order to remove it,
but I'll sacrifice wood any day when the whole deck is in jeopardy.
That was enough for the day--it was late.
The next day, when I got home
from work at about 1:30 in the afternoon, my box from McMaster-Carr was waiting
for me. I just love that place...(maybe I'll marry it). Fewer than
24 hours from the time of my order to delivery. Wow!
|
|
 The
3/8" stainless plate is a massive affair. It is fairly heavy...I hope
I don't sink my boat bow-first! One thing is for certain, though: it
will not break. (Or, if it does...well, I don't want to imagine the
scenario that could do it.) It is 12" wide by 24" long,
the best compromise of the sizes offered. The plate is long enough to
support the overhang, rest on the stem, and extends back far enough so that the
first of the three sets of boltholes securing the platform to the deck passes
through the plate. The rest is gravy. I realize this is overkill,
but overkill never hurts in the long run when you're talking ground tackle
anyway. The
3/8" stainless plate is a massive affair. It is fairly heavy...I hope
I don't sink my boat bow-first! One thing is for certain, though: it
will not break. (Or, if it does...well, I don't want to imagine the
scenario that could do it.) It is 12" wide by 24" long,
the best compromise of the sizes offered. The plate is long enough to
support the overhang, rest on the stem, and extends back far enough so that the
first of the three sets of boltholes securing the platform to the deck passes
through the plate. The rest is gravy. I realize this is overkill,
but overkill never hurts in the long run when you're talking ground tackle
anyway.
|
|
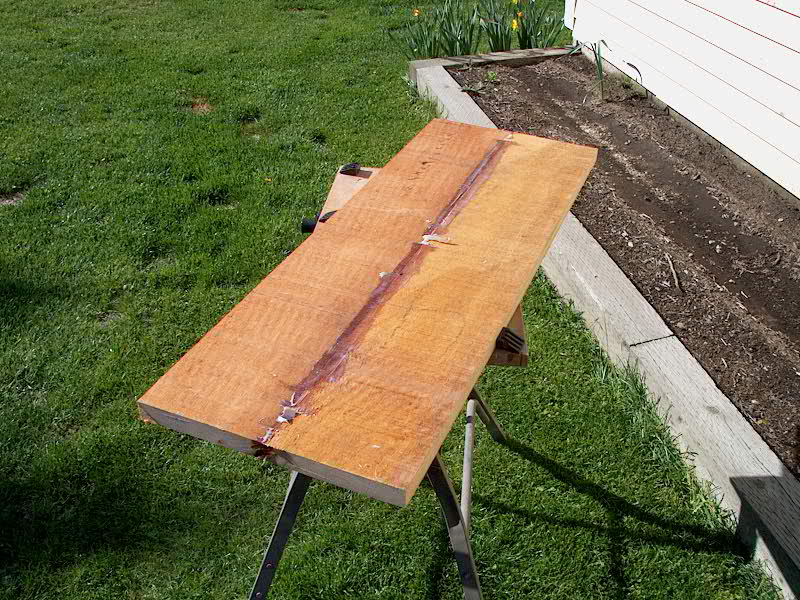
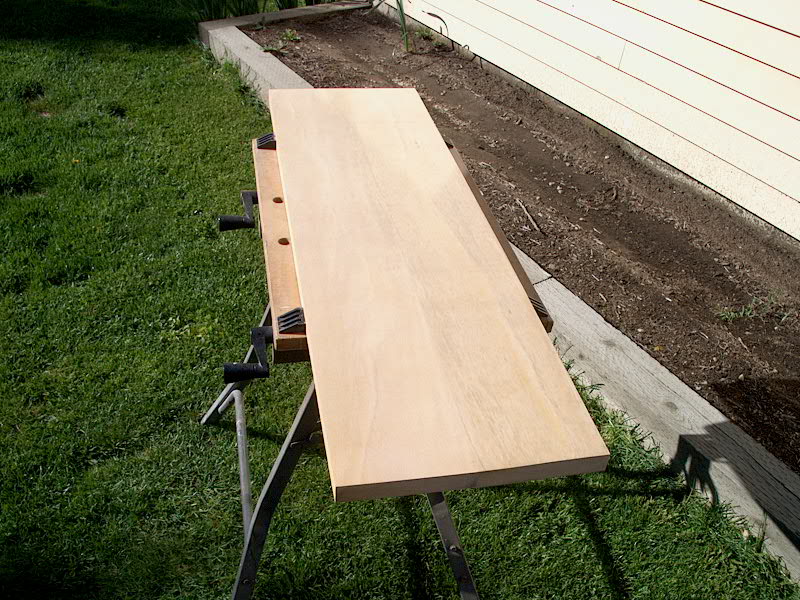
  When
the glued up panel cured, I removed the clamps and, after sanding off the excess
epoxy, trimmed the panel down to 12" in width, the finished
dimension. The length as glued is the proper 41".
Then, I spent some time sanding the rough surface of the panel smooth, first
with a belt sander, then my random orbital. The photo on the left is
the panel before; on the right, the panel after sanding. When
the glued up panel cured, I removed the clamps and, after sanding off the excess
epoxy, trimmed the panel down to 12" in width, the finished
dimension. The length as glued is the proper 41".
Then, I spent some time sanding the rough surface of the panel smooth, first
with a belt sander, then my random orbital. The photo on the left is
the panel before; on the right, the panel after sanding.
|
|
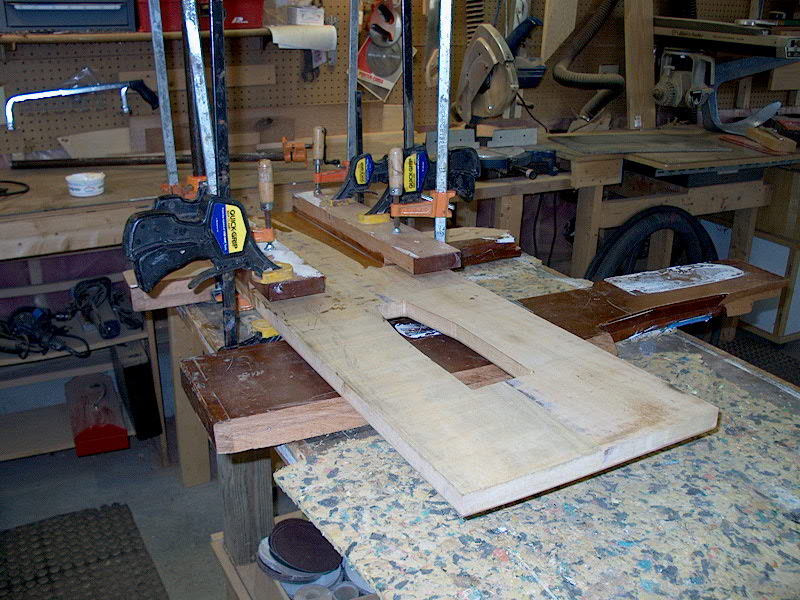
When the panel was sanded to 80
grit, I used my jigsaw to cut out the center portion in order to accommodate the
stem piece and headstay on the boat. I used the old platform as a guide,
and made the cutout slightly bigger than before. Then, I rounded the top
edges of the cutout and the platform with a 1/4" roundover bit in my
router. Placing the platform over the stainless plate, I marked that for
the stem cutout.
|
|
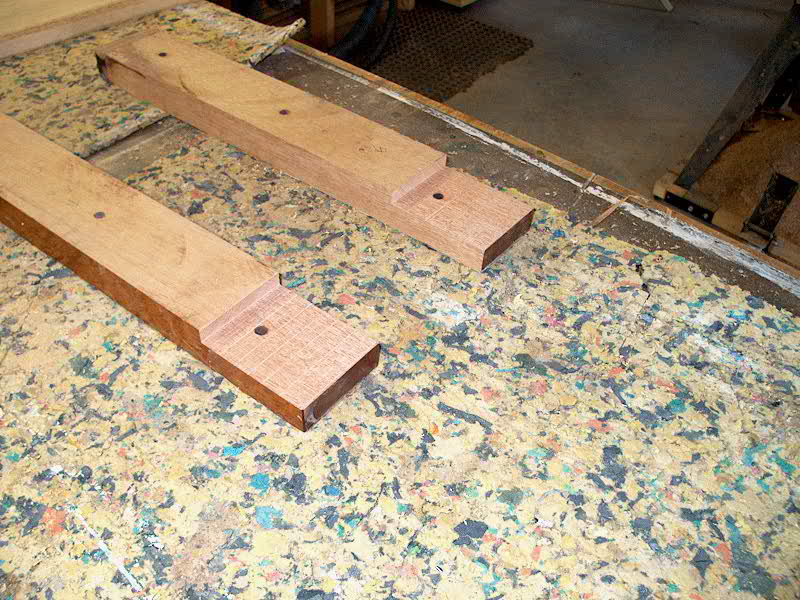
  Because
the plate will extent back into the section where the "feet" are
installed at the aft end of the platform, I had to remove a section of the top
of the forward part of the feet to allow the plate to slip in. I used a
dado head cutter in my table saw to remove a little over 3/8" of
thickness on each of the feet salvaged from my old platform. Then, I
secured the feet to the platform with epoxy, clamping them in place overnight.
(20/20 hindsight note: wrong! This was a
mistake. Minor problem...but I should have added 3/8" instead of
subtracted. See below for details.) Because
the plate will extent back into the section where the "feet" are
installed at the aft end of the platform, I had to remove a section of the top
of the forward part of the feet to allow the plate to slip in. I used a
dado head cutter in my table saw to remove a little over 3/8" of
thickness on each of the feet salvaged from my old platform. Then, I
secured the feet to the platform with epoxy, clamping them in place overnight.
(20/20 hindsight note: wrong! This was a
mistake. Minor problem...but I should have added 3/8" instead of
subtracted. See below for details.)
|
|
To
continue the construction of the anchor platform, please click here to go to the
next page.
|
|