|
Reinforcing the
Mast Step
This page was last updated
on 17 January 2004.
During the summer of 2003, I became
somewhat concerned about the condition of the mast beam and/or mast
step. During the initial restoration of the boat, I did not recore
the coachroof, nor did I replace the mast beam as is common. The
mast beam looked to be in good condition, and with so many other
projects to complete I did not see a reason to do the mast beam at that
time. There were no obvious signs of damage to the deck, and there
was no need to core the area at the time, as sounding and other standard
tests revealed no evidence of compromised core.
The factors leading to my
concern were twofold: first, I had had a leak through the nearby
wire chase for the mast wires, which I corrected early in the season
after I noticed it, but I was unsure how long it had been going
on. Second, the main upper shrouds' turnbuckles, were cranked up
nearly all the way, which was definitely more than they had been three
years earlier when the mast was stepped for the first time since the
restoration. Part of this was because the wire was an inch or so
longer than it should have been, as the turnbuckles were always cranked
up more than I would have wanted ideally, but I felt that it was worse
than it had been.  Also, I noticed
water pooling around the mast step during the season, and there was a
definite depression in the area. Also, I noticed
water pooling around the mast step during the season, and there was a
definite depression in the area.
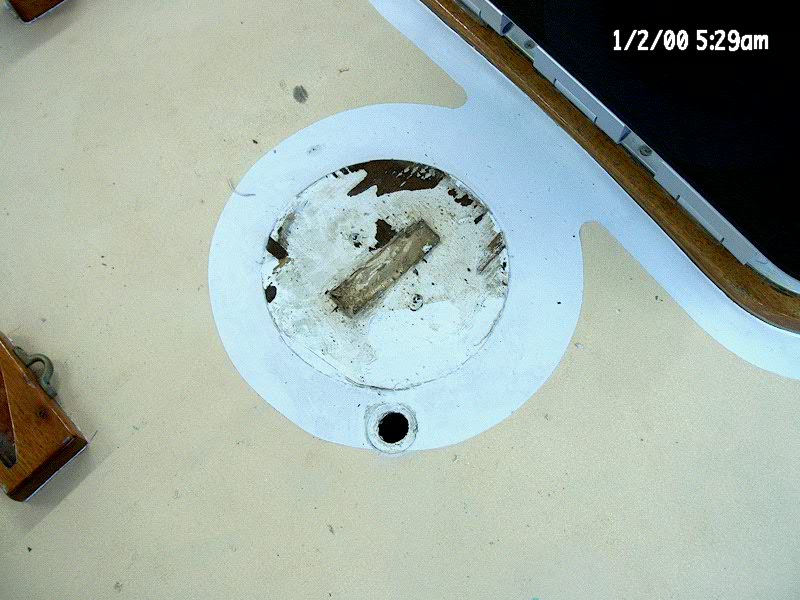
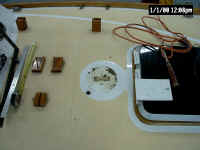
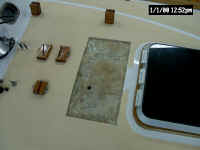
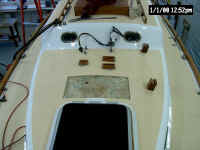
With
the boat at home in the shop after the season ended, one of the first
things I did was remove the mast step from the deck to determine what,
if anything, was going on beneath. I also removed the wire chase
fitting, which exposed some rotted core (which was new since I installed
the fitting three years earlier--bummer).
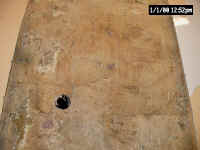
I
sounded the deck beneath the mast step, which revealed evidence of
moisture saturation in the core beneath. So, if nothing else, it
looked like I was going to be faced with removing the core in that
immediate area and filling the area with solid fiberglass reinforcement |
|
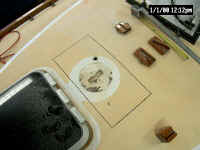
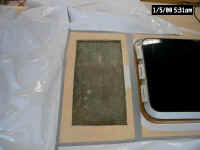
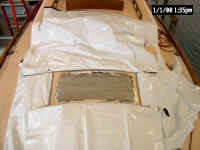
 A
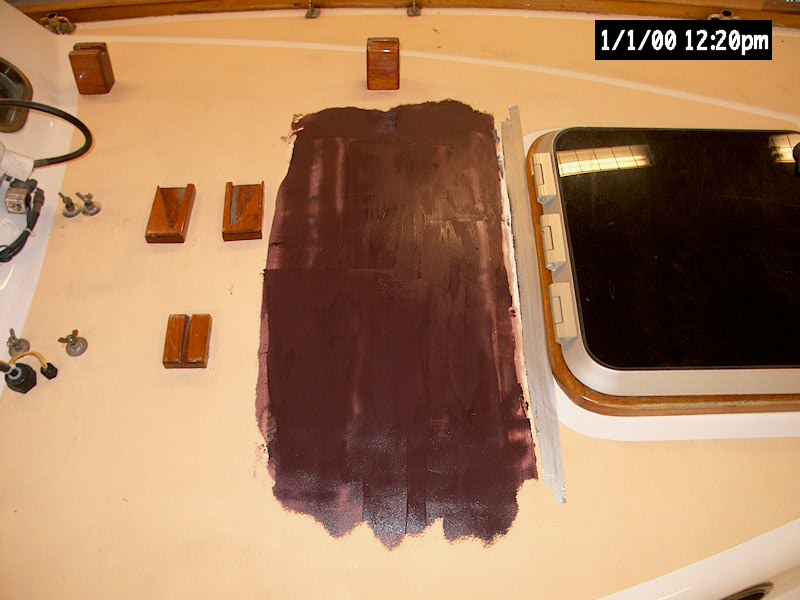
few days later, I bit the bullet and cut a hole in the deck.
Taking a saw to a nice deck is always somewhat traumatic, though with my
previous experience recoring the boat several years ago it was less of
an issue for me--even though the boat now was nicely finished, when
before it was a near derelict. Perception and experience changes
all. However, there was no reason to mess around here: the
deck needed reinforcement, so I marked off an area about 12" wide
and 24" athwartships to remove the top skin (after measuring
the location of the mast step and taking photos of the whole area to
ensure proper placement later). Then, with my small circular saw
set to about 1/4" depth, I cut out the top skin. It took no
time at all, but cutting fiberglass in this manner creates copious
amounts of dust and debris. What a mess! A
few days later, I bit the bullet and cut a hole in the deck.
Taking a saw to a nice deck is always somewhat traumatic, though with my
previous experience recoring the boat several years ago it was less of
an issue for me--even though the boat now was nicely finished, when
before it was a near derelict. Perception and experience changes
all. However, there was no reason to mess around here: the
deck needed reinforcement, so I marked off an area about 12" wide
and 24" athwartships to remove the top skin (after measuring
the location of the mast step and taking photos of the whole area to
ensure proper placement later). Then, with my small circular saw
set to about 1/4" depth, I cut out the top skin. It took no
time at all, but cutting fiberglass in this manner creates copious
amounts of dust and debris. What a mess!
|
|
|
|
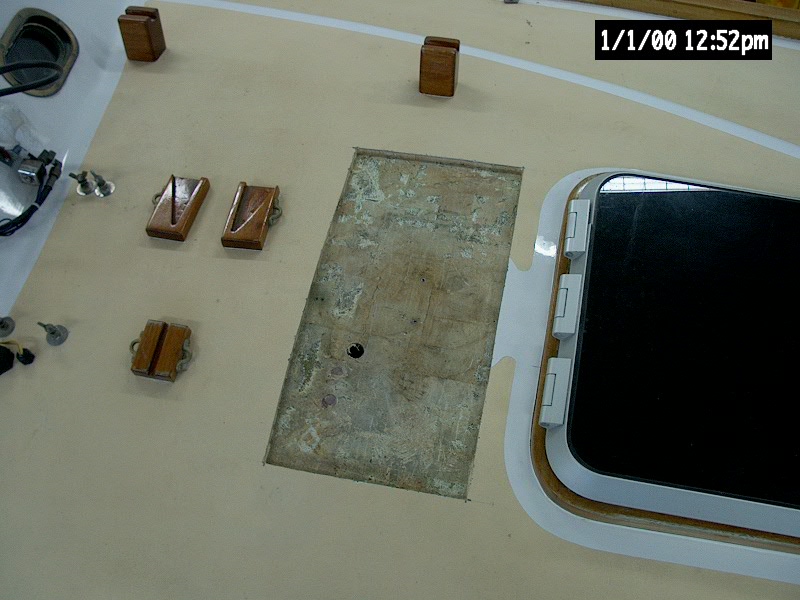
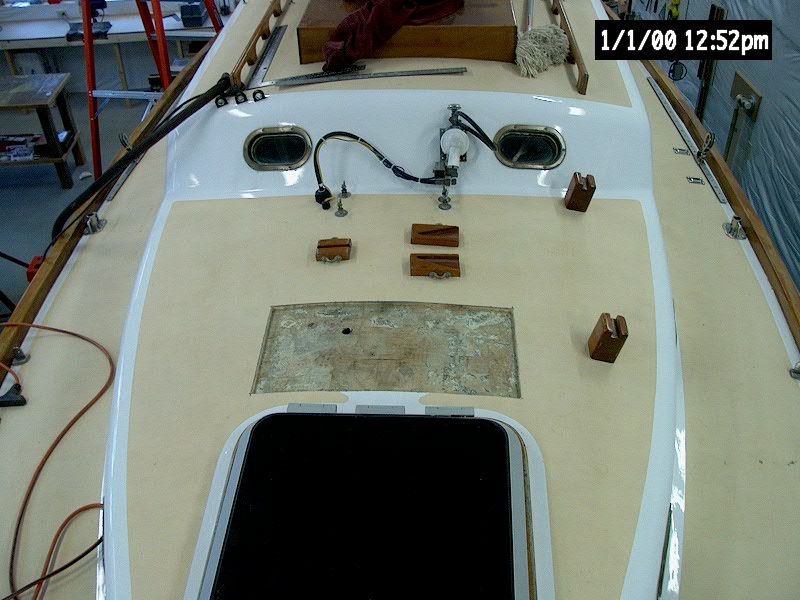
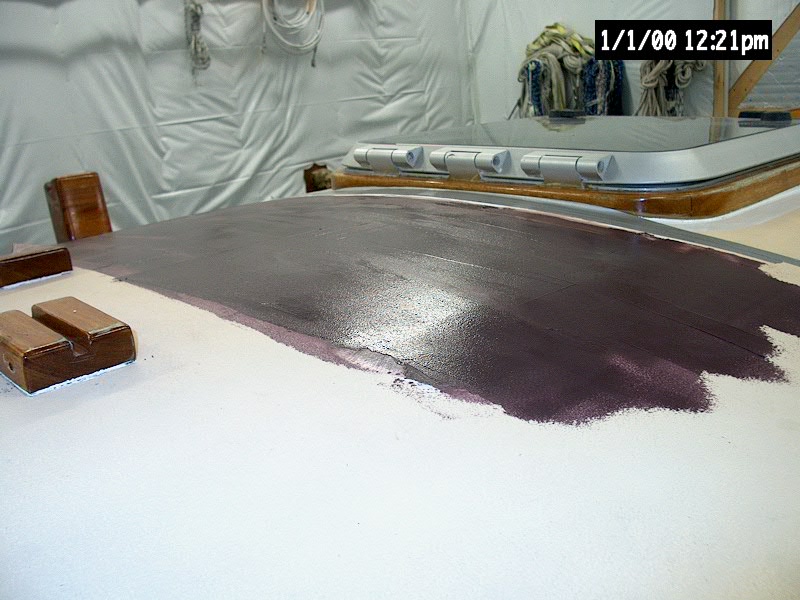
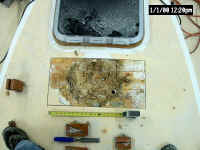
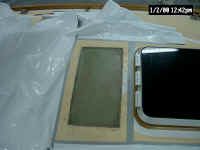
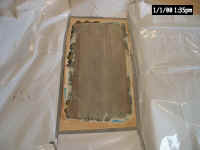
 The
core was still fairly well adhered to the underside of the top skin, so
to make it easier to remove the fiberglass I made several more cuts
across and lengthwise. The smaller pieces were easier to get
started. I used a large chisel to pry off the top skins, then used
the same tool to remove all the core from the area. The core was
in better condition than I had expected, but was obviously badly
compressed in the area directly beneath the mast step, and there were
definitely signs of rot and water damage--though not even close to the
extent of my decks back in 1999 when I bought the boat and embarked on a
major recore. Once all the core was removed, I swept it up and
vacuumed the entire area to keep things clean; with the boat finished, I
didn't want to grind the abrasive fiberglass dust into any shiny painted
or varnished surfaces. The
core was still fairly well adhered to the underside of the top skin, so
to make it easier to remove the fiberglass I made several more cuts
across and lengthwise. The smaller pieces were easier to get
started. I used a large chisel to pry off the top skins, then used
the same tool to remove all the core from the area. The core was
in better condition than I had expected, but was obviously badly
compressed in the area directly beneath the mast step, and there were
definitely signs of rot and water damage--though not even close to the
extent of my decks back in 1999 when I bought the boat and embarked on a
major recore. Once all the core was removed, I swept it up and
vacuumed the entire area to keep things clean; with the boat finished, I
didn't want to grind the abrasive fiberglass dust into any shiny painted
or varnished surfaces.
|
|
|
|
 With
the core removed, I could see that the inner skin was cracked on each
side of the mast beam, where the deck had flexed around the more solid
beam over the years. I was happy to see that the core all the way
around my cutout was clean and dry, though. With
the core removed, I could see that the inner skin was cracked on each
side of the mast beam, where the deck had flexed around the more solid
beam over the years. I was happy to see that the core all the way
around my cutout was clean and dry, though.
Before
continuing with the fiberglass repair, I moved inside the boat to remove
the existing mast beam.
Click
here to read that portion of the job now.
Or, just keep reading, and you'll find another link to the mast beam at
the bottom of this page. |
|
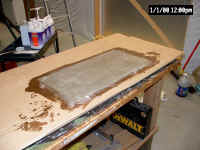
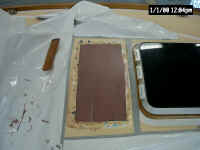
My next
step was to laminate solid fiberglass in the area on deck where I
had removed the core beneath the mast step. First, though, I
sanded the inner skin in the uncored area to remove old resin and core
bits, and then, after cleaning the area thoroughly, mixed a small batch
of thickened epoxy and applied it to the edges of the opening, to seal
the surrounding core and to fill the small voids that had been created
when I removed the inner portion. Then, I began the laminating
process. Earlier, I had cut a number of pieces of fiberglass cloth
to the correct size for the opening. Because I had a large supply
of 10 oz. cloth on hand, and I was anxious to get the project completed,
I used the materials on hand. Heavier material would have filled
the area with fewer layers, of course, but my local supplier didn't have
any of the biaxial cloth I wanted, so I pressed on with the lighter
material.
 Because
I was unsure how hot the resin I was using would cure (MAS low-viscosity
resin with medium hardener), I began with around 4 layers of
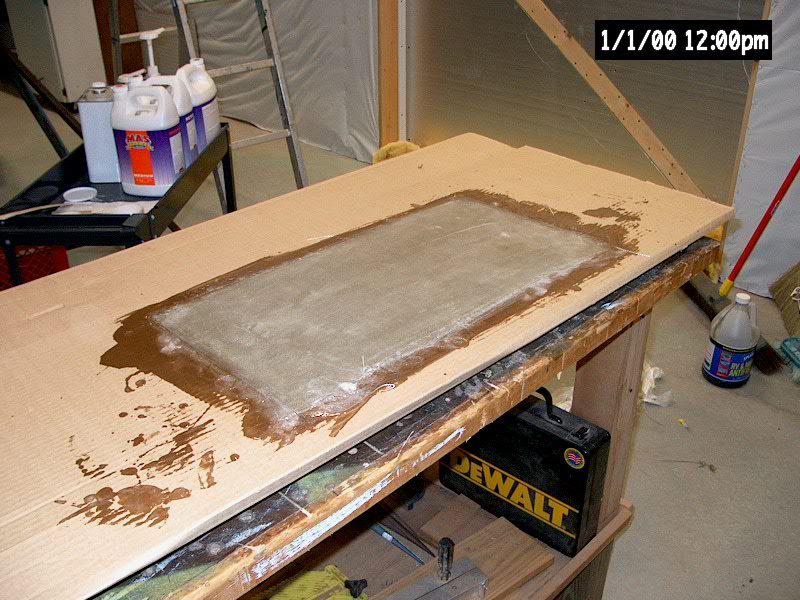
cloth. To make my life easier, I wet the material out on a piece
of cardboard on my bench, then carried the whole cardboard up to the
boat, where I transferred the glass to the opening and rolled it out. Because
I was unsure how hot the resin I was using would cure (MAS low-viscosity
resin with medium hardener), I began with around 4 layers of
cloth. To make my life easier, I wet the material out on a piece
of cardboard on my bench, then carried the whole cardboard up to the
boat, where I transferred the glass to the opening and rolled it out.
|
|
 Over
the next several days, I repeated this process twice per day--in the
morning and late in the afternoon, which allowed the previous layers to
cure sufficiently while retaining the green stage that allowed the new
layers to chemically bond. Since there had been no signs of heat
from the 4 layers I used the first time, I increased the number as I
went, sometimes installing up to 8 layers at once. Any thicker
than that and it becomes hard to roll out the air, so I left it at
that. The cloth is so thin that 8 layers doesn't add up to that
much, thicknesswise. Over
the next several days, I repeated this process twice per day--in the
morning and late in the afternoon, which allowed the previous layers to
cure sufficiently while retaining the green stage that allowed the new
layers to chemically bond. Since there had been no signs of heat
from the 4 layers I used the first time, I increased the number as I
went, sometimes installing up to 8 layers at once. Any thicker
than that and it becomes hard to roll out the air, so I left it at
that. The cloth is so thin that 8 layers doesn't add up to that
much, thicknesswise.
|
|
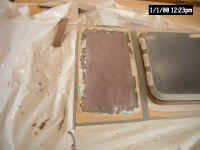
 Finally,
after several days of this, the material was built up thick enough to
approach the surface of the deck. I lost count of how many layers
it took to fill the 1/2" thick void. To avoid building up
fiberglass thicker than the surrounding deck surface, I erred on the
side of caution and left it a bit low, allowing the final layers to cure
before sanding off the edges and determining exactly how much more
material, or fairing compound, was to be necessary. Finally,
after several days of this, the material was built up thick enough to
approach the surface of the deck. I lost count of how many layers
it took to fill the 1/2" thick void. To avoid building up
fiberglass thicker than the surrounding deck surface, I erred on the
side of caution and left it a bit low, allowing the final layers to cure
before sanding off the edges and determining exactly how much more
material, or fairing compound, was to be necessary.
|
|
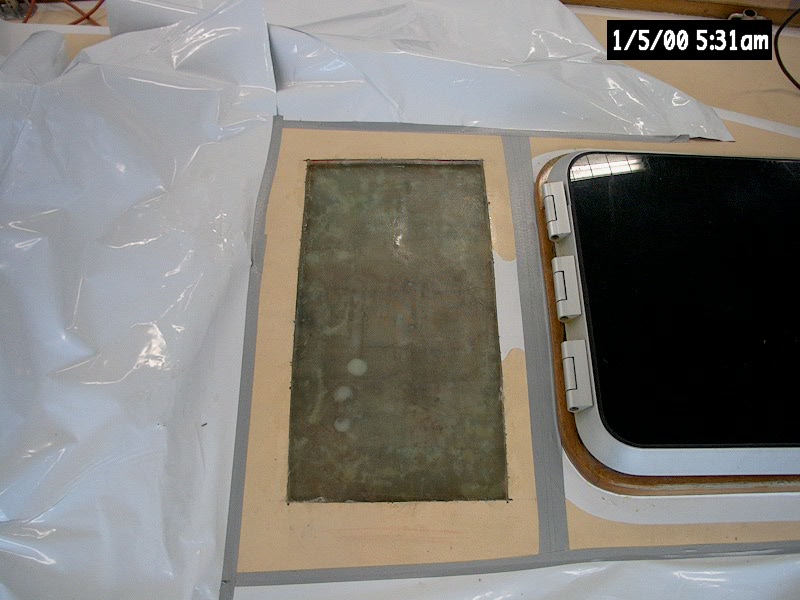
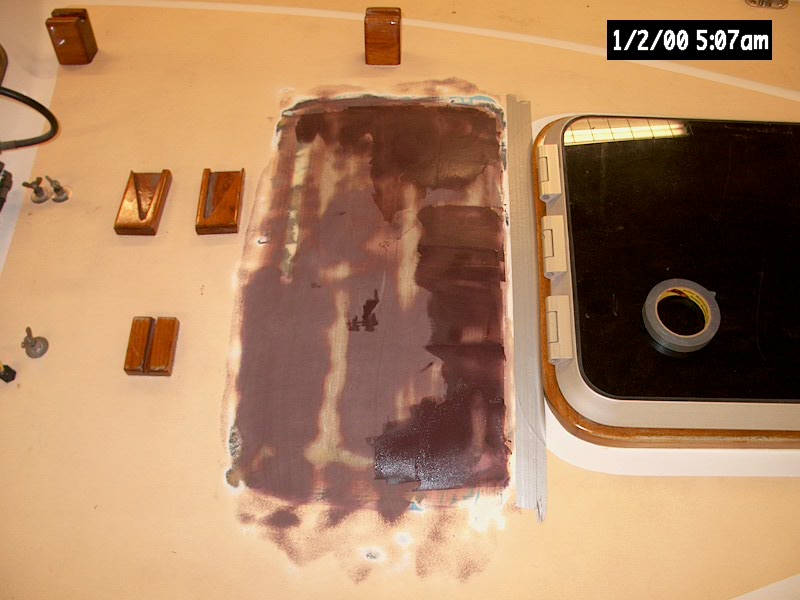
When the material was cured, I determined that the glass was built up
close enough (within 1/8") to the existing deck level--therefore,
no additional fiberglass was to be needed to fill the void, as I could
make up the small difference with structural fairing compound.
First, though, I sanded the rough edges of the patch, grinding off any
material that had spilled up over the edge during lamination.
Then, with the patch cleaned, I troweled in a coat of epoxy fairing
compound (low density filler and cabosil). To form a crown that
would match closely the surrounding, existing coachroof, I cut a
straight board to a bit wider than the patch, and used it as a screed to
smooth the putty and ensure that it was at the same level as the
surrounding deck, and at the same curvature.
|
|
 Later,
after the latest coat kicked, I washed the epoxy with water, sanded off
any high or rough spots, and troweled in a smooth coat to fill the waves
and voids caused by the screed. This made the patch smooth and
level with the surrounding deck, and when it cured the area was ready
for the final layers of fiberglass reinforcement, which would strengthen
and tie the area in with the surrounding deck. Later,
after the latest coat kicked, I washed the epoxy with water, sanded off
any high or rough spots, and troweled in a smooth coat to fill the waves
and voids caused by the screed. This made the patch smooth and
level with the surrounding deck, and when it cured the area was ready
for the final layers of fiberglass reinforcement, which would strengthen
and tie the area in with the surrounding deck.
|
|
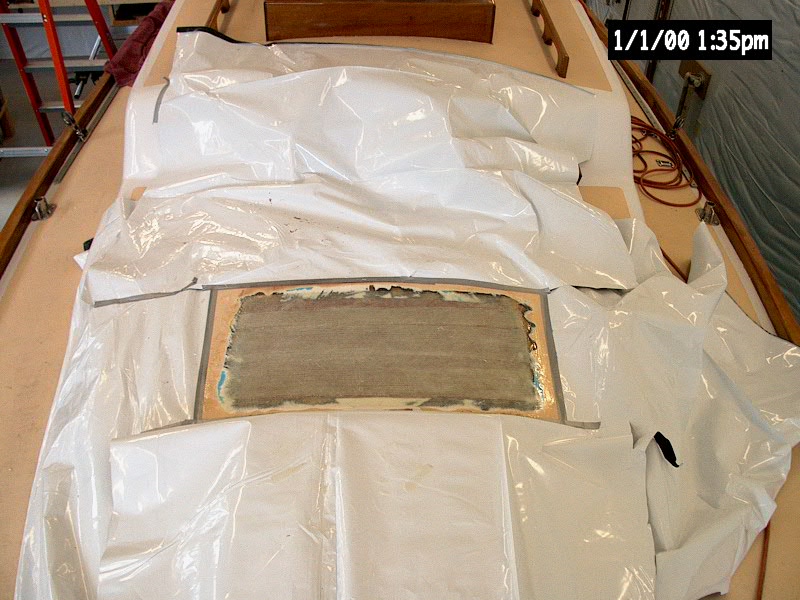
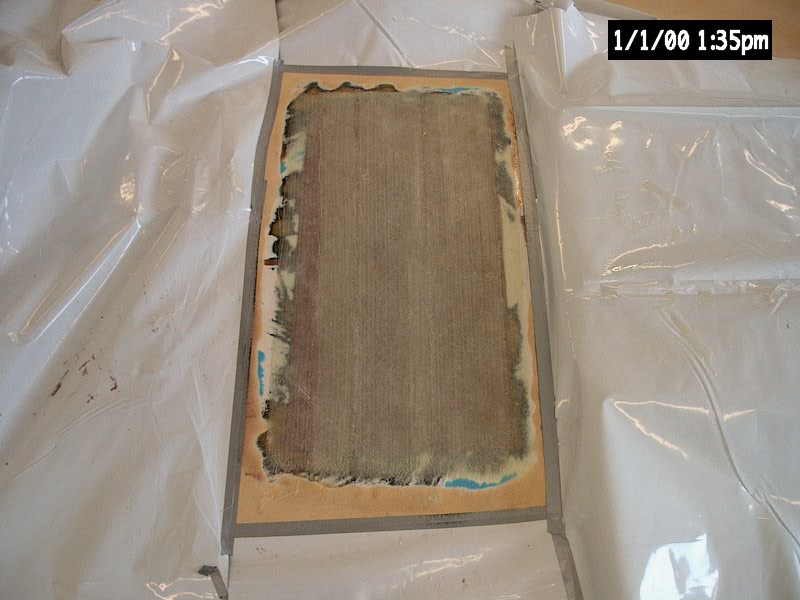
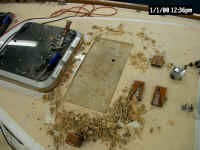
 The
next morning, I washed and sanded the patch, and ground the deck a few
inches on each side of the patch to prepare for laying in the final
layers of material. I used 17 oz. biaxial tape to
glass the area, with two layers in the area directly under the step,
laid up in epoxy resin. I left the patch to cure fully before
continuing. The
next morning, I washed and sanded the patch, and ground the deck a few
inches on each side of the patch to prepare for laying in the final
layers of material. I used 17 oz. biaxial tape to
glass the area, with two layers in the area directly under the step,
laid up in epoxy resin. I left the patch to cure fully before
continuing.
|
|
|
|
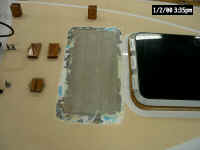 With
the new fiberglass fully cured, I prepared it for the final fairing
steps by first washing it with water (not being sure if System Three resin
blushes appreciably or not and deciding to play it safe) and then sanding
it to eliminate high and rough spots, and to widen the sanded area of the
surrounding deck a bit so that the fairing compound could fair naturally
and smoothly into those areas. The new patch sits slightly
higher than the surrounding area, which is just what I wanted. I
intended to create a sort of "power bulge" in the deck around
the mast step, which bulge would be neatly faired into the coachroof and
thus barely noticeable. I also removed the protective plastic that
had been covering the surrounding deck, since with the messy fiberglassing
complete it was no longer necessary and was becoming a hindrance. With
the new fiberglass fully cured, I prepared it for the final fairing
steps by first washing it with water (not being sure if System Three resin
blushes appreciably or not and deciding to play it safe) and then sanding
it to eliminate high and rough spots, and to widen the sanded area of the
surrounding deck a bit so that the fairing compound could fair naturally
and smoothly into those areas. The new patch sits slightly
higher than the surrounding area, which is just what I wanted. I
intended to create a sort of "power bulge" in the deck around
the mast step, which bulge would be neatly faired into the coachroof and
thus barely noticeable. I also removed the protective plastic that
had been covering the surrounding deck, since with the messy fiberglassing
complete it was no longer necessary and was becoming a hindrance.
|
|
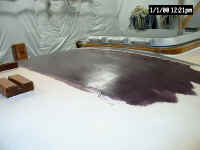
 I
mixed up way too much (as usual) of a thick epoxy fairing compound using
low-density filler and cabosil, and troweled it over the edges of the
patch and through the middle, leaving just enough in place to fill the
weave of the cloth and to fair the edges down to the deck around. I
left it to cure overnight before continuing. I
mixed up way too much (as usual) of a thick epoxy fairing compound using
low-density filler and cabosil, and troweled it over the edges of the
patch and through the middle, leaving just enough in place to fill the
weave of the cloth and to fair the edges down to the deck around. I
left it to cure overnight before continuing.
|
|
I hand sanded the hardened
fairing compound the next morning, as it was smooth enough that I saw no
need to get out a machine. It was also easier to maintain the
pleasing curve and contours of the patch with hand sandpaper on a rubber
sanding block.
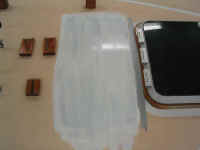
 After
cleaning off the dust, I prepared to apply what I hoped would be the final
coat of fairing compound. I used a new product for me: System
Three Quick-Fair putty, a two-part epoxy material that already contained
thickening agents and therefore only required mixing the two parts in the
proper ratio. The material was extremely smooth and creamy in
texture, unlike the coarser texture of epoxy putties made with the
traditional fillers. It's designed to cure to a sandable stage in
3-4 hours, unlike the 24 or so hours requires for epoxy. After
cleaning off the dust, I prepared to apply what I hoped would be the final
coat of fairing compound. I used a new product for me: System
Three Quick-Fair putty, a two-part epoxy material that already contained
thickening agents and therefore only required mixing the two parts in the
proper ratio. The material was extremely smooth and creamy in
texture, unlike the coarser texture of epoxy putties made with the
traditional fillers. It's designed to cure to a sandable stage in
3-4 hours, unlike the 24 or so hours requires for epoxy.
|
|
 I
applied the Quick-Fair using standard methodology, and was pleased with
the texture. After curing overnight, the material was hard and
sanded very easily and smoothly, leaving an excellent surface.
However, there were few pinholes in some of the exposed cloth (exposed
after the putty was sanded), so I mixed a small batch of the Quick-Fair
and applied it one final time, sticking only to those areas with pinholes
or other minor surface interruptions. I
applied the Quick-Fair using standard methodology, and was pleased with
the texture. After curing overnight, the material was hard and
sanded very easily and smoothly, leaving an excellent surface.
However, there were few pinholes in some of the exposed cloth (exposed
after the putty was sanded), so I mixed a small batch of the Quick-Fair
and applied it one final time, sticking only to those areas with pinholes
or other minor surface interruptions.
|
|

|
To complete the patch, I coated the fairing material with unmodified epoxy
resin, using a foam roller, and, after the material kicked, I sanded it
one final time. Then, I applied a coat of white primer as a final
preparatory step before the nonskid paint application.
|
|
|
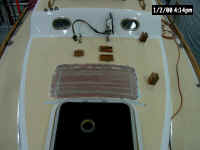
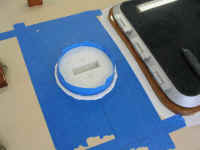 Later,
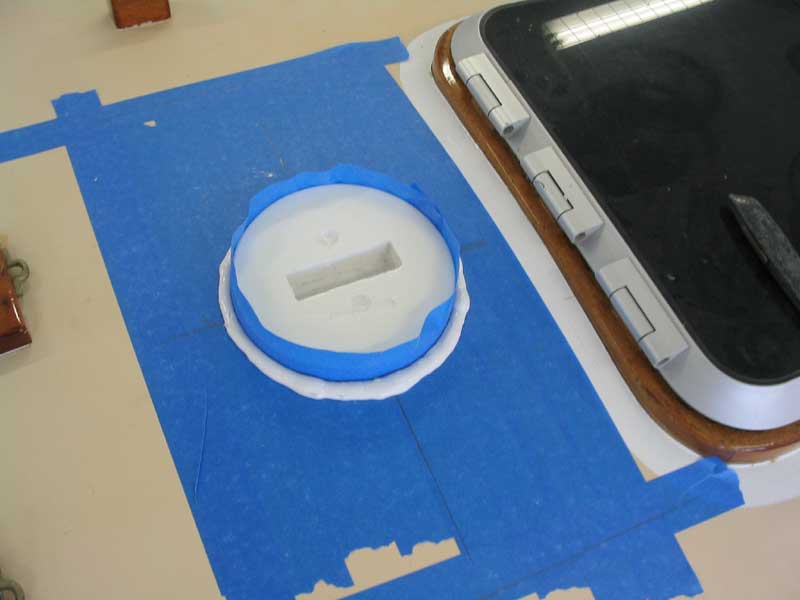
after repainting the nonskid and taking care of myriad other projects, I reinstalled the mast step in a heavy bed of 3M 101
polysulfide. As before, the step is simply screwed through the deck into the forward portion of the mast beam.
After drilling pilotholes and my usual countersink at the top, I filled each screwhole with 101, pressing the tip of the
caulking gun into the hole, and heavily caulked the entire base area of the step, the screwholes through eh step, and then,
after installing the screws, filled the remaining countersinks at the top (weather) side of the step with more
101. While the deck is now solid fiberglass in this area, I certainly wished to avoid any possibility of water
ingress into the wooden mast beam. When the caulk had cured overnight, I cut away the excess. Later,
after repainting the nonskid and taking care of myriad other projects, I reinstalled the mast step in a heavy bed of 3M 101
polysulfide. As before, the step is simply screwed through the deck into the forward portion of the mast beam.
After drilling pilotholes and my usual countersink at the top, I filled each screwhole with 101, pressing the tip of the
caulking gun into the hole, and heavily caulked the entire base area of the step, the screwholes through eh step, and then,
after installing the screws, filled the remaining countersinks at the top (weather) side of the step with more
101. While the deck is now solid fiberglass in this area, I certainly wished to avoid any possibility of water
ingress into the wooden mast beam. When the caulk had cured overnight, I cut away the excess.
Along with the deck repairs, I also built a new laminated mast beam
to support the area from beneath.
Please
click here to continue with the mast beam.
|
|