|
Mast Work
and Rigging
This page was last
updated on 15 May 2001.
|
|
Preparation
and Painting of the Mast and
Boom
With the Awlgrip painted on the deck,
and the hull painting underway, I decided it was
time to get some work done on the mast.
When the boat arrived home,
one of the first things I did was strip the mast of all halyards and standing
rigging for storage, including the jumpers, one of which was bent. I then placed it aside on a couple
sawhorses, next to the boat shed, where it was soon buried in weeds.
 Just
over a year later, I
pulled the mast from its storage place and brought it out into the yard forward
of the boat, where there is good sun and a flat area on which to work. The
first thing to do was carefully inspect the spar for any signs of damage or
other things that I hadn't noticed before--nothing unusual to report,
fortunately. Just
over a year later, I
pulled the mast from its storage place and brought it out into the yard forward
of the boat, where there is good sun and a flat area on which to work. The
first thing to do was carefully inspect the spar for any signs of damage or
other things that I hadn't noticed before--nothing unusual to report,
fortunately.
Next, I removed any hardware
that I could, including the old halyard cleats, etc. These were severely
"welded" to the spar with aluminum corrosion, but a few careful bangs
with a hammer loosened the grip, and I was able to remove all the
fittings. I also removed the masthead fitting and mast base, which was
really pretty straightforward; I had to drill out a couple of the screws, but
otherwise these pieces came right out with no difficulty--definitely one benefit
of the mast having been unstepped every winter. I removed the genoa
halyard winch and pad, the steaming light and wiring. I disturbed an ants'
nest, complete with scurrying workers and huge, lazy queen in the base of the
mast when I removed the base core; bye-bye for you. I left the tangs,
spreader bases and headstay/halyard attachment points in place.
|
|
With all the hardware removed
(it will all be replaced with new) I cleaned the mast with a strong Simple Green
solution and Scotch-Brite pad. It's amazing how much better the mast looks
after this simple cleaning. I removed years of dirt and grime, and the
mast now looks so good that I am considering forgoing the paint job, at least
for now. It's too late now (November) to do anything about painting
anyway, so I'll let the mast sit over the winter and decide in the spring what
to do. As much as I would like to have a shiny white mast to complement
the boat, I could live without the extra work at this point. If I have
time in the spring, I'll probably go forward with the mast painting.
Spring
2001 Update!
Well, mast painting is not going
to happen this season. As of this writing, on April 11, the mast is still
surrounded by more than a foot of slowly melting snow. The winter weather
hung on so long this year; all hopes of any early spring outdoor work were
dashed in March. It will be all I can do to just rerig the mast in time
when the snow melts sufficiently, so I will put off the painting until later.
Getting
the Mast on the Boat
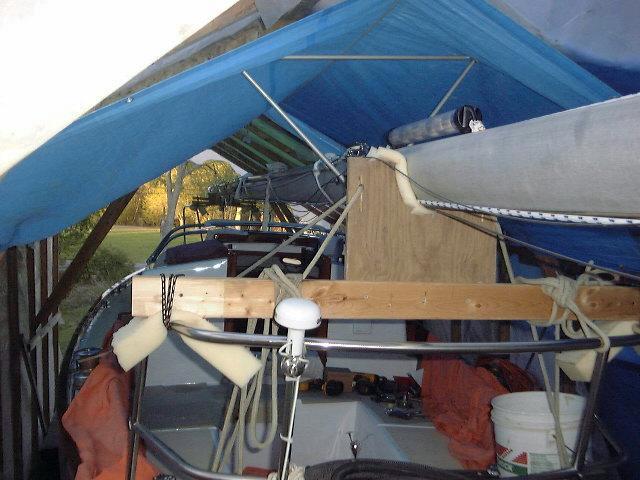
Call me crazy, idiotic, or
stubborn--but a few days before launch I got the mast back up on the boat by
myself. First, I built some simply plywood and 2x4 supports that I
attached to the bow and stern rails. Then, using my little flat dolly that
I had stored the engine on, I slowly moved the mast, a little at a time, from
out in front of the shed to alongside the boat--I had removed most of the
staging the day before, leaving only a small section at the stern on the port
side. I lifted the masthead onto this staging, and pulled the whole thing
a little more aft. Then, I lifted the other end up on to the top of my 8'
stepladder. This got it pretty much level, and parallel to the boat. I
tied the stepladder in place to hold it while I continued--I didn't want it to
tip over. Now for the fun part!
 I
wrapped the midsection of the mast in a large cloth I had around, to protect it
and the boat from damage. Then, I was able to lift the masthead (stern)
end onto the side of the aft support on the stern pulpit. This left the
mast alongside the cabin trunk, and then running over the rail to the stepladder
just outside the shed at the bow. Then, from the foredeck, I hefted the
other end of the mast up onto the boat. Done! The only thing I
damaged in my stubborn stupidity was the lens on the new masthead light--it
broke when the end of the mast bumped the shed frame at one point. I
replaced the light and the old one--with broken lens--is awaiting repair for use
as a spare. I
wrapped the midsection of the mast in a large cloth I had around, to protect it
and the boat from damage. Then, I was able to lift the masthead (stern)
end onto the side of the aft support on the stern pulpit. This left the
mast alongside the cabin trunk, and then running over the rail to the stepladder
just outside the shed at the bow. Then, from the foredeck, I hefted the
other end of the mast up onto the boat. Done! The only thing I
damaged in my stubborn stupidity was the lens on the new masthead light--it
broke when the end of the mast bumped the shed frame at one point. I
replaced the light and the old one--with broken lens--is awaiting repair for use
as a spare.
Yes, I suppose it was dumb to
lift the mast up by myself. I was ready to call it off at any time if I
determined that I was going to damage the boat or mast. However, things
went smoothly, and, although it was a struggle, I did get it done with no
negative ramifications. My wife came home from work and just shook her
head in disgust and incredulity...
|
|
 After
some adjustments to the position of the mast, padding, and turning the mast over
so that the track side was down in some grooves I had made in my supports (lined
with foam), the project was complete. I will secure the mast in several
places before the boat goes down the road. After
some adjustments to the position of the mast, padding, and turning the mast over
so that the track side was down in some grooves I had made in my supports (lined
with foam), the project was complete. I will secure the mast in several
places before the boat goes down the road.
|
|
Chainplates
During the fairing stage of the
deck recore, I pulled the four old chainplates out of the deck. #381 did
not, and does not, have the add-on forward lower shrouds and chainplates, and I
am still undecided as to whether to add any. The mast is a large section,
and, after all, it managed to make it all these years without a problem.
This is still under consideration.
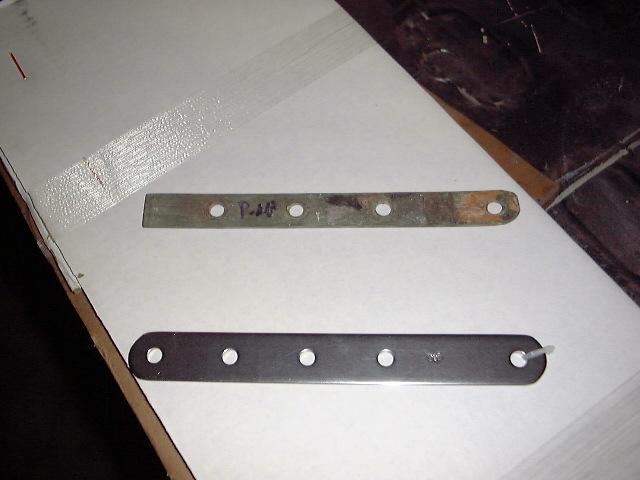 The
original bronze chainplates were in poor condition, weak with galvanic
corrosion, and replacement was necessary. The backstay chainplate had been
removed from the boat prior to my purchase, and a newer-than-original chainplate
came with the boat. It is in good condition, and I will reuse it.
The large cast bronze stem fitting is in good condition (removed from the boat)
and I intend to clean it up and reinstall it. The
original bronze chainplates were in poor condition, weak with galvanic
corrosion, and replacement was necessary. The backstay chainplate had been
removed from the boat prior to my purchase, and a newer-than-original chainplate
came with the boat. It is in good condition, and I will reuse it.
The large cast bronze stem fitting is in good condition (removed from the boat)
and I intend to clean it up and reinstall it.
The replacements are Schaefer #
84-88, 3/8" pin diameter. The plates are 1 1/4" wide; they are
much beefier than the originals, and surely stronger.
Chainplate covers, Schaefer # 84-54, will be used to cover and seal the holes,
and to trim the top of the chainplates for a cleaner look.
|
|
The first step towards
installation was to enlarge the slots in the deck left over from the old
chainplates. I used a Sawz-all to open the slots up so that the new
chainplates would fit. It was then a theoretically simple matter to insert
the new chainplate, drill the appropriate new holes, and bolt them in
place. In practice, this 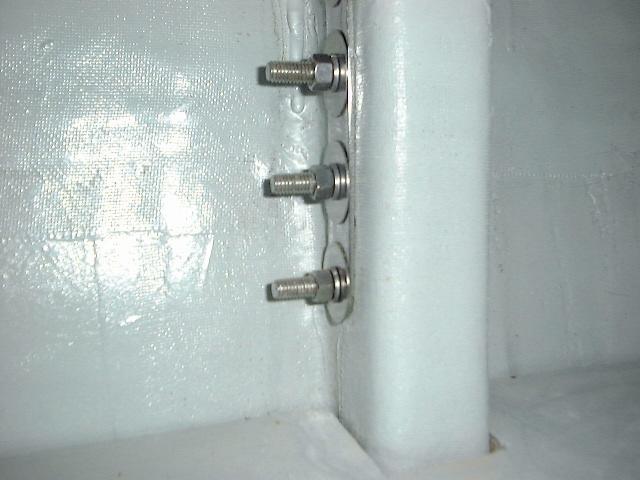 was
substantially more difficult, owing to the tight access belowdecks. I used
a right angle attachment on my drill to get in and drill the new holes, but the
spaces were still too tight in some cases, forcing the use of shorter drill
bits. For the main chainplates--the uppers--I had to drill small pilot holes
from the aft side of the locker into the vee berth, then go around and enlarge
them from the forward side, since there was not enough clearance between the
lowers' knee and the bulkhead on the aft side, even with the right angle
attachment. was
substantially more difficult, owing to the tight access belowdecks. I used
a right angle attachment on my drill to get in and drill the new holes, but the
spaces were still too tight in some cases, forcing the use of shorter drill
bits. For the main chainplates--the uppers--I had to drill small pilot holes
from the aft side of the locker into the vee berth, then go around and enlarge
them from the forward side, since there was not enough clearance between the
lowers' knee and the bulkhead on the aft side, even with the right angle
attachment.
The chainplates feature four bolt
locations, but I could only use four bolts on the port lower chainplate.
The two upper chainplates, attached to the main bulkhead, use only the top three
holes, since the fourth, lowest hole ended up aligned with the shelf and molded
support/hull stiffener in the vee berth. On the starboard side, the after
chainplate ended up partially passing through the shelf behind the old hanging
locker, and the bottom hole was inaccessible for bolting. However, three
bolts should be more than sufficient, as the old chainplates were secured with
only three bolts. Space constraints simply do not allow the use of four
bolts in 3 of 4 cases. Oh well. The bolts are 3/4" stainless
steel, secured with nuts,
locking washers, and large fender washers on each side.
|
|
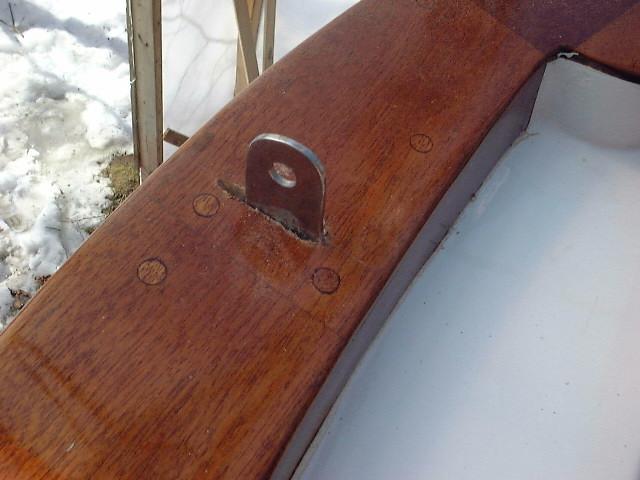
 I reused the first original hole;
the other holes are new, as the old ones did not line up. The chainplates
stick out above deck a couple inches. Cover plates are on order and will
be installed and well sealed when they arrive. I reused the first original hole;
the other holes are new, as the old ones did not line up. The chainplates
stick out above deck a couple inches. Cover plates are on order and will
be installed and well sealed when they arrive.
|
|
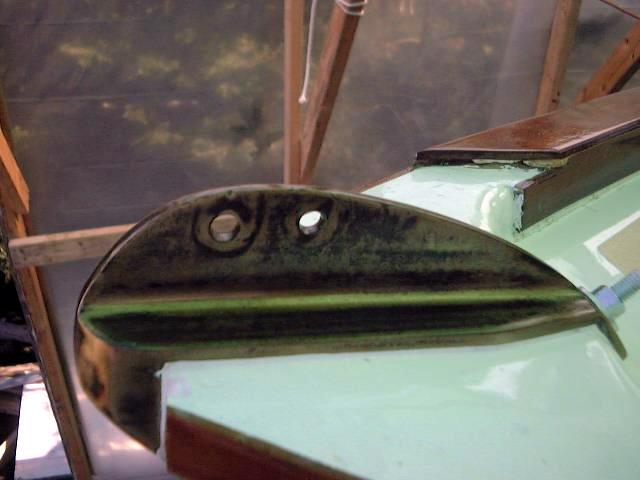
 I
reused the original (or maybe newer than that, but it came with the boat)
backstay chainplate, a piece of stainless steel cut into a boomerang-like angled
shape. First, I had to recut the slot in the taffrail from scratch.
The original had been all chewed up, and when I installed the mahogany caprail
earlier I simply epoxied over the old slot, and installed the wood across.
Now, I had to cut a new slot. This was easy enough, as I could look down
through the new lazarette hatch in the deck and, using a straightedge, visually
transfer the position of the edge of the backstay knee to the taffrail.
Then, I drilled a series of smallish holes, approximately the thickness of
the chainplate, through the rail in a slot pattern, using the drill to open up
the spaces between the closely spaced holes. Then, I opened it
further as necessary using my Sawz-all. I
reused the original (or maybe newer than that, but it came with the boat)
backstay chainplate, a piece of stainless steel cut into a boomerang-like angled
shape. First, I had to recut the slot in the taffrail from scratch.
The original had been all chewed up, and when I installed the mahogany caprail
earlier I simply epoxied over the old slot, and installed the wood across.
Now, I had to cut a new slot. This was easy enough, as I could look down
through the new lazarette hatch in the deck and, using a straightedge, visually
transfer the position of the edge of the backstay knee to the taffrail.
Then, I drilled a series of smallish holes, approximately the thickness of
the chainplate, through the rail in a slot pattern, using the drill to open up
the spaces between the closely spaced holes. Then, I opened it
further as necessary using my Sawz-all.
|
I reused the
original bronze stemhead fitting, after sanding and polishing and coating
with several coats of spray lacquer. I purchased some very expensive
3/8"x7" silicone bronze flathead machine screws to attach it, but ran
into several problems. These problems stem from the fact that I did not
remove the fitting myself--the previous owner had already removed it.
First, the topmost hole is inaccessible--to me, at least--from the 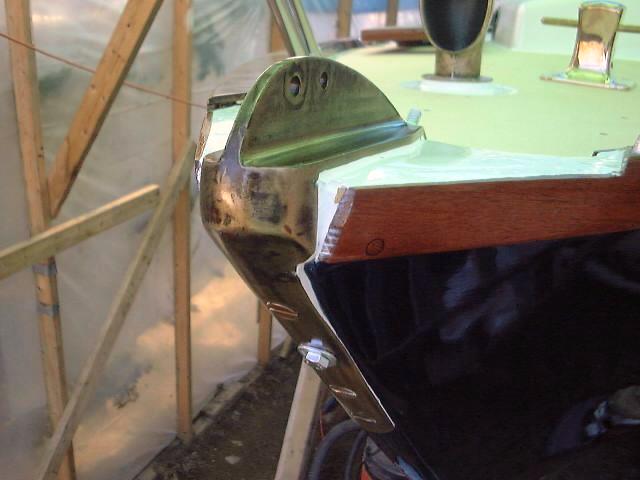 inside.
It comes through above the knee that is fiberglassed into the bow, and I could
find no way to access it to install a nut and washer. Also, the second
hole down is designed for a bolt to pass all the way through to the back side of
the stemhead that wraps over the top of the deck--I did not know this, and it
requires an 8" bolt, which I have ordered from Jamestown, as Hamilton
Marine did not have anything like that. The last two bolts worked out as
planned, although the initial ones I bought were far too short, necessitating
the move to 7" bolts. inside.
It comes through above the knee that is fiberglassed into the bow, and I could
find no way to access it to install a nut and washer. Also, the second
hole down is designed for a bolt to pass all the way through to the back side of
the stemhead that wraps over the top of the deck--I did not know this, and it
requires an 8" bolt, which I have ordered from Jamestown, as Hamilton
Marine did not have anything like that. The last two bolts worked out as
planned, although the initial ones I bought were far too short, necessitating
the move to 7" bolts. |
|
I installed the fitting in a bed
of polysulfide. After securing the lowest two through bolts, I inserted a
shorter one in the top location, in a thick bed of caulk, and taped it in
place--at least it will act as a pin. For the second bolt, since I did not
have my special-ordered  bronze
bolt yet, I installed a temporary zinc-plated bolt from the hardware store, just
to pull things into position while the sealant cured. When the new bolt
arrived in the mail a few days later, I removed the steel one and installed the
new in its stead. bronze
bolt yet, I installed a temporary zinc-plated bolt from the hardware store, just
to pull things into position while the sealant cured. When the new bolt
arrived in the mail a few days later, I removed the steel one and installed the
new in its stead.
|
|