|
Building a New
Interior
This page was last updated on 8 November 2001
Construction
of backrests and storage in the salon
| Installation
of ceilings and other hull coverings
Wood
trim and finish carpentry
| Installation
of new cabin sole
Modification
of vee berth to include drawers and storage
|
|
Main
Salon--Backrests and Storage Areas
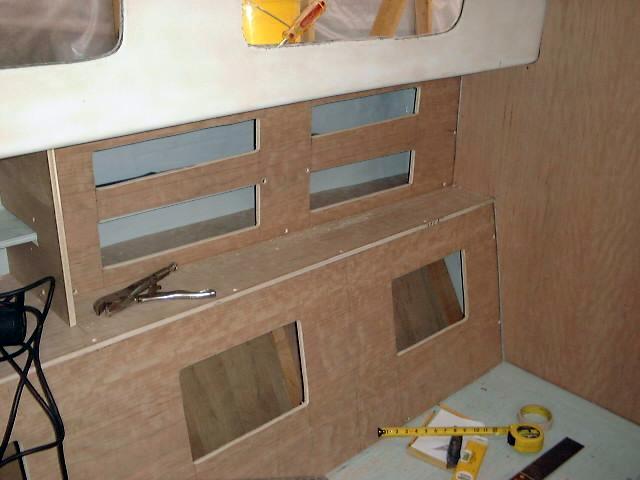
With the basics
of the new galley in place, I moved on to visualizing and installing the new backrests and the storage areas that will be
formed behind them and above. The starboard berth was shortened to
accommodate the new stove, but is still long enough to comfortably sit with feet
stretched out--essential for reading! The port berth is six feet long and
will remain so as a sea berth.
I sat on the
settee in several different directions to help figure out the proper width for
the berths/seats. 20" seemed to be about right for sitting in any
direction, and also allowed substantial storage behind, so I penciled in a
line. Then, I added lines on the surrounding vertical bulkheads, drawn at
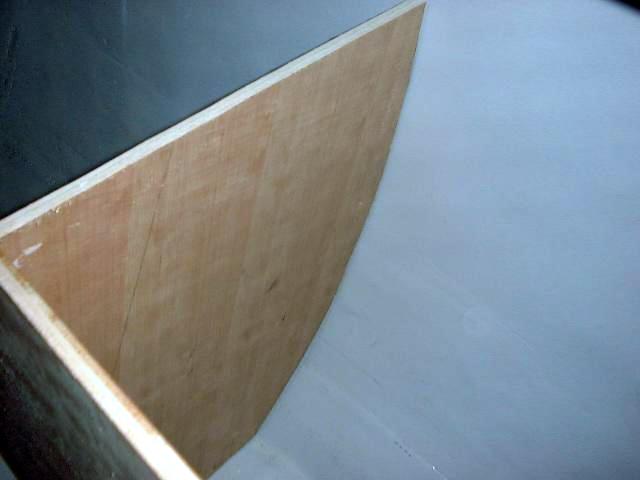
a 10 degree angle to mark the position of the backrests. After measuring, I cut
pieces of 1/2" cherry plywood to the proper length and height and loosely
installed them against cleats that I screwed in place on the bottom and sides.
|
|
|
|
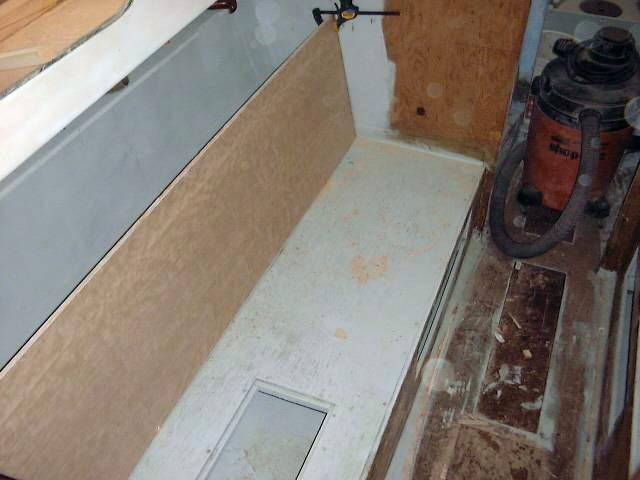
 With
the backrests cut to fit, I laid out and cut holes for the access doors, which I
eventually be covered with caned hatches later on during the building
process. I cut three openings on the port side, and two to
starboard. With this done, I laid out for mini bulkheads/dividers that
will separate the storage compartments from one another, and cut them to
fit. These were screwed to the backs of the backrests and tabbed to the
hull with a few layers of fiberglass. With
the backrests cut to fit, I laid out and cut holes for the access doors, which I
eventually be covered with caned hatches later on during the building
process. I cut three openings on the port side, and two to
starboard. With this done, I laid out for mini bulkheads/dividers that
will separate the storage compartments from one another, and cut them to
fit. These were screwed to the backs of the backrests and tabbed to the
hull with a few layers of fiberglass. I removed the paint from the hull in the area where the fiberglass was to go.
|
|
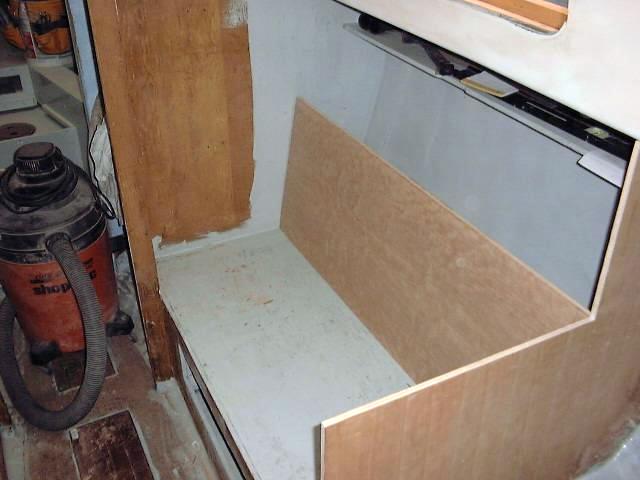
 With
these supports in place, I cut a plywood (cherry) top to fit,
scribing it to conform to the curvature and irregularities of the hull, and secure
this in place with several cleats I screwed to the insides of the existing
pieces. Then, I cut vertical cherry plywood pieces to cover the final
space between the shelf and the cabin liner, and cut some access holes which,
like the others, will be covered with hatches later. I screwed this piece to the existing shelf against the side of the hull, and to several more
cleats that I screwed in place. Later during the building process, I
plugged all the screwholes with cherry plugs that I cut in my shop. With
these supports in place, I cut a plywood (cherry) top to fit,
scribing it to conform to the curvature and irregularities of the hull, and secure
this in place with several cleats I screwed to the insides of the existing
pieces. Then, I cut vertical cherry plywood pieces to cover the final
space between the shelf and the cabin liner, and cut some access holes which,
like the others, will be covered with hatches later. I screwed this piece to the existing shelf against the side of the hull, and to several more
cleats that I screwed in place. Later during the building process, I
plugged all the screwholes with cherry plugs that I cut in my shop.
|
|
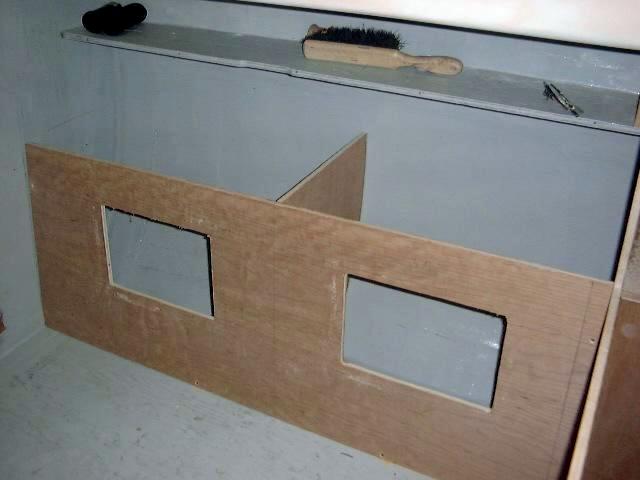
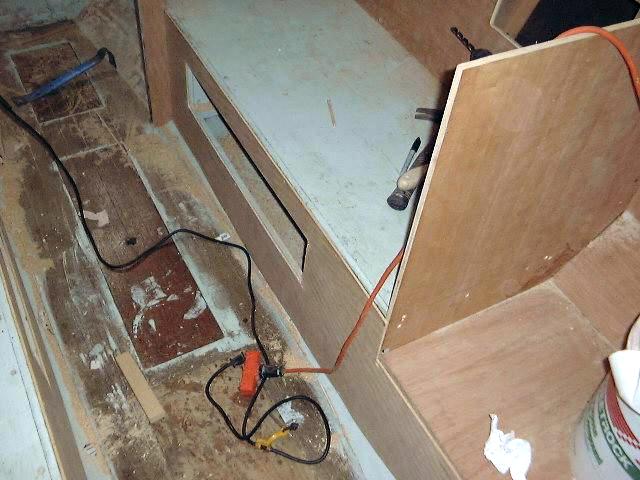
 At the after end of the port side cabinets, I
created a space that will contain a flat cherry panel, into which the new electrical panel and other related
gear was later installed. You can
see the forward side of the panel space at the left of the photo above; a
bulkhead in the galley at the forward end of the icebox provides the other side
of the enclosure. The photo to the left shows the flat panel loosely
installed awaiting finishing details. Further pictures of the panel and
the completed electrical system are available elsewhere on this site. At the after end of the port side cabinets, I
created a space that will contain a flat cherry panel, into which the new electrical panel and other related
gear was later installed. You can
see the forward side of the panel space at the left of the photo above; a
bulkhead in the galley at the forward end of the icebox provides the other side
of the enclosure. The photo to the left shows the flat panel loosely
installed awaiting finishing details. Further pictures of the panel and
the completed electrical system are available elsewhere on this site.
|
|
 Next,
I made patterns of and cut 1/4" cherry plywood for the bottom portions of
the settees, finally covering over the cheap plywood that had once been covered
with equally unattractive fake wood Formica. I made the patterns
the same way I always do, and installed the cherry ply with #6 x 5/8"
stainless steel screws along the edges. These will eventually be hidden
with trim. Once the plywood was installed, I drilled a 1/2" or so
hole in the middle of each drawer cutout, inserted a small router with a
1/4" flush trim bit (bottom bearing) and cut out these openings. The
existing drawers will be reused here, after refinishing the teak fronts. Next,
I made patterns of and cut 1/4" cherry plywood for the bottom portions of
the settees, finally covering over the cheap plywood that had once been covered
with equally unattractive fake wood Formica. I made the patterns
the same way I always do, and installed the cherry ply with #6 x 5/8"
stainless steel screws along the edges. These will eventually be hidden
with trim. Once the plywood was installed, I drilled a 1/2" or so
hole in the middle of each drawer cutout, inserted a small router with a
1/4" flush trim bit (bottom bearing) and cut out these openings. The
existing drawers will be reused here, after refinishing the teak fronts.
Work completed lately has been less
noticeable; I have milled several trim pieces for the salon, including the
fiddles for the settees and the shelves outboard of the settees (on the
backrests).
|
|
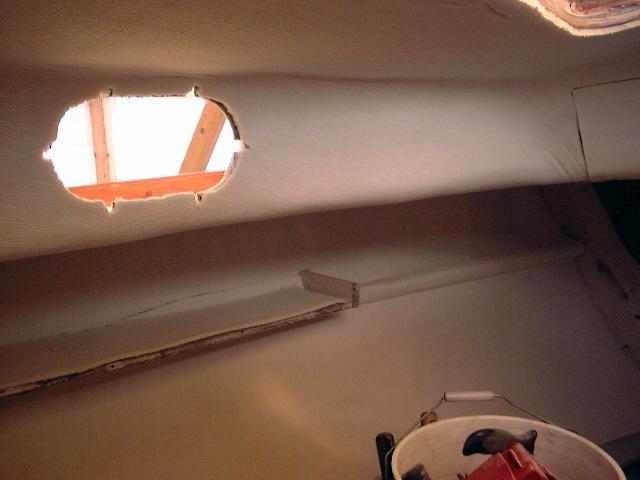
Ceilings
and Hull Coverings
A ceiling, in
nautical nomenclature, refers to a more or less vertical covering against the
side of a hull or compartment. Before completing the installation of the
cabinets in the salon, I creates a wooden liner, or ceiling, against the hull in
those areas. The purpose of this is twofold: first, it will provide
protection of the contents of the locker against condensation and second, it
will be more attractive inside the lockers.
To do this, I
first screwed cleats to the insides of the lockers, one on each side.
Remember, there are three smaller lockers on the port side, and two to
starboard. I didn't bother with conforming the ceilings with the curvature
of the hull--I lose a little storage space, but the process was much easier this
way. After attaching the cleats, I cut some 1/2" foil covered
solid foam insulation to size and laid it in place; this will also help greatly
with the condensation problem. Finally, I covered the insulation with
1/4" cherry plywood that I had in the scrap pile, screwing it to the
cleats. This provides a nice appearance to the inside of the lockers.
|
|
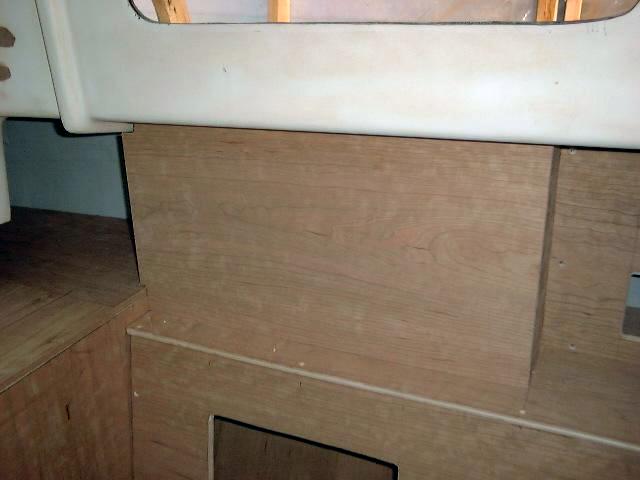
 I
also cut and installed 1/4" cherry plywood to the main bulkhead in the
salon, covering the raw plywood there--which had originally been covered with
that awful fake wood Formica. I simply made patterns of the shapes of the
bulkheads, cut the plywood to fit, and screwed it in place along its edges; the screws
will be covered with trim later. I
also cut and installed 1/4" cherry plywood to the main bulkhead in the
salon, covering the raw plywood there--which had originally been covered with
that awful fake wood Formica. I simply made patterns of the shapes of the
bulkheads, cut the plywood to fit, and screwed it in place along its edges; the screws
will be covered with trim later.
|
|
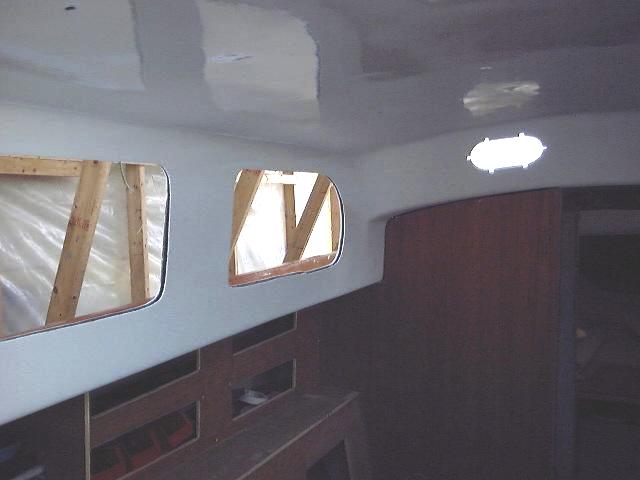
The inside of
the cabin trunk is covered with a molded fiberglass liner in the salon, but not
in the head or vee berth. The exposed fiberglass in these areas had been
painted numerous times, and was a rough and uneven surface. I decided that
painting would not provide an acceptable appearance, so we searched for an
option.
The
traditional option for the inside of the hull surfaces is a wooden ceiling,
consisting of narrow wooden slats attached in place. This is attractive,
but expensive and time consuming. Plus, while this would cover the inside
of the hull in the vee berth, the inside if the cabin trunk and overhead in the
forward cabin and head would still be raw glass. Yuck.
I decided that
a fabric liner would be the best bet--while not cheap, the cost was probably
less than wood to cover all the areas, and the time needed to install the fabric
would be much less. I ordered a foam backed marine headliner material in a
soft beige color.
UPDATE:
Because I get more requests for the source of and additional information about
the V berth liner material than just about anything else, I decided it was time
to put the exact information right here on the site. I found the material
at Boat/US (www.boatus.com).
The exact product we used is Marine Headliner/Hull Liner, Item # 172304;
pattern: Irish Tweed; Color: Light Sand. $18.49US per yard
(2002 prices). This is on page 542 of the 2002 Boat/US catalog, which I
believe you can access page-for-page on the above website. There are
several other styles and colors available, too.
The liner
fabric was installed against the hull and cabin trunk with spray adhesive.
At first, it seemed overly difficult and awkward, but I quickly found the
technique for installation, covering a small area with adhesive and pressing the
fabric in place before moving on. I covered the sides of the hull in the
vee berth, the overhead and cabin trunk, and the overhead/cabin trunk in the
head with the attractive, soft fabric. The excess at the edges was trimmed
with a sharp utility knife--the blade required changing often, as it dulls quickly
when cutting against the fiberglass. The transformation was
instant--suddenly, instead of being cold and ugly, these spaces were warm and
inviting.
UPDATE
10/2/00:
I have had
some serious trouble getting the fabric to stay stuck, however; the spray
adhesive just did not seem to do the trick. As of this writing, much of it
has come unstuck, annoyingly, and I am contemplating alternatives. I have
milled some mahogany trim pieces that I was planning to install to cover they
seams and edges of the liner, and these will surely help hold the liner in
place. Likewise, the small portholes, when reinstalled, will help. I
am unsure if this will be enough, however, and am considering using contact
cement--which will be a real pain--of possibly some sort of household
underlayment or flooring/carpet adhesive to hold the fabric in place. My
theory is that the foam backing absorbs too much of the spray adhesive (and
possibly contact cement), rendering the bond weak at best-not to mention that
ordinary spray adhesives probably aren't the best to begin with.
|
|
 To correct
this, I changed adhesives. I found a 3M product designed for installing
foam-backed headliners--3M Trim Adhesive in a spray can. I found this at
my local auto supplier. This is a contact adhesive--you spray it on both
surfaces, let it tack for a couple minutes, then mate the two pieces.
There is a little time to pull back and reposition the material if needed, but
it sticks pretty tenaciously within seconds. This stuff was great--it made
all the difference. I am confident that the liner will stay in place now.
Thanks to Mark, owner of # 516, for this tip--even though I didn't use the exact
product he recommended (3M 77, a spray adhesive--on the shelf right next to the
Trim Adhesive I bought), I might not have known about the existence of spray
contact cement otherwise. There is still some trim needed to cover a few
seams in the liner; visit the interior trim page
for details. To correct
this, I changed adhesives. I found a 3M product designed for installing
foam-backed headliners--3M Trim Adhesive in a spray can. I found this at
my local auto supplier. This is a contact adhesive--you spray it on both
surfaces, let it tack for a couple minutes, then mate the two pieces.
There is a little time to pull back and reposition the material if needed, but
it sticks pretty tenaciously within seconds. This stuff was great--it made
all the difference. I am confident that the liner will stay in place now.
Thanks to Mark, owner of # 516, for this tip--even though I didn't use the exact
product he recommended (3M 77, a spray adhesive--on the shelf right next to the
Trim Adhesive I bought), I might not have known about the existence of spray
contact cement otherwise. There is still some trim needed to cover a few
seams in the liner; visit the interior trim page
for details.
I also used
some of the same material to cover the wooden beam beneath the mast in the
head. Installation was straightforward with no problems.
|
|
 I
painted the molded salon liner with primer and two coats of Interlux Brightside
white polyurethane. Click here to see previous
prep work leading up to the painting. I
painted the molded salon liner with primer and two coats of Interlux Brightside
white polyurethane. Click here to see previous
prep work leading up to the painting.
To see finish trim details and finishing
touches, please click here.
|
|