|
The Head
This page was last updated on 11
February 2002
Installing
Formica over most head surfaces | Reinstalling
wood trim | Installing
overhead liner
Completing
vanity | Painting
| Choosing
and Installing the Marine Toilet
Holding Tank and
Associated Plumbing
|
|
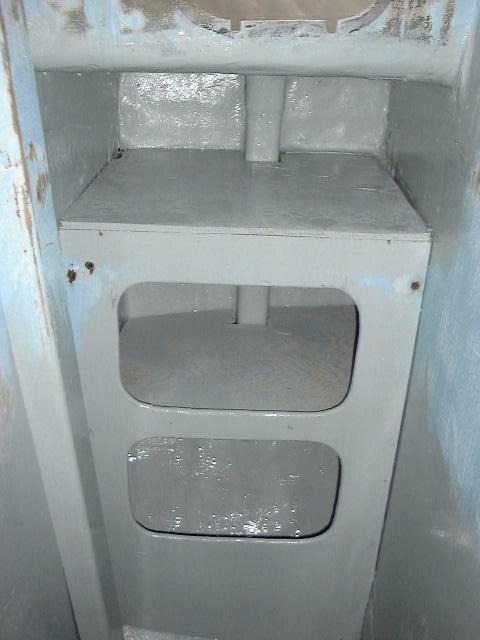 Before
moving on to the major part of the new head installation, I wanted to take care
of a few other details. The first thing to do was paint out the inside of
all the lockers in the head, before these areas became obscured or more
difficult to reach. As with everything else on board, I painted these
areas with two to three coats of Interlux Bilgekote, which is a light gray
color. There's nothing nastier than an old, dirty, rusty, moldy locker, so
the fresh paint really helped. Having these spaces painted will make them
much easier to keep clean and appropriate for storage. I painted the three
lockers immediately behind the head location to port, as well as the lockers
opposite in the old hanging locker. I also painted out the area of the
hanging locker that will become enclosed by the new vanity; the other areas of
the head will be covered with Formica or other liners later in the process. Before
moving on to the major part of the new head installation, I wanted to take care
of a few other details. The first thing to do was paint out the inside of
all the lockers in the head, before these areas became obscured or more
difficult to reach. As with everything else on board, I painted these
areas with two to three coats of Interlux Bilgekote, which is a light gray
color. There's nothing nastier than an old, dirty, rusty, moldy locker, so
the fresh paint really helped. Having these spaces painted will make them
much easier to keep clean and appropriate for storage. I painted the three
lockers immediately behind the head location to port, as well as the lockers
opposite in the old hanging locker. I also painted out the area of the
hanging locker that will become enclosed by the new vanity; the other areas of
the head will be covered with Formica or other liners later in the process.
(The areas not painted in the
photograph will later be painted or otherwise covered with our material of
choice--mostly white Formica.)
|
|
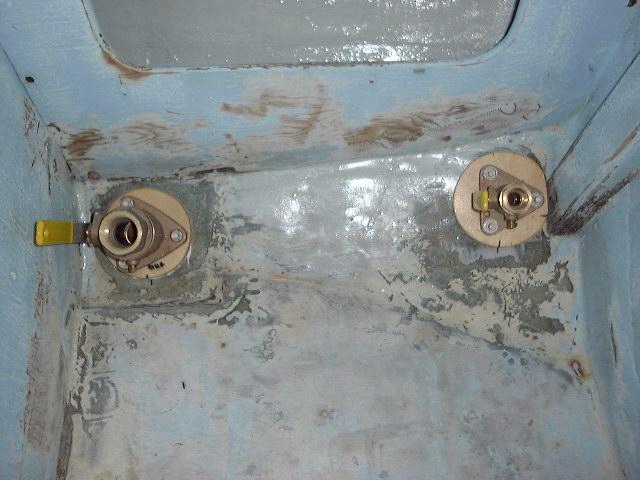 The
new head seacocks were also installed (see Seacocks
for detailed installation information). The area around the seacocks will soon
be painted. The
new head seacocks were also installed (see Seacocks
for detailed installation information). The area around the seacocks will soon
be painted.
With this done, the basis for
installation of the final coverings and systems installation is complete.
|
INSTALLING
FORMICA
The use of Formica on interior surfaces is a
good choice for boats, especially in the head, where constant moisture could
make paint a maintenance nightmare. We decided to use satin white Formica
on all possible surfaces in the head, which include the fore and aft bulkheads,
the cabinets outboard of the head and vanity, and the vanity itself.
Installing the Formica was fairly
straightforward, but time consuming and fussy. Personally, I would rather
work with wood any day, but the white surfaces do brighten up the space
considerably and there should be basically no maintenance in the future, other
than regular cleaning, which will also be facilitated by the smooth, slippery
Formica.
A few tools make the installation neater,
quicker, and I would say are almost required for any large scale
formication. These are:
-
J Roller
-
Laminate Shears
-
Laminate Trimmer or small router
 The basic process I followed was this:
first, I made newspaper patterns of the areas to be covered, using time-honored
pattern making techniques. Then, transferring the patterns to my shop, I cut
out all the pieces using the laminate trimmer and a straightedge where possible,
the laminate shears for the curves and other, smaller pieces. This
process, for most of the head area, took several hours and was kind of a pain,
as the pieces, once cut, had to be dry fitted and trimmed again as necessary (in
some cases). I then spread contact cement on the back of the laminate
pieces and on the surfaces to be covered, let dry an appropriate length of time,
and applied the pieces. I rolled them out with the J roller to firmly bond
the adhesive. The basic process I followed was this:
first, I made newspaper patterns of the areas to be covered, using time-honored
pattern making techniques. Then, transferring the patterns to my shop, I cut
out all the pieces using the laminate trimmer and a straightedge where possible,
the laminate shears for the curves and other, smaller pieces. This
process, for most of the head area, took several hours and was kind of a pain,
as the pieces, once cut, had to be dry fitted and trimmed again as necessary (in
some cases). I then spread contact cement on the back of the laminate
pieces and on the surfaces to be covered, let dry an appropriate length of time,
and applied the pieces. I rolled them out with the J roller to firmly bond
the adhesive.
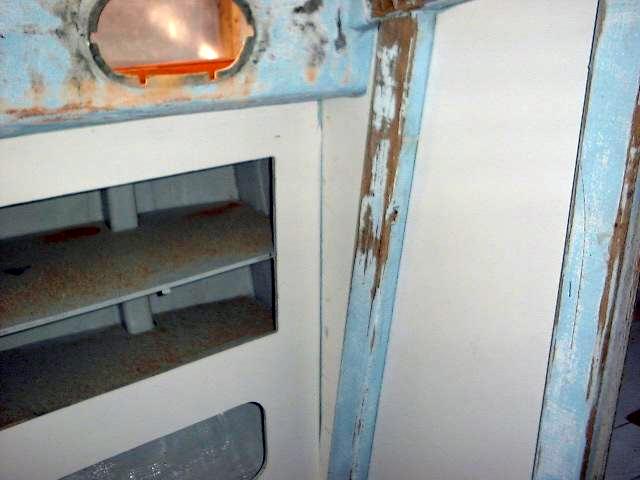
This installation was a dramatic
transformation to the head, although there are a number of trim pieces needed to
cover the gaps between various pieces. With the odd angles,
out-of-squareness and un-plumbness of the bulkheads and cabinets, it was nearly
impossible to get perfect fits, and I did not even try, as I knew trim would be
necessary anyway. I plan on using some of the old teak trim from inside
the boat, cut to the proper profile and refinished as necessary. The solid
oak bulkhead/mast step supports, seen in the photo as still light blue, will be
primed and painted white; the overhead will be covered in fabric.
|
|
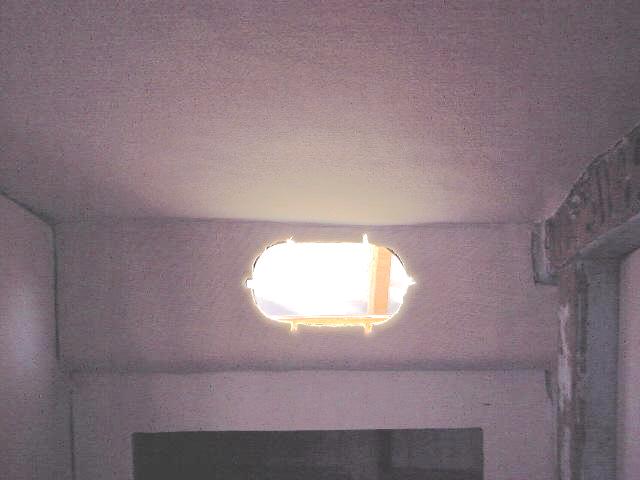 I
installed a foam-backed headliner,
the same as used in the forward cabin, on
the overhead and cabin trunk sides. I used 3M trim adhesive, a spray
contact cement, to hold the liner in place; a previous attempt using ordinary
spray adhesive failed miserably. The headliner looks nice and has the
added benefit of being slightly cushioned, for those inevitable knocks on the head
in the middle of the night. There is still some wood trim needed to cover
the edges. I
installed a foam-backed headliner,
the same as used in the forward cabin, on
the overhead and cabin trunk sides. I used 3M trim adhesive, a spray
contact cement, to hold the liner in place; a previous attempt using ordinary
spray adhesive failed miserably. The headliner looks nice and has the
added benefit of being slightly cushioned, for those inevitable knocks on the head
in the middle of the night. There is still some wood trim needed to cover
the edges.
|
|
TRIM
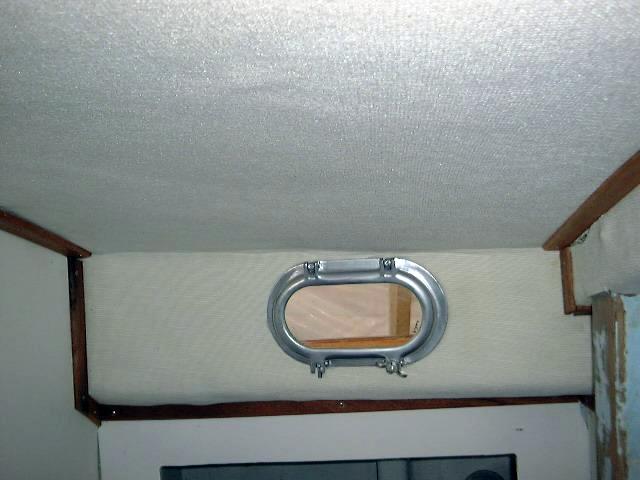 I
milled some 1/4" x 3/4" mahogany trim pieces for the head, with some
pieces rounded on both sides (for use on the seams in the headliner) and others
rounded on only one side (for use where one edge is against a flat
surface). I prefinished the pieces with tung oil. I installed these
pieces over all the edges in the head, on the overhead, cabin trunk and
elsewhere as needed. I installed the pieces with #4 x 1/2" screws and
some hot melt glue where necessary. I
milled some 1/4" x 3/4" mahogany trim pieces for the head, with some
pieces rounded on both sides (for use on the seams in the headliner) and others
rounded on only one side (for use where one edge is against a flat
surface). I prefinished the pieces with tung oil. I installed these
pieces over all the edges in the head, on the overhead, cabin trunk and
elsewhere as needed. I installed the pieces with #4 x 1/2" screws and
some hot melt glue where necessary.
I also milled
larger, solid mahogany trim pieces to cover some of the other portions of the
head, including trimming out the vanity and covering the outside corners of the
bulkheads where necessary.
The original teak
cabinet doors and frame from above the toilet platform were in good shape,
although the varnish required renewing. I sanded off the old finish and
applied three coats of Epifanes rubbed effect interior varnish.
|
|
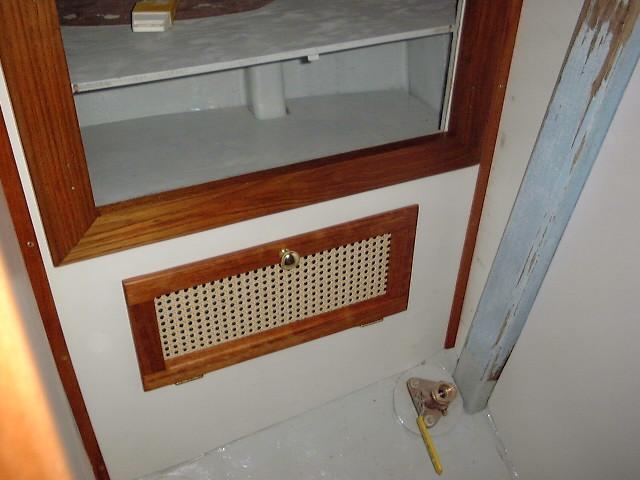
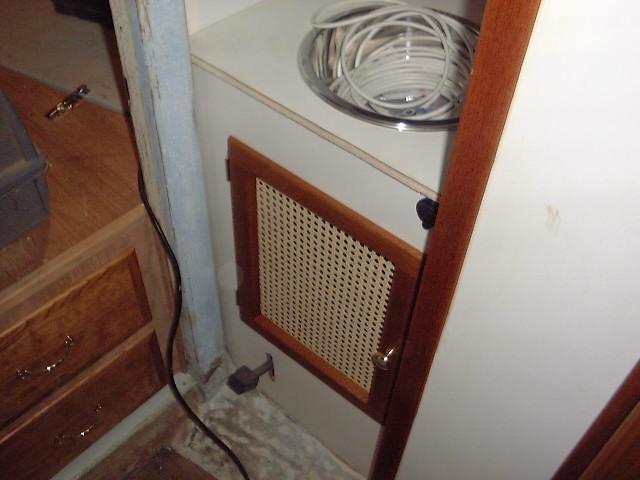
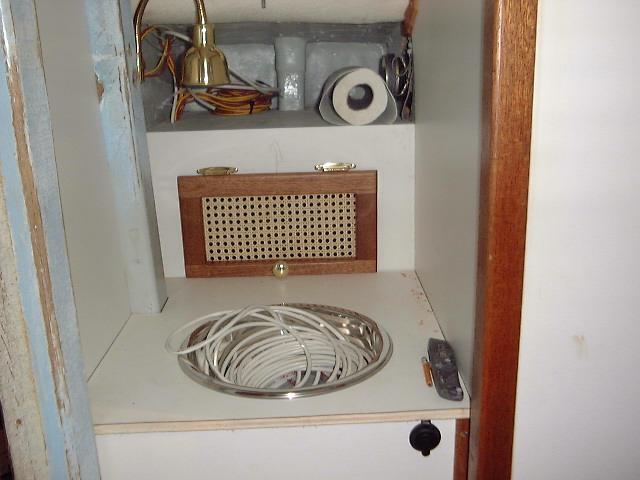
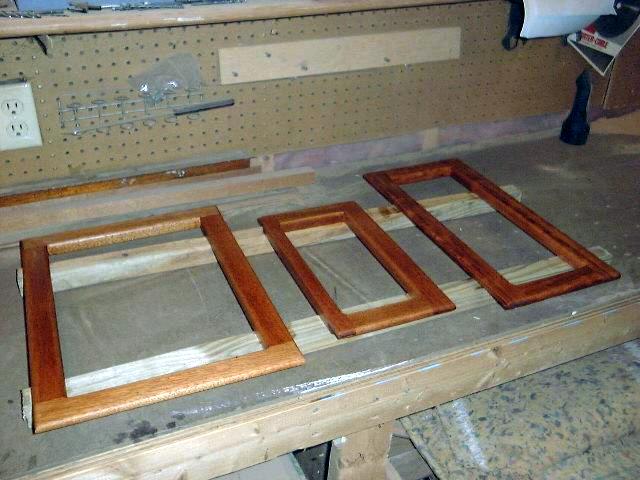 I
made three mahogany doors to cover the new opening
beneath the vanity, the opening immediately behind the toilet, and the opening
above the sink. The doors are 3/4" mahogany, joined at the corners
with half lap joinery, and milled for a 3/8" overlay. I glued the
pieces together with waterproof glue, and varnished them to match the rest of the
woodwork. Then, I installed caning as described here. I
made three mahogany doors to cover the new opening
beneath the vanity, the opening immediately behind the toilet, and the opening
above the sink. The doors are 3/4" mahogany, joined at the corners
with half lap joinery, and milled for a 3/8" overlay. I glued the
pieces together with waterproof glue, and varnished them to match the rest of the
woodwork. Then, I installed caning as described here.
I installed the
doors with 3/8" overlay brass cabinet hinges, and they are held in the
closed position with brass cabinet catches that are screwed to the doors and the
inside of the cabinets. The doors look great in place--the varnished
mahogany against the white background is a classic, elegant look.
|
|


|
|
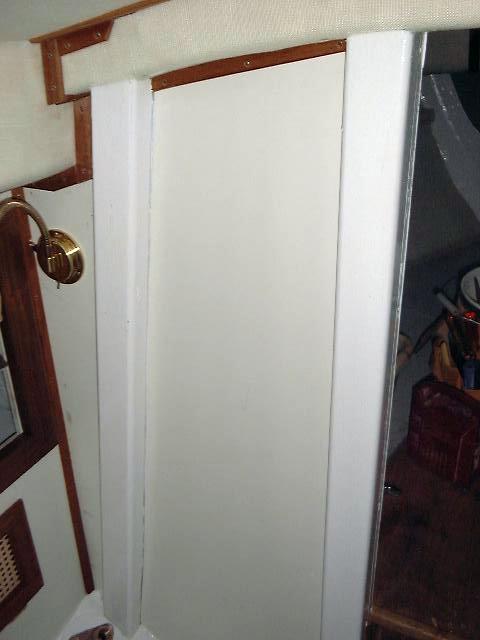
PAINTING
The support posts for the mast beam were still
the original sky-blue-awful paint, with many bare areas left from sanding.
With an improvement in the weather and warmer temperatures, the time finally
came to paint these areas, bringing the head compartment ever nearer to
completion.
 I began by masking off the surrounding areas,
including the Formica-covered bulkheads around each post and the head support
platform. I will likely be covering this platform with a teak and holly
cabin sole, but figured I might as well paint it for now--if only to hide the
ugly and old. Next, I applied a coat of Brightside primer to all surfaces
and, after allowing the primer to dry overnight, applied two coats of white
Brightside to all surfaces. What a difference! I began by masking off the surrounding areas,
including the Formica-covered bulkheads around each post and the head support
platform. I will likely be covering this platform with a teak and holly
cabin sole, but figured I might as well paint it for now--if only to hide the
ugly and old. Next, I applied a coat of Brightside primer to all surfaces
and, after allowing the primer to dry overnight, applied two coats of white
Brightside to all surfaces. What a difference!
Work remaining: Installing the marine
toilet and sanitation system, plumbing the sink, cabin sole, miscellaneous trim
details, and probably lots of other things I haven't thought of yet.
|
|