|
Repairing the Damaged Toerail
This page was last updated
on 13 November 2003.
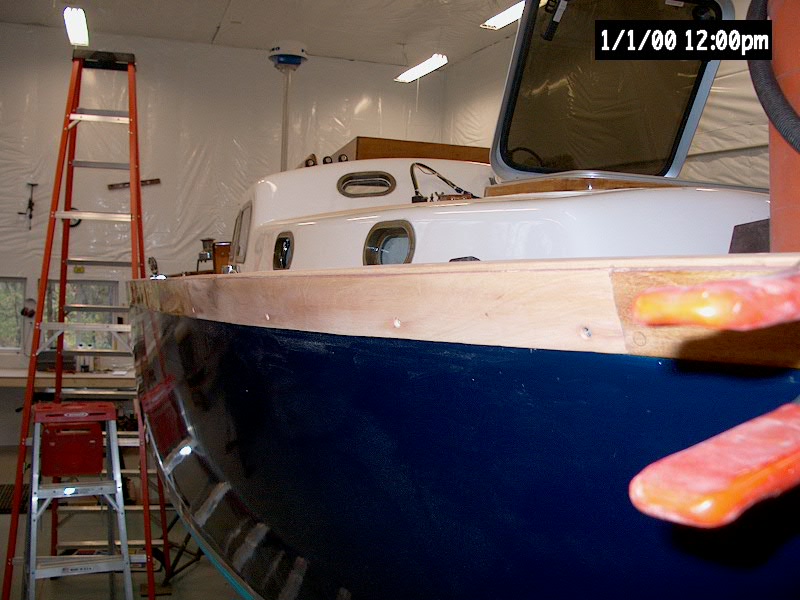
Back in June, in an unfortunate
incident, Glissando's toerail was damaged on the starboard
bow in a collision. The damage, amazingly, was quite slight, and I
made a temporary repair with caulk and duct tape that saw the boat
through the remainder of the season. Knowing at the time that the
boat would be stored inside my new boat shop for the winter, I didn't
attempt to effect "real" repairs with the boat in the water.
Later, with the boat
inside the shop, I turned my attention to the toerail. Earlier,
when removing gear from the boat, I discovered that the toerail had
leaked inside the boat beneath the damage, which I had been unaware of;
the water stain was hidden behind my stash of rolled-up charts in the
vee berth.
Click
here to refresh your memory on how the toerail is constructed.
 The
first step, after removing the old duct tape, was to cut back the wood
toerail to solid material. With three sections of wood--inside,
outside, and caprail--I chose to stagger the joints where the new
material would be added in. On the caprail, I chose two
preexisting seams from the original construction. On the inside
and outside rails, I picked random points and created new cutlines. The
first step, after removing the old duct tape, was to cut back the wood
toerail to solid material. With three sections of wood--inside,
outside, and caprail--I chose to stagger the joints where the new
material would be added in. On the caprail, I chose two
preexisting seams from the original construction. On the inside
and outside rails, I picked random points and created new cutlines.
To remove the old wood, I first scored
and cut the material where I wanted the repairs to end. I used a
small backsaw to make sharp, accurate cuts in the wood as needed on the
horizontal caprail and on one end of the inside and outside rails where
the cutline was going to be exposed by the removal of the caprail.
At the after ends of the inside and outside rails, where the caprail
would remain undisturbed, I couldn't use the saw to make the cut, so I
scored the line with a sharp knife and then chiseled out the material at
that end, before continuing with the rail removal. |
 This
shows the after cut on the caprail. I removed the wood sections
with a chisel, and found that it was not particularly difficult despite
the 5200 securing things in place. I was careful in all cases not
to cause any damage to any rail sections that were to remain in place. This
shows the after cut on the caprail. I removed the wood sections
with a chisel, and found that it was not particularly difficult despite
the 5200 securing things in place. I was careful in all cases not
to cause any damage to any rail sections that were to remain in place. |
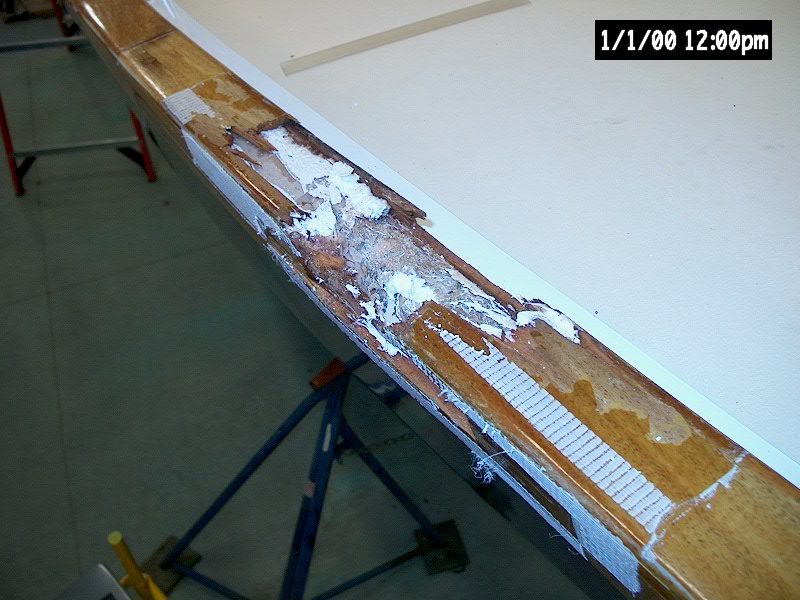
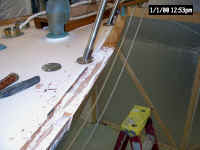
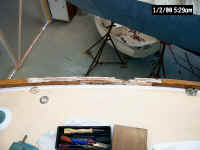
 This
photo shows some of the damage to the fiberglass toerail inside the
wooden and epoxy structure. The chisel is stuck into a splintered
gap above the tabbing securing the hull and deck together. Only a
small opening into the interior of the boat was present, so this damage,
while it looks terrible, is actually quite insignificant,
structurally. This was the point of impact, and I have cut away
and removed the worst of the splintered wood and broken epoxy from the
area. This
photo shows some of the damage to the fiberglass toerail inside the
wooden and epoxy structure. The chisel is stuck into a splintered
gap above the tabbing securing the hull and deck together. Only a
small opening into the interior of the boat was present, so this damage,
while it looks terrible, is actually quite insignificant,
structurally. This was the point of impact, and I have cut away
and removed the worst of the splintered wood and broken epoxy from the
area. |
 This
shows the forward cutline on the caprail, which was a pre-existing seam
in the original construction. I later removed the bow pulpit for
better access. This
shows the forward cutline on the caprail, which was a pre-existing seam
in the original construction. I later removed the bow pulpit for
better access. |
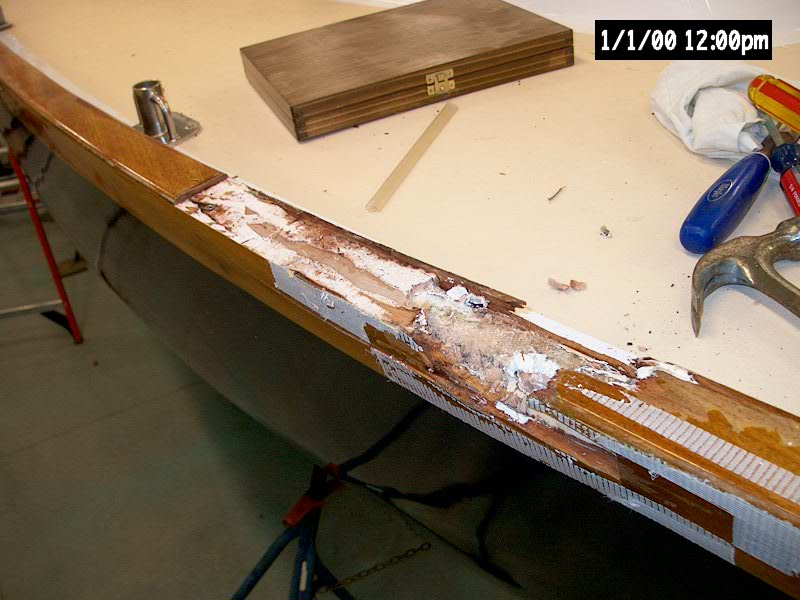
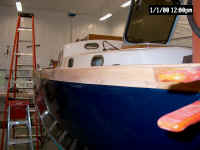
 Here
is the forward cut on the outside rail. I carefully made this cut
with a backsaw, and then carefully chiseled off the wood up to the
cutline, being very cautions not to damage the hull paint in any
way. The 5200 was tenacious in its grasp, but still succumbed
relatively easily to the chisel. Here
is the forward cut on the outside rail. I carefully made this cut
with a backsaw, and then carefully chiseled off the wood up to the
cutline, being very cautions not to damage the hull paint in any
way. The 5200 was tenacious in its grasp, but still succumbed
relatively easily to the chisel. |
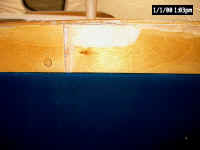 This
is the cutline at the aft end of the outside rail. I scored the
wood just forward of the screwhole, and then chiseled out the material
at that end very carefully before beginning to pry any of the wood
off. The caprail above the after part of this section will remain
in place, as the cutline for replacement is further forward on the
caprail, so I also chiseled carefully along the seam at the top edge so
as not to damage the caprail. This
is the cutline at the aft end of the outside rail. I scored the
wood just forward of the screwhole, and then chiseled out the material
at that end very carefully before beginning to pry any of the wood
off. The caprail above the after part of this section will remain
in place, as the cutline for replacement is further forward on the
caprail, so I also chiseled carefully along the seam at the top edge so
as not to damage the caprail.
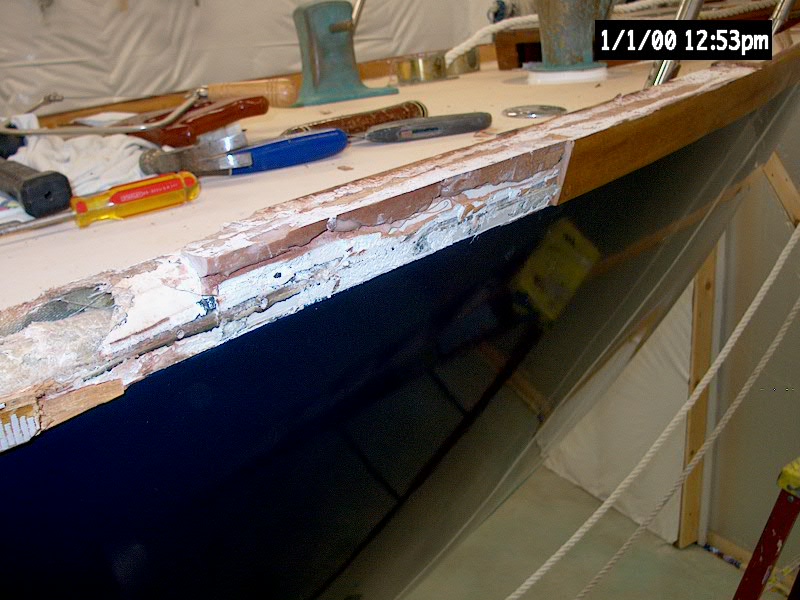
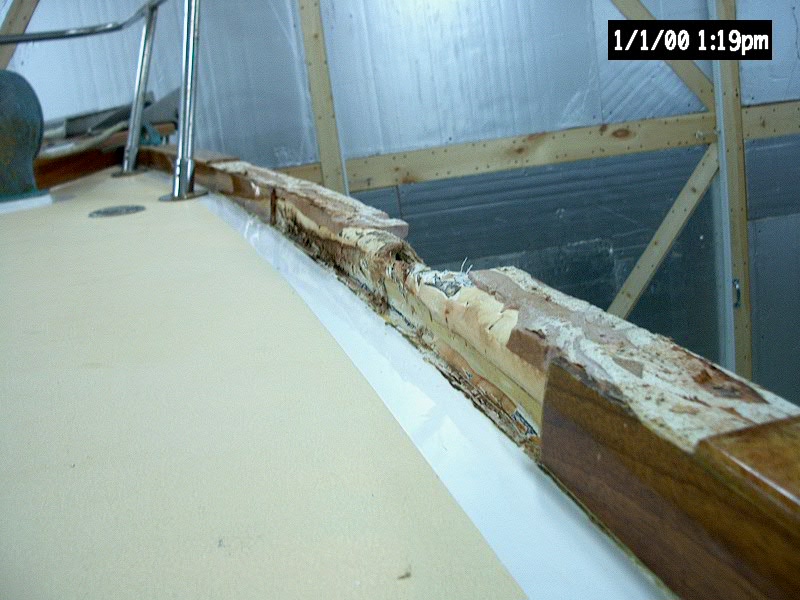
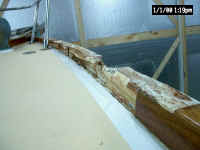
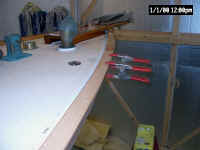
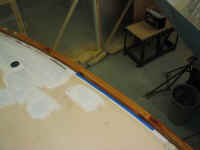
The series of photos below shows several
different views of the toerail after all broken wood was removed.
New material will later be installed after repairs are made to the
broken fiberglass in the center section, the point of
impact. |
|

|
|
|
 Along
with the damage to the toerail, the lifelines and forwardmost stanchion
received damage as well. The impact stretched the upper lifeline
substantially, to the point that taking up the turnbuckle all the way,
while leaving the lifeline just tight enough to avoid sags, did not
really provide enough adjustment in order to get the lifeline as tight
as I liked it. Also, the vinyl coating was compromised on both the
upper and lower lifelines where they had been stretched through the
stanchions during the impact. Therefore, I planned to replace both
lifelines. Along
with the damage to the toerail, the lifelines and forwardmost stanchion
received damage as well. The impact stretched the upper lifeline
substantially, to the point that taking up the turnbuckle all the way,
while leaving the lifeline just tight enough to avoid sags, did not
really provide enough adjustment in order to get the lifeline as tight
as I liked it. Also, the vinyl coating was compromised on both the
upper and lower lifelines where they had been stretched through the
stanchions during the impact. Therefore, I planned to replace both
lifelines. |
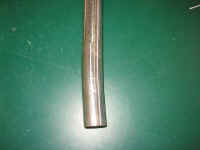 The
forwardmost stanchion was also bent very slightly where it exited its
base. It was hardly noticeable when the boat was in the water and
all rigged, but when I removed the stanchion from its base later on the
kink was obvious, and I decided to replace that single stanchion as
well. The
forwardmost stanchion was also bent very slightly where it exited its
base. It was hardly noticeable when the boat was in the water and
all rigged, but when I removed the stanchion from its base later on the
kink was obvious, and I decided to replace that single stanchion as
well. |
|
Even though the damage to
the fiberglass portion of the toerail appeared severe at first glance,
in reality the damage from a structural nature was so slight as to be
virtually negligible. The raised half-circular shape of the
original toerail is cosmetic only, and serves no real purpose--all the
more so in my modified toerail design. Beneath the cosmetic shell,
the deck was originally tabbed to the hull along its full length with
several layers of fiberglass, which was pushed partly into the void
formed by the molded toerail, but not all the way to the top.
Therefore, beneath the shattered outer portion of the old toerail, the
tabbing was nearly completely intact, with only a small void that had
allowed the leak into the vee berth below. As a result, I
determined that there were not any substantial fiberglass lamination
repairs that were required and, as with several damaged areas that
existed on the toerail that I addressed during the restoration project
several years earlier, I proceeded with repairs along a similar vein.
Had I been concerned about the integrity and strength of the surrounding
hull-deck joint, I would have made other repairs as necessary.
Repairs
were straightforward. After removing the remaining shattered
toerail fiberglass back to solid material with a chisel, I cleaned the
area with acetone and prepared to begin filling the void with
strengthened epoxy, much as I had done with the other minor toerail
repairs needed during the initial restoration three years earlier.
As I was "auditioning" epoxy brands at the time for another
boat project, I decided to use the sample kit I had received from System
Three resins. Using the materials 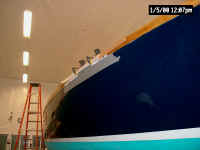 in
the kit, I mixed up an appropriate amount of resin (a 2:1 mix), and
added cabosil as a thickening agent. To strengthen the material, I
added in some so-called plastic mini fibers, a finely-ground material
resembling cornstarch. When I had the mix thick enough, I stuffed
it in to the voids around the broken area on the toerail, and build up
some thickness of epoxy. I refrained from adding too much, lest it
get too hot during curing. To prevent any epoxy from oozing out of
the repair beyond the outer edge of the toerail, I installed a temporary
length of wood as a mold, which I covered with plastic to prevent the
epoxy sticking. With the surrounding voids and edges of the
damaged area filled with the strengthened epoxy, I left the repair to
cure overnight. in
the kit, I mixed up an appropriate amount of resin (a 2:1 mix), and
added cabosil as a thickening agent. To strengthen the material, I
added in some so-called plastic mini fibers, a finely-ground material
resembling cornstarch. When I had the mix thick enough, I stuffed
it in to the voids around the broken area on the toerail, and build up
some thickness of epoxy. I refrained from adding too much, lest it
get too hot during curing. To prevent any epoxy from oozing out of
the repair beyond the outer edge of the toerail, I installed a temporary
length of wood as a mold, which I covered with plastic to prevent the
epoxy sticking. With the surrounding voids and edges of the
damaged area filled with the strengthened epoxy, I left the repair to
cure overnight. |
|
|
|
The next day, I removed
the "mold" and prepared the area for further work.
First, I washed the epoxy with water in case it formed amine blush (I
don't know offhand if System Three blushes or not), and then sanded off
the rough spots in preparation for more work.
 Next,
I began forming the inside and outside pieces of wood that make up the
toerail. The material is 1/2" thick mahogany, so my first
step was to mill some pieces to the proper thickness out of some rough
boards I had. Getting the exterior rail just right took some time,
but eventually I fit a piece in nicely. The curvature and flare of
the hull in this area is, as it happens, some of the most extreme on the
entire boat, so the job was made more difficult as a result. In
the end, I decided it would be easier to let the top edge of the
exterior rail run high, and to trim it off later. Next,
I began forming the inside and outside pieces of wood that make up the
toerail. The material is 1/2" thick mahogany, so my first
step was to mill some pieces to the proper thickness out of some rough
boards I had. Getting the exterior rail just right took some time,
but eventually I fit a piece in nicely. The curvature and flare of
the hull in this area is, as it happens, some of the most extreme on the
entire boat, so the job was made more difficult as a result. In
the end, I decided it would be easier to let the top edge of the
exterior rail run high, and to trim it off later.
|
|
The inside rail was easier to size, and soon I had both pieces ready for
permanent installation. The idea was to install the inner and
outer rails, let the adhesive cure, and then trim the top edges as
needed before proceeding with the epoxy fill and caprail.
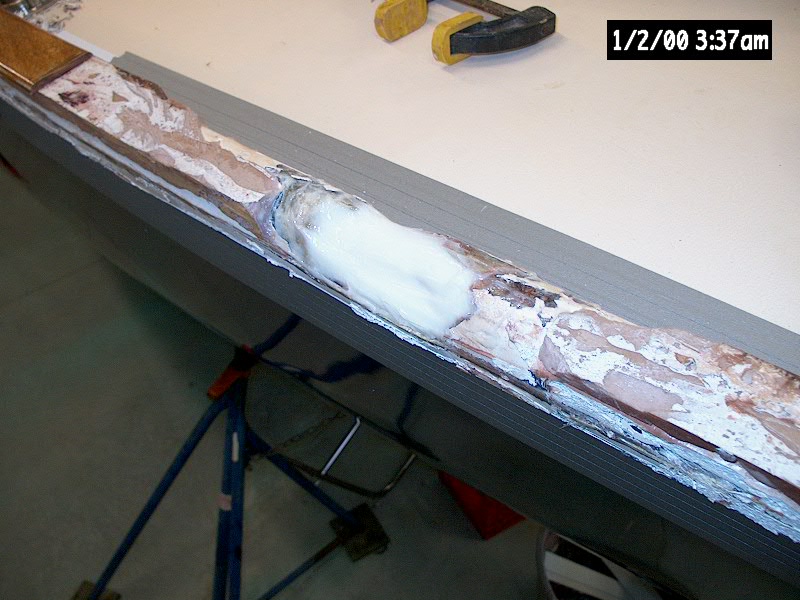
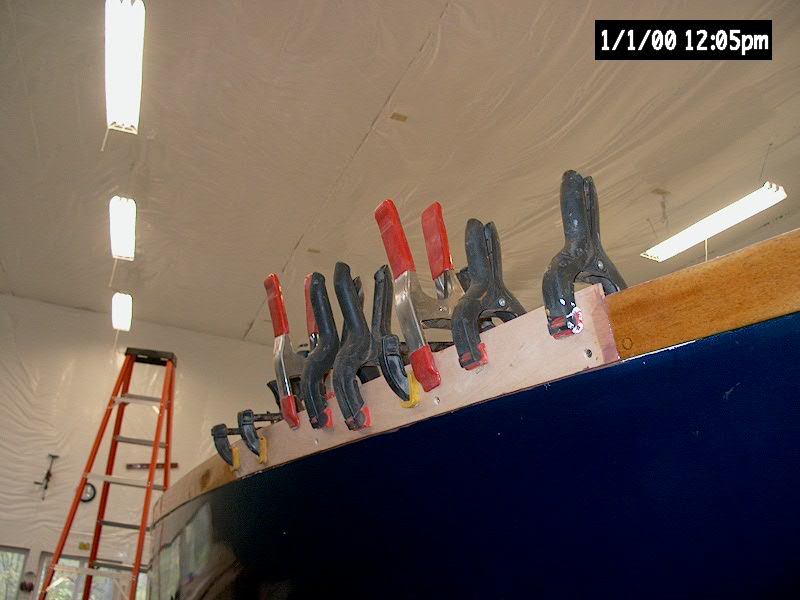
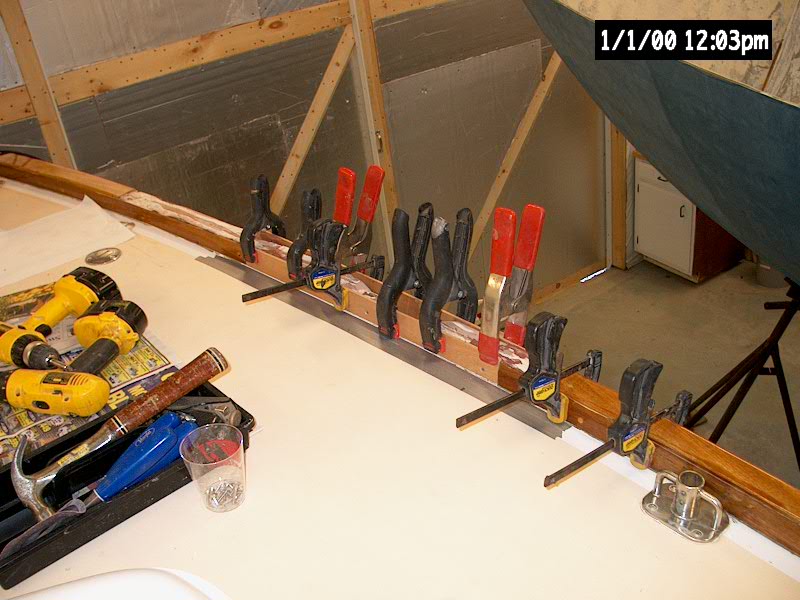
 I
installed the rails in a bed of polyurethane adhesive--I happened to
have a tube of Sikaflex 240 in a mahogany color on hand, so I used
that. During the dry fit, I had installed and countersunk the
necessary screws, so once the Sikaflex was applied I secured the boards
with screws. To help hold the top edge in tightly to the adhesive,
I installed several clamps as well, and left the arrangement to cure
before proceeding. Late in the day, I found that the adhesive was
cured enough for me to fill the deepest void between the rails (right
where the point of impact had been) with some more thickened epoxy, so
that the next day I could fill the whole void flush and be done with it. I
installed the rails in a bed of polyurethane adhesive--I happened to
have a tube of Sikaflex 240 in a mahogany color on hand, so I used
that. During the dry fit, I had installed and countersunk the
necessary screws, so once the Sikaflex was applied I secured the boards
with screws. To help hold the top edge in tightly to the adhesive,
I installed several clamps as well, and left the arrangement to cure
before proceeding. Late in the day, I found that the adhesive was
cured enough for me to fill the deepest void between the rails (right
where the point of impact had been) with some more thickened epoxy, so
that the next day I could fill the whole void flush and be done with it.
|
|

|
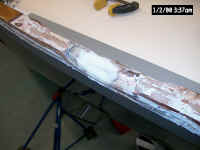
 First
thing the next day, I trimmed the
inner and outer rails down to the proper height with a hand plane, then
mixed a batch of epoxy and applied it to the remaining void, filling the
area flush with the rails. I left this to cure for a while and
worked on other projects in the meantime. First
thing the next day, I trimmed the
inner and outer rails down to the proper height with a hand plane, then
mixed a batch of epoxy and applied it to the remaining void, filling the
area flush with the rails. I left this to cure for a while and
worked on other projects in the meantime.
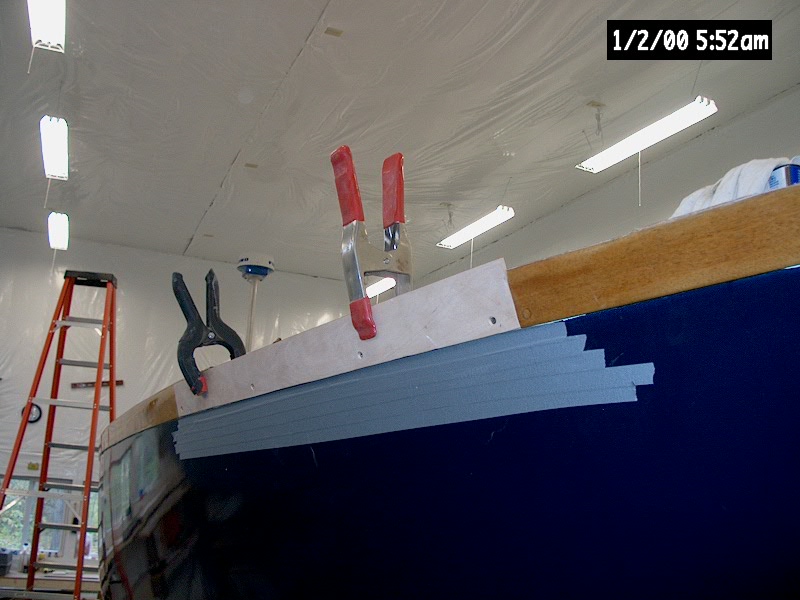
When the epoxy had cured sufficiently, I
installed the top rail. Using a piece of wood wider than that
needed, I dry fitted it first to get the length right and match the
angles of the cuts at either end, and to ensure that the top piece
overhung the inner and outer rails (to be trimmed later). Then, I
installed the caprail permanently in a heavy bed of the Sikaflex, using
some clamps to help pull the piece tightly into the adhesive. I
trimmed the piece to the proper width with a combination of a hand plane
(on the outer edge) and a router with a straight pattern bit, on the
concave inner edge. Then, with the adhesive cleaned up, I did some
preliminary sanding to contour the edges to match the surrounding,
existing toerail. |
|
|
|
 After
a few weeks working on other things, I wrapped up work on the
toerail repair by plugging the screw holes with mahogany plugs set in
resorcinol glue, and then sanded the whole area again before applying a
sealer coat of varnish to the new wood. There remained plenty of
varnish work to be completed on the new toerail--as well as the
surrounding areas--but there was the whole winter for that. With a
couple coats of varnish over the new wood, I no longer had to worry
about fingerprints or stains, and could work about the new area without
concern. After
a few weeks working on other things, I wrapped up work on the
toerail repair by plugging the screw holes with mahogany plugs set in
resorcinol glue, and then sanded the whole area again before applying a
sealer coat of varnish to the new wood. There remained plenty of
varnish work to be completed on the new toerail--as well as the
surrounding areas--but there was the whole winter for that. With a
couple coats of varnish over the new wood, I no longer had to worry
about fingerprints or stains, and could work about the new area without
concern.
|
|