MAINTENANCE LOG 2003
(And a little of 2002) |
|
I will use this page to cover
some of the general maintenance and small projects I do on the boat that are too
small to justify their own pages on the site. Most of these items
are either small upgrades or routine maintenance. Where a project
requires more description and detail, you'll find a link leading to that project
page.
To read the log sequentially,
click here to go to the bottom.
|
|
Date |
Maintenance/Projects
Underway |
|
12/31/04 |
Please click here to continue to the 2004 maintenance log.
|
|
12/29/03 |
 I had hoped to get more done during Christmas week, but it just didn't happen. I managed
to get some varnish on a few parts of the boat during the week, but holiday commitments ate up much of the time.
Needless to say, I was anxious to get back to work and wrap up the myriad projects I had going. I had hoped to get more done during Christmas week, but it just didn't happen. I managed
to get some varnish on a few parts of the boat during the week, but holiday commitments ate up much of the time.
Needless to say, I was anxious to get back to work and wrap up the myriad projects I had going.
I spent the day removing masking tape from the varnish work, as I was done with that--for
now, at least. Time to move on to bigger and better things. I began reinstalling the deck hardware that I had
removed for the deck projects earlier, beginning with the new instrument
panel surround in the cockpit. As of this writing, I have all the stanchion bases reinstalled, the chain
hawsepipes forward, and some other pieces. I still need to reinstall the mooring bit, anchor platform, and bow
pulpit, which I plan to do immediately. All hardware is bedded in 3M 101 polysulfide. Tomorrow or later,
depending on the cure time, I'll go back and cut away the excess squeezeout and remove the masking tape from around the
hardware that I installed to protect the decks and hardware from the sealant.
I purchased a new aluminum cockpit access hatch
and intended to enlarge the cutout in the sole to accommodate it, but I dropped my saw to the concrete floor, ruining
it. I ordered a new one, but there will be a slight delay before I can get back to work. I decided to order
the saw and wait for it rather than head out to pick one up, since my time is better spent working on the boat--and
there's plenty to do.
I expect to make much progress this week, so check back.
|
|
12/17/03 |
With the new nonskid
on the deck complete, all major structural repairs over with, and
at a time of year when time may be as hard to come by as any (holiday
season, of course), I proceeded to begin applying a number of coats of
varnish to the toerail and new rubrail, as well as some other areas,
including the cockpit coamings, companionway, handrails, and sea hood.
In addition, I prepared to get a coat or
two of paint on the v-berth plywood, which is usually hidden during the
season by the cushions. Originally, I had applied several coats of
gray bilgekote to this area, but it became somewhat scarred and dirty
during the completion of the original restoration project. Adding
new coats at that time was one of those things that went by the wayside,
as such things are wont to do, but with a full winter inside I found I
was able to address numerous projects that had been put off and
neglected during past winters.
I also began seriously considering the
installation of some forward chainplate knees, which I had been wanting
to add for some time (and often wished I had just added from the
onset--20/20 hindsight). In addition, I started to look at finally
replacing the plastic cockpit sole hatch, now that I had removed it for
the deck painting project.
I'm having trouble believing how much
work has been required on the boat this season. OK, perhaps it's
not required, per se, but with a conducive work environment it
sure is easy to keep finding upgrade projects that help tie up the loose
ends from earlier years. I manage to feel under pressure to
complete the jobs in short order, as I hoped to begin work on my other
project, the Triton Daysailor, in earnest after the new year. By
forming these admittedly artificial deadlines, I manage to keep pushing
and keep the various projects moving along, which I find is critical to
the ultimate and timely success of any given project.
With the decks all painted, I can now
turn my attention to reinstalling the deck hardware that I removed,
including the bow pulpit and anchor platform. You all know how I
go about this sort of installation, so I beg forgiveness if I don't
actually write a detailed account of this routine procedure. We'll
see how it goes, I guess.
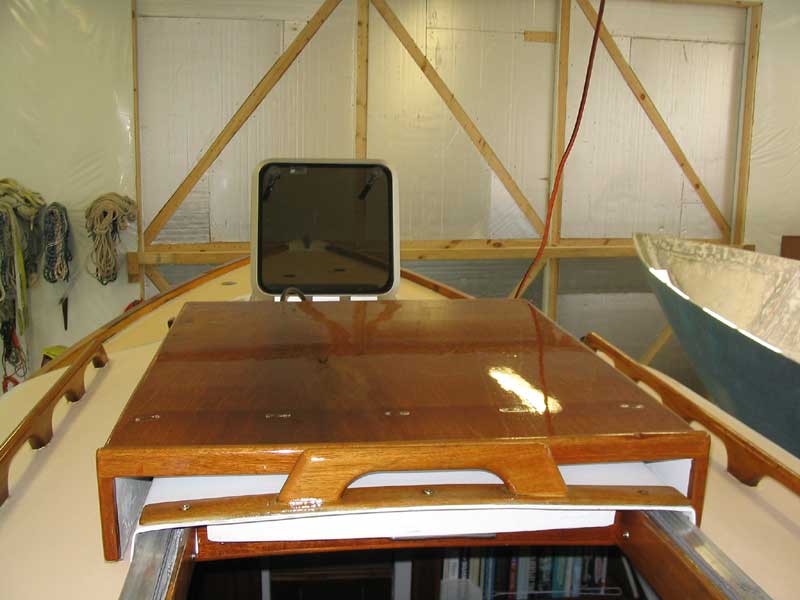
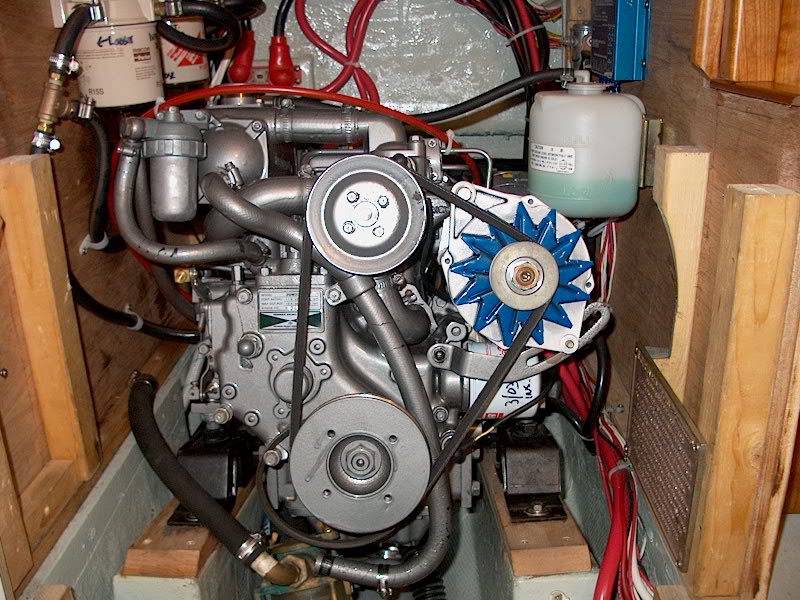
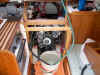
The new engine instrument surround is
complete, for all intents and purposes, and I'll install it when I get
into the deck hardware installation, so that once I have a tube of 101
started I can seal the surround in place. I'll post more details
on the completed surround when appropriate.
See
the new surround here.
The work continues, in a general frenzy
of activity. More to come soon.
|
|
10/29/03 |
I continued work on the foredeck
and mast step repairs, after completing the toerail
repair last week. I removed the mast beam.
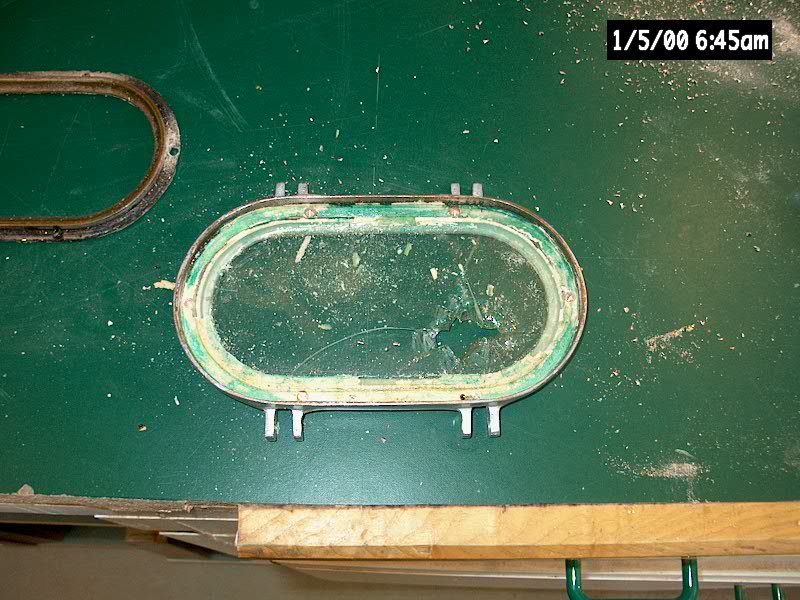
 I
managed to break the glass in one of the head ports while removing the
mast beam, so I removed the hinged portion of the port and disassembled
it to remove the glazing. I had to drill out the screws holding
the glass in place, since long-term soaking with PB Blaster failed to
loosen their grip. I'll take the broken glass to a glass shop to
replace it in kind with tempered glass. I
managed to break the glass in one of the head ports while removing the
mast beam, so I removed the hinged portion of the port and disassembled
it to remove the glazing. I had to drill out the screws holding
the glass in place, since long-term soaking with PB Blaster failed to
loosen their grip. I'll take the broken glass to a glass shop to
replace it in kind with tempered glass.
I performed some lubrication and
maintenance on the forward hatch, which had become extremely
stiff. PB Blaster on the hinges and loosening (with great effort)
the hinge bolts seemed to take care of it for now.
I removed the cockpit coamings for
storage and eventual refinishing. I also removed some pieces of
deck hardware in preparation for painting the nonskid.
I began research into what I would need
for new cockpit scuppers. Details on that are coming soon, once
the other major projects are out of the way.
|
| 10/18/03 |
With the boat comfortably located inside the
new boat
shop, I began several projects that I had been planning ahead for
all summer.
Firstly, I took care of winterizing the
engine and changing the oil. Winterizing might not be strictly
necessary inside the heated shop, but I felt it was a prudent thing to
do anyway; plus, the antifreeze acts as a corrosion preventative during
the long layup.
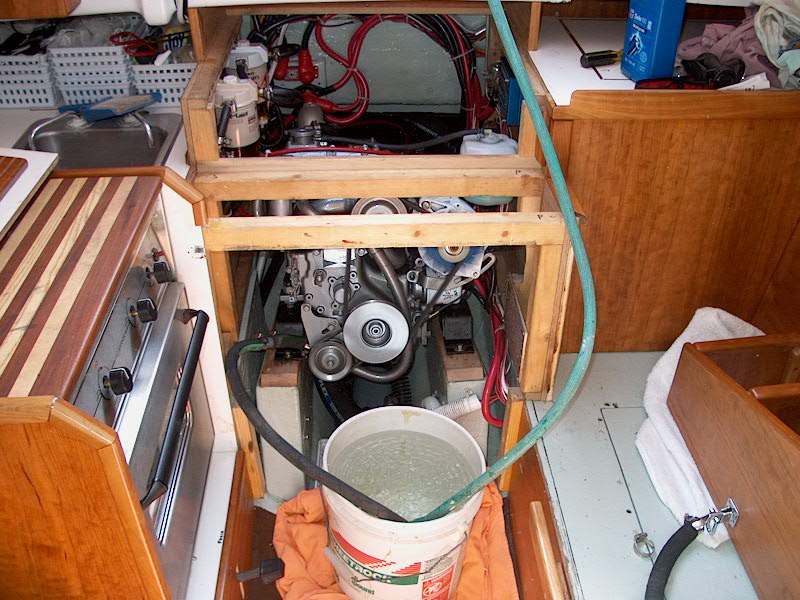
Since the boat was inside a building,
running the engine for winterizing took a bit of forethought and some
ingenuity in order to see to it that the exhaust and water discharge
would be taken care of. Click
here to read more detail about what I did.
I also drained the water system and dried
out the bilge. I didn't bother winterizing the water system this
year, since I felt comfortable that I had most of the water purged
anyway, and the boat is never expected to be subjected to anything close
to freezing temperatures.
Two more significant projects that I
began this week include starting the repairs to the damaged
starboard toerail, which was impacted during a collision earlier in
the season. The first step in the repair was to cut back the rail
to solid material. Read
more about this project by following this link.
The toerail project and a need to repair
some of the core on the foredeck (unrelated to the toerail incident)
necessitated the removal of the bow pulpit. I also removed all the
lifelines and stanchions for their annual inspection, and to make
various jobs on the boat easier.
Read
more about foredeck repairs here.
Over the course of the season, I had
become concerned about the mast beam and mast step. It seemed to
me that the turnbuckles were definitely tightened more than they had
been three years ago. Plus, I knew I had had a small leak through
the wire chase near the mast (which I rebedded earlier in the season),
but didn't know how much, if any, damage might have been done.
With the boat at home, I removed the wire chase and the mast step for
inspection and, as it turns out, the beginning of a mast step
reinforcement project. The mast beam looks the same as it ever
did, so I don't think I'll have to do any major work on that
front.
Click
here to read more about this project.
|
|
10/8/03 |
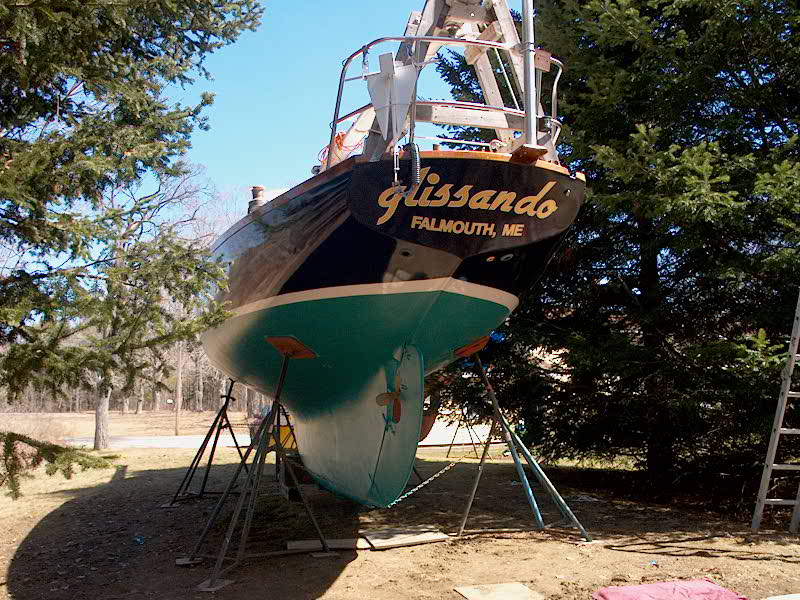
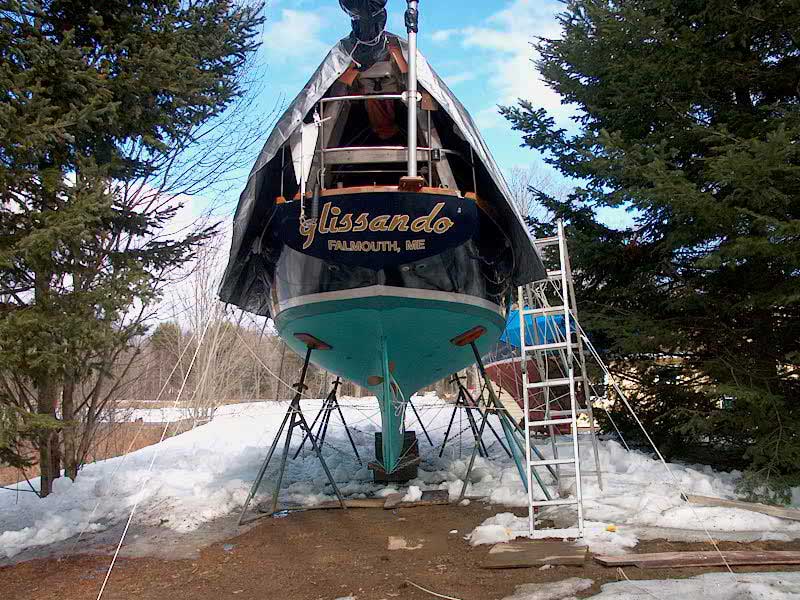
Haulout for the season! Although I
was, as always, sad to see the season come to an end, it was time.
There reaches a point each year where it becomes a relief to get the
boat home and move on to other pursuits.
Read a brief account of the mast
unstepping and haulout here.
|
|
8/14/03 |
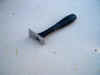
During a spirited sail, I
noticed that the tiller was coming apart beneath my hands. Screws
holding the tiller extension housing, which is a metal piece drilled
into the depths of the tiller, had created a longitudinal split that
opened alarmingly when I pulled on the extension.
Read more about the damage and a quick
repair here.
|
|
6/16/03 |
I revamped the outhaul system so that I
could adjust it from the cockpit.
Read more about it here.
|
|
5/18/03 |
OK, so the previous two
entries weren't really maintenance.
This week, following
launch, I took care of some minor early-season maintenance items, such
as testing the propane system for leaks (both by the usual pressure drop
test and with soapy water on all the connections)--all was OK. I
also finished up the mast wiring hookups, and finished squaring away
things on deck and below.
We have a new outboard
motor for the dinghy. Read
more about it here.
|
|
5/14/03 |
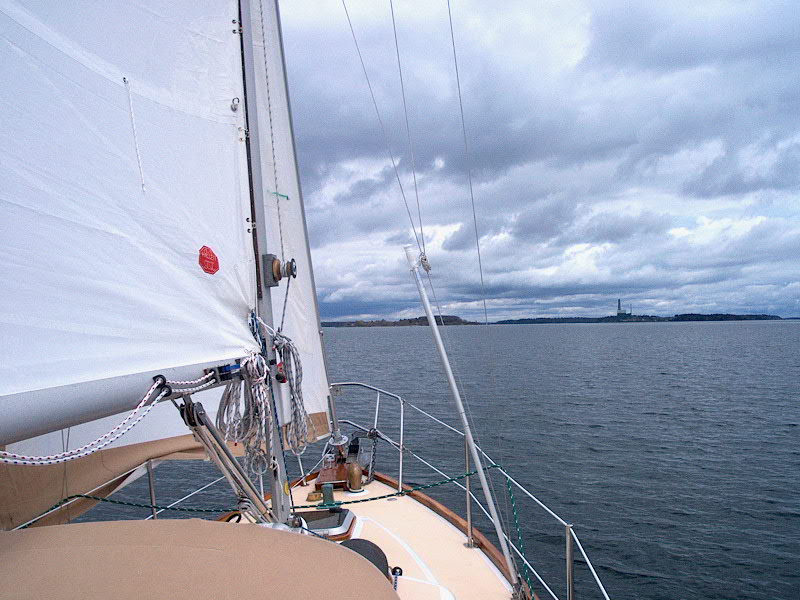
 The
inaugural sail of the year, kind of spur of the moment. The
inaugural sail of the year, kind of spur of the moment.
Read a sailing
log here.
|
|
5/12/03 |
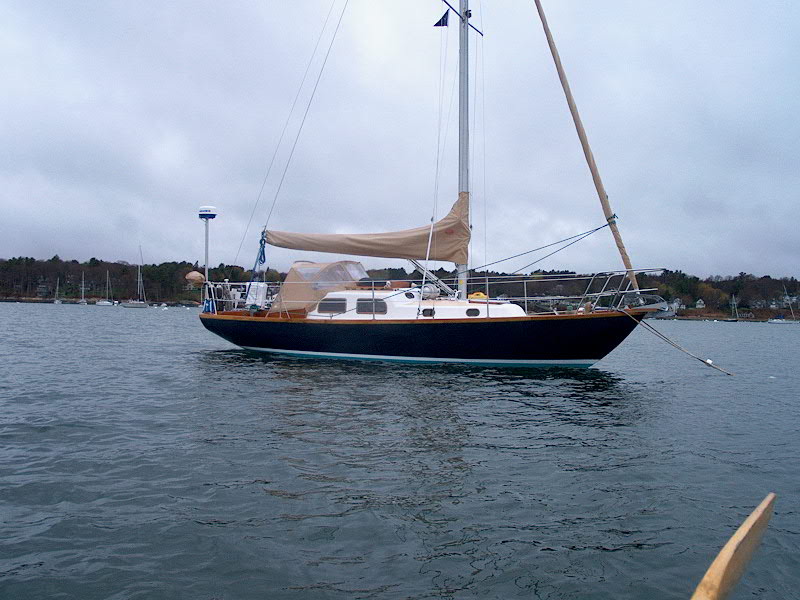
 Launching
day! Launching
day!
Read all about
the launch and mast stepping here.
|
|
5/11/03 |
An hour or two on a day
here and a day there saw the completion of most of the preparation for
launch on the 12th. I rigged up the spreaders and resorted the
halyards and stays on the mast to make sure everything was where it
belonged, and reinstalled spreader boots and tape as needed. I
applied some silicone spray to the bronze mast track to help the main go
up and down easily; I'll spray some on the mainsail slides too.
I ran the engine one more
time--all is well--and, after removing the temporary bucket cooling
hose, reinstalled the "real" intake hose so that the engine is
ready to go. I gave the decks their "first coat" scrub down
and will do a final wash this afternoon to remove debris.
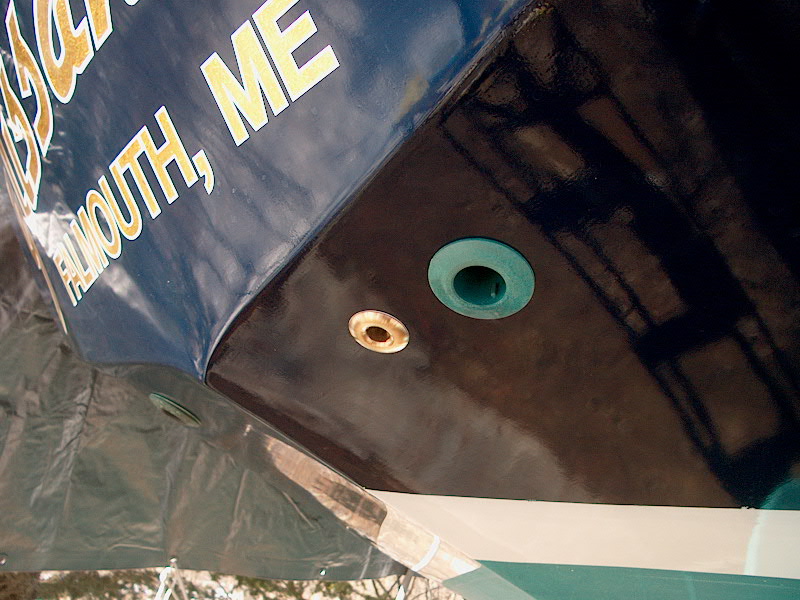
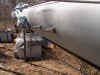
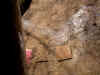
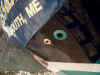
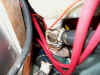 discovered that the sidedeck scupper hose connection, where the lower
end attaches to the dumb--and constantly aggravating--fiberglass scupper
tree beneath the cockpit, had broken free. The hose attaches to a
short length of fiberglass tube that, at the original time of
construction, was inserted into the main scupper and glassed in
place. For one reason or another, that bond failed, so I gooped
the end up well with thickened epoxy and stuck it back in. Please
forgive the blurry nature of the photo; it was taken by holding the
camera at arm's length deep in the cockpit locker, allowing a view that
otherwise never could have been seen my human eyes. In the photo,
you can see the empty hole in the scupper tree (midframe) and, below it
and to the left, is the hose and fiberglass tube.
discovered that the sidedeck scupper hose connection, where the lower
end attaches to the dumb--and constantly aggravating--fiberglass scupper
tree beneath the cockpit, had broken free. The hose attaches to a
short length of fiberglass tube that, at the original time of
construction, was inserted into the main scupper and glassed in
place. For one reason or another, that bond failed, so I gooped
the end up well with thickened epoxy and stuck it back in. Please
forgive the blurry nature of the photo; it was taken by holding the
camera at arm's length deep in the cockpit locker, allowing a view that
otherwise never could have been seen my human eyes. In the photo,
you can see the empty hole in the scupper tree (midframe) and, below it
and to the left, is the hose and fiberglass tube.
Had I known just how
irritating these scupper tubes and related connections were going to be
when I was first working in that area during the restoration, I would
have ripped everything out and started fresh. Live and learn--and
new scuppers are high on the work list for the coming winter.
Meantime, I'll continue inspecting the connections frequently, and
keeping at least the port seacock closed. (The port side has, so
far anyway, been the only side to cause any problem.)
After her final washdown
and check-over later today, she'll be all set for launching. She
gets picked up by 0700 tomorrow morning. Forecast: showers,
with highs "near 50". In other words--it'll be in the
40s. Burrr...
|
|
5/6/03 |
Over the weekend, I accomplished many things
on board. Most importantly, I suppose, I got all the necessary
gear loaded, including cushions, supplies, etc. Basically, I got
the boat ready to go, 100%. I installed the lifelines and
stanchions, dealt with several small jobs on my list, and whatever else
seemed necessary.
I finally got around to installing my new
(used) Lewmar #8 main halyard winch. I reused the original
aluminum platform that the old winch (now gracing my desk as a
paperweight) was attached to. Read
more about this project here.
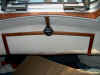 I
installed a little compass in the vee berth so that I can easily tell
what direction we're heading when I wake up, while at anchor, in the
middle of the night. It's just a simple Danforth compass, mounted
on the centerline. I
installed a little compass in the vee berth so that I can easily tell
what direction we're heading when I wake up, while at anchor, in the
middle of the night. It's just a simple Danforth compass, mounted
on the centerline.
 With
the stuff loaded, I masked off and sanded the remaining brightwork on
deck: handrails, sea hood, companionway trim, forward hatch trim,
anchor platform, and taffrail. It was too windy, and too late in
the day Saturday, to varnish, so I got it all prepared for Sunday. With
the stuff loaded, I masked off and sanded the remaining brightwork on
deck: handrails, sea hood, companionway trim, forward hatch trim,
anchor platform, and taffrail. It was too windy, and too late in
the day Saturday, to varnish, so I got it all prepared for Sunday.
Sunday morning, I applied the first of
two maintenance coats on these trim pieces, and managed to get a final
coat on Monday morning. I removed the masking tape late that
afternoon.
The only work remaining before launch is
to give the decks and hull a thorough cleaning, finish rigging the mast
(install the spreaders), and lower and secure the mast to the pulpits
for transport.
|
|
5/2/03 |
The beginning of the week was
varnish-friendly, at least for my purposes. On Monday, Tuesday,
and Wednesday, the sun shone and it was dry--good for building up three
coats of varnish on the toerails. Phew. After the third coat
on Wednesday, I decided it was good enough for now--with rainy weather
predicted the rest of the week and only one further week before launch,
I thought that the last coat I got on would suffice. One thing
I've learned is to know when to quit when ahead! Besides, I plan
to strip the rails to bare wood after this season, so why build up more
varnish than necessary?
The varnished rails look pretty good,
considering. There are some color variations in the tops between
where I scraped and where the existing varnish remained, but those will
even out over time. Next, I have to concentrate on some
maintenance coats on the remaining exterior varnish--taffrail,
companionway trim, seahood, anchor platform, and forward hatch
trim. That's next, as soon as the weather allows.
|
|
4/27/03 |
After a cloudy start, the
day turned out nicely. I got a lot done: installed all the
halyards and rigging, and loaded a ton of gear back on board that I had
removed during the fall. I also vacuumed the whole interior of the
boat to rid it of excess dust and stuff from the winter.
I discovered that some
critter had gotten in and chewed the corner of our little Bocce rug that
I had rolled up and stored in the vee berth. Fortunately, the
damage isn't too bad. No other signs of life inside, though...
 With
a beautiful late afternoon and a good forecast for at least a couple
days, I decided to get a jump on the toerail varnish project. I
set up The World's Ricketiest Staging around the boat, managing to get
planks along both sides at once. I applied silver long-mask tape
to both sides of the toerail, both on the hull and on the deck, and
then, armed with my fancy new scraper from the Wooden Boat Store, and
various grades of sandpaper, I set to work. With
a beautiful late afternoon and a good forecast for at least a couple
days, I decided to get a jump on the toerail varnish project. I
set up The World's Ricketiest Staging around the boat, managing to get
planks along both sides at once. I applied silver long-mask tape
to both sides of the toerail, both on the hull and on the deck, and
then, armed with my fancy new scraper from the Wooden Boat Store, and
various grades of sandpaper, I set to work.
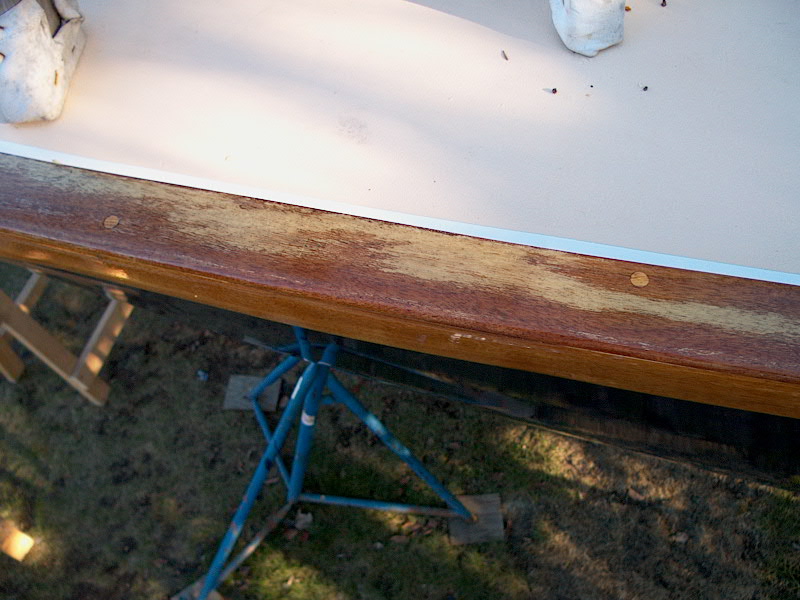
The varnish is,
unfortunately, in sad shape. Over the winter, moisture got into
the varnish, and lifted it in several areas. Ideally, the rails
would both be stripped back to bare wood, and the varnish process begun
anew. This is impossible given the short time till launch (2
weeks) and the difficulties involved in getting varnish on the rail with
the boat in its present location. Therefore, I decided to scrape
off the loose stuff where needed, sand smooth, and recoat with as many
coats as possible. I hope that maybe (keep your fingers crossed) I
might have a barn for the boats by next winter, so I could take that
opportunity to strip the varnish right back to bare wood and start over.
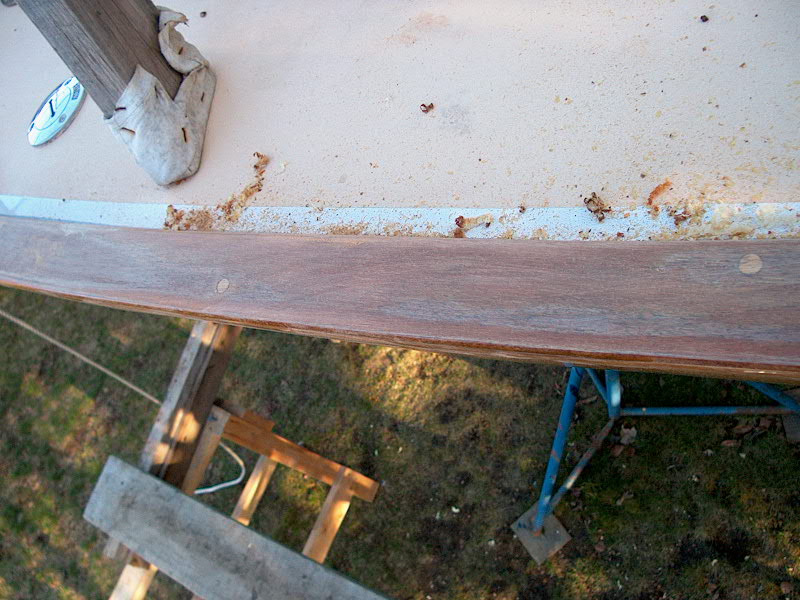
On the left is one of the
worst areas of water-damaged varnish, before doing any work. On
the right is the same area after scraping and sanding with 80 grit and
120 grit.


I got the port side
spot-scraped and sanded, and part of the starboard side. Tomorrow,
I'll finish the starboard side and sand both rails smooth with 120 and
220; then, I'll get a coat of varnish on. I hope to get a minimum
of 2 coats on this week, and possibly more. Weather permitting.
|
|
4/25/03 |
Finally--a nice day. I took advantage
of it to knock off several projects I'd been wanting to get to.
|
First order of
business: Tim's Folly. From time to time, it's been
brought to my attention that I could be a little bit
stubborn. Needless to say, I find these accusations
baseless and uncalled for :<), but perhaps there's more
truth to it than I care to admit.
That's right,
folks--today, once again, I refused to let go and give up my
bright, clear-lacquered port frames. As was the case last
spring, I discovered that some of the lacquer had flaked off
the ports during the winter, and for a while this spring I
wavered on whether or not I would go to the trouble to
clean them up and relacquer them again this year. Of
course, my love of the bright look won out, so today was as good
a time as any to knock this project off my list.
Somehow it seemed
to be easier and go faster than last year. As before, I
taped off the inside and outside of each port frame and then
installed newspaper to protect against overspray, before
scraping off any loose lacquer and sanding the ports with 120
grit paper. Then, I sprayed on a number of coats of clear
lacquer. The end result is antique-bronze ports, protected
against tarnishing by the lacquer for another season. Note
that I am only continuing to maintain the lacquer on the ports,
and am letting all other bronze on board (cleats, chocks, winch
bases, etc) go natural. |
 |
 |
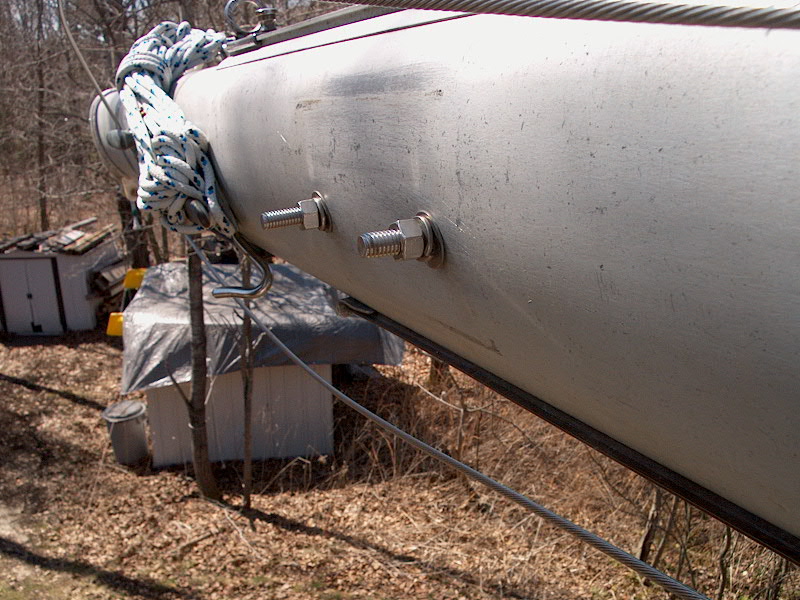
 I
also removed the existing aluminum winch base and lousy old Southcoast
#1 halyard winch from the mast in preparation for installing my two
Lewmar 8s (Ebay). Two years ago, I had installed this
original winch base and winch with two stainless steel bolts through the
mast, replacing the original aluminum ones that could not be saved. I
also removed the existing aluminum winch base and lousy old Southcoast
#1 halyard winch from the mast in preparation for installing my two
Lewmar 8s (Ebay). Two years ago, I had installed this
original winch base and winch with two stainless steel bolts through the
mast, replacing the original aluminum ones that could not be saved.
 Well,
I don't know what happened, but I started to loosen the nuts, and they
quickly became bound--cross threaded, or something. How and why
this happened I have no idea, but the long and the short of it was that
I couldn't get the nuts off. I had to drag out my Sawz-all to cut
the bolts off so I could remove the thing. Nothing is easy!
Later, I'll install the new winches. Well,
I don't know what happened, but I started to loosen the nuts, and they
quickly became bound--cross threaded, or something. How and why
this happened I have no idea, but the long and the short of it was that
I couldn't get the nuts off. I had to drag out my Sawz-all to cut
the bolts off so I could remove the thing. Nothing is easy!
Later, I'll install the new winches.
I prepared the engine for its first run
by installing the batteries on the boat (with a fresh charge), and
bleeding the fuel system (necessary since I replaced the fuel filters
earlier in the month). I reassembled the raw water pump (I
had removed the pump and impeller in the fall) and installed it in
place. Then, I set up my bucket of fresh water and hose, and
cranked the engine over. It started right up and quickly settled
into a smooth roar. I ran it for a few minutes, then shut it down
to check the oil--I had to add a little since I had changed the oil
filter earlier, but the design of the filter does not allow filling the
filter with oil before installing it. Then, I restarted the engine
and ran it for 5 or 10 minutes. All was well.
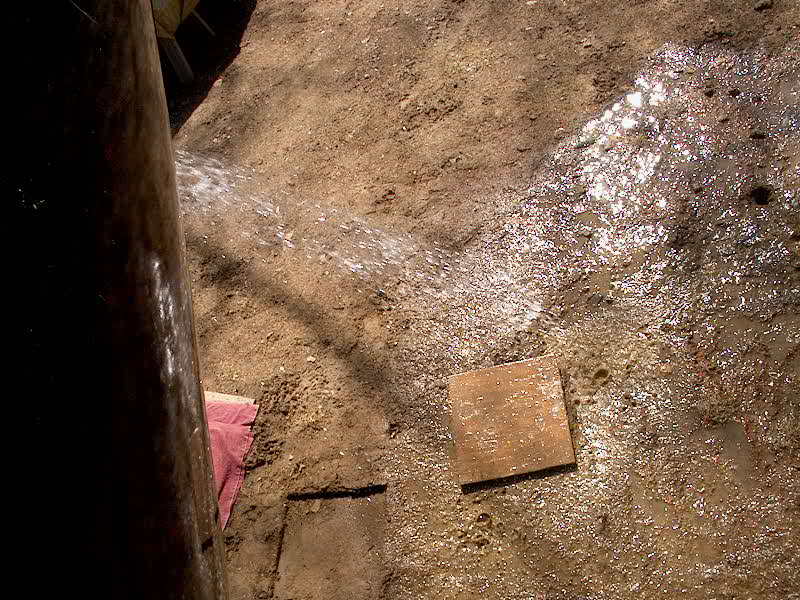
I tested my new galley
sink sump by pouring the remains of my bucket of cooling water into the
sink. It worked great!
Finally, I rinsed the
boat off with fresh water, removing the winter's grime and all the
little leaves and tree bud stuff that was all over the place. A
clean boat is a happy boat--and, most importantly, makes for a happier
owner!
|
|
4/20/03 |
Installed the new jumper
struts and stays.
Read
more about this project here.
Installed the new
spreader bases on the mast.
Read
more about this project here.
Installed my new Davis
Megalight masthead (anchor) light. Read
more about this project here.
Moved the jackstands and
painted the patches beneath. The bottom is now ready for
launch. There is plenty of other stuff I want to get done, but
nothing that has to be done before launch, except for
reinstalling all the standing and running rigging on the mast (all of
which was removed for storage).
|
|
4/13/03 |
 Painted
the bottom. I used Micron Extra (green), which contains a biocide
designed to reduce slime buildup. Slime is the main fouling
problem we experience here, so I figured I'd give it a try.
Painting the entire bottom with one coat used about 3/4 gallon of
paint. It always feels good to get the bottom painted--it just
looks better! I always like to get the bottom paint done early,
just in case the weather turns sour for weeks at a time near launch
time. This way, it's off my mind. I still have to do the
patches under the jackstands, but that can wait a little while. Painted
the bottom. I used Micron Extra (green), which contains a biocide
designed to reduce slime buildup. Slime is the main fouling
problem we experience here, so I figured I'd give it a try.
Painting the entire bottom with one coat used about 3/4 gallon of
paint. It always feels good to get the bottom painted--it just
looks better! I always like to get the bottom paint done early,
just in case the weather turns sour for weeks at a time near launch
time. This way, it's off my mind. I still have to do the
patches under the jackstands, but that can wait a little while.
|
|
4/10/03 |
 After
two really lousy weeks of cold, raw, gray weather--which also brought
some snow our way--we finally broke out into decent sunshine
today. What a pleasure. Eschewing things I really should
have been doing, I escaped to the back yard and pulled the cover and
frame off. By doing so, I have probably sentenced us to continuing
cold and snowstorms well into June, but I couldn't stand it any
more. With plenty on my schedule in the coming weeks (relatively
speaking), I didn't want to miss out on a nice hour or two on a given
day to get some projects done that the cover would have prevented--mast
work, varnish, that kind of thing. After
two really lousy weeks of cold, raw, gray weather--which also brought
some snow our way--we finally broke out into decent sunshine
today. What a pleasure. Eschewing things I really should
have been doing, I escaped to the back yard and pulled the cover and
frame off. By doing so, I have probably sentenced us to continuing
cold and snowstorms well into June, but I couldn't stand it any
more. With plenty on my schedule in the coming weeks (relatively
speaking), I didn't want to miss out on a nice hour or two on a given
day to get some projects done that the cover would have prevented--mast
work, varnish, that kind of thing.
The bright toerails are
sort of a mess--some moisture got in here and there and has lifted the
varnish partially. Yuck. Some significant work will be
required to get things back the way they should be for this
season. The lacquer on the bronze ports is in better shape than
last year, but still needs some work. There's just over a month
till launching.
Reinstalled the
freshly-varnished coamings--no sealant this time, except for blobs of
polysulfide on the screwholes where the coaming blocks are secured
through the cabin trunk.
|
|
4/1/03 |
Over the last week or so,
I took care of several smaller jobs on board, including replacing both
primary fuel filter elements. Given the number of hours the engine
has been run since installation (not particularly high), I'm sure the
filter replacement wasn't truly necessary. Both filter elements of
course contained some material, but were essentially good. Still, replacing
the elements is much easier under the low-pressure and calm conditions
found when the boat is in the backyard, rather than rolling around in a
seaway. I feel that as a preventative maintenance item,
replacement every other year is well worth it. I used an R15P
30-micron filter as the first element in the series, and an R15S
2-micron filter for the second, the same setup that existed
previously. I have a couple of the 2 microns in stock, but I
ordered a number of the 30-micron filters to keep as spares; I have
trouble finding them locally, and never wish to be without some new ones
on board. (Mr. Obsessive Spare Parts Man here...)
 I
also changed the oil filter, a chore I put off last fall when I changed
the oil with the boat in the water. Because of the tight access in
way of the oil filter (another brilliant engineering marvel of space
efficiency by the folks at Yanmar), I had had a very difficult time
changing the filter for the first time last summer--at that time, I had
to eventually remove the entire alternator just to get a good enough
grip on the filter with a filter wrench. This time, I was thrilled
and pleased to find that, with the filter NOT overtightened the way it
had come from the factory (thanks, guys), I could remove the old element
without having to dismantle half the engine--so it was actually a pretty
simple, straightforward procedure. I still don't understand why
these filters are installed sideways, though--which virtually guarantees
that oil will spill out when you remove it. (I know--more of that
efficiency of space thing. But come on, the filter is, like,
3" long. How much space would it really take to install it
with the opening facing UP?) I
also changed the oil filter, a chore I put off last fall when I changed
the oil with the boat in the water. Because of the tight access in
way of the oil filter (another brilliant engineering marvel of space
efficiency by the folks at Yanmar), I had had a very difficult time
changing the filter for the first time last summer--at that time, I had
to eventually remove the entire alternator just to get a good enough
grip on the filter with a filter wrench. This time, I was thrilled
and pleased to find that, with the filter NOT overtightened the way it
had come from the factory (thanks, guys), I could remove the old element
without having to dismantle half the engine--so it was actually a pretty
simple, straightforward procedure. I still don't understand why
these filters are installed sideways, though--which virtually guarantees
that oil will spill out when you remove it. (I know--more of that
efficiency of space thing. But come on, the filter is, like,
3" long. How much space would it really take to install it
with the opening facing UP?)
 Anyway,
whining over, I got all the major filters changed out without
incident. Later, I'll change the engine-mounted secondary filter
element. Anyway,
whining over, I got all the major filters changed out without
incident. Later, I'll change the engine-mounted secondary filter
element.
|
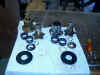
With a partial
bucket of clean diesel fuel at my disposal (from draining the
filter bowls), I decided now was the perfect time to
disassemble, clean, and lube two Lewmar #8 single speed winches
that I purchased early this past winter on Ebay. (The
winches are for the halyards on the mast.) Both winches
(one bronze, one the standard chrome-plate over bronze) were in
good shape, but the chrome one, in particular, was extremely
stiff in operation; regular maintenance was called for.
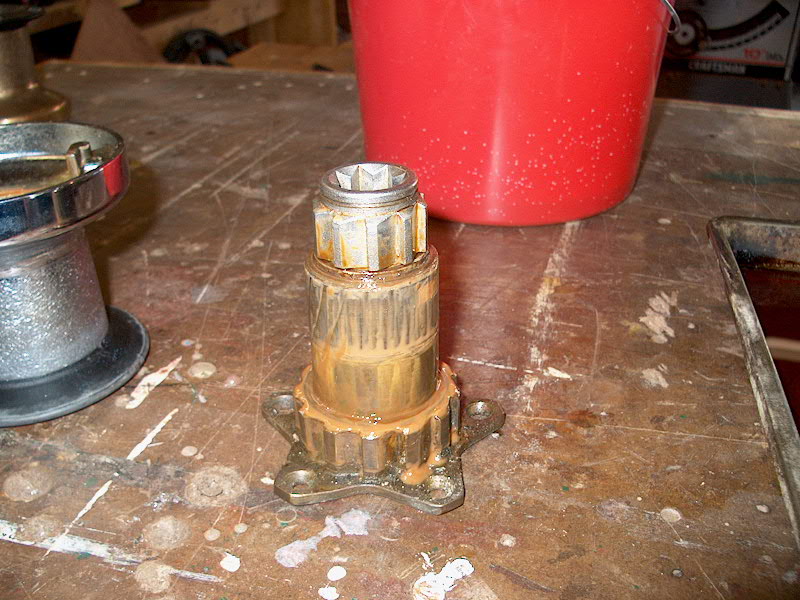
 The
plain bronze winch was clean and dry inside, with little excess
buildup of old grease. However, the chromed winch was a
disaster of goop, oozing grease, and the resulting gunk, all
over the bearings, pawls, springs, and all surfaces. Yuck! The
plain bronze winch was clean and dry inside, with little excess
buildup of old grease. However, the chromed winch was a
disaster of goop, oozing grease, and the resulting gunk, all
over the bearings, pawls, springs, and all surfaces. Yuck! |
|
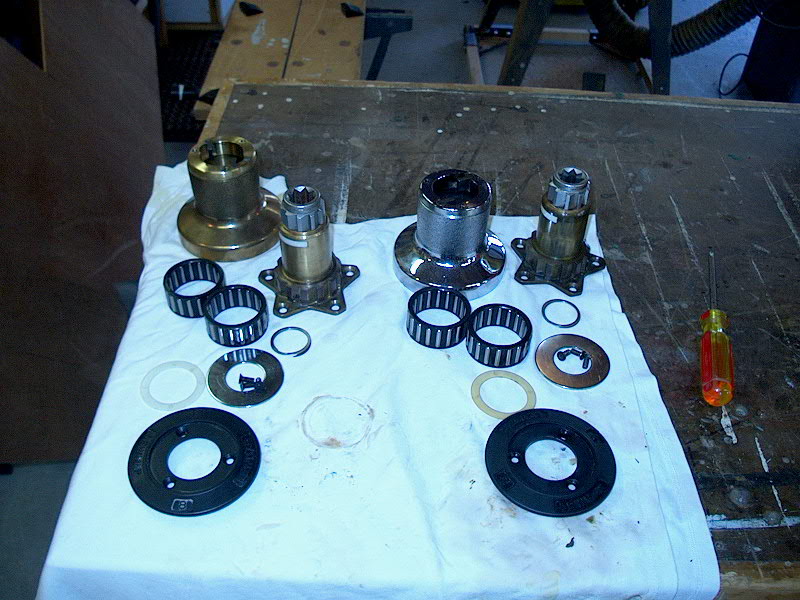
 I
poured some of the diesel fuel into an old baking pan, and
soaked all the various winch parts in the fuel to remove the
grease and accumulated buildup. The diesel fuel worked
wonders loosening the old material, but it still took quite a
bit of soaking and then cleaning with a diesel-soaked rag (and
even a screwdriver to scrape some of the gunk off the ratchets
and other winch parts) to get them perfectly clean. I also
cleaned all the grease off the winch spindles and bodies, and
cleaned the exterior parts of the winch with more diesel fuel as
well. I repeated this procedure with both winches. I
poured some of the diesel fuel into an old baking pan, and
soaked all the various winch parts in the fuel to remove the
grease and accumulated buildup. The diesel fuel worked
wonders loosening the old material, but it still took quite a
bit of soaking and then cleaning with a diesel-soaked rag (and
even a screwdriver to scrape some of the gunk off the ratchets
and other winch parts) to get them perfectly clean. I also
cleaned all the grease off the winch spindles and bodies, and
cleaned the exterior parts of the winch with more diesel fuel as
well. I repeated this procedure with both winches.
 With
all the parts cleaned and inspected, I purchased some winch lube
grease and light oil, and lubricated the various parts as
appropriate--grease on the bearings and spindle, light oil on
the pawls and springs. A light coating is all that is
necessary; the ratchets and springs should never be laden with
heavy grease, as this stuff can adversely affect the winch
operation. With the two halyard winches greased up, all
that remains is to install them on the mast, which I will do
once the cover gets removed in a week or two (if the weather
warms up again...grr.) I also need to lube the two primary
cockpit winches. With
all the parts cleaned and inspected, I purchased some winch lube
grease and light oil, and lubricated the various parts as
appropriate--grease on the bearings and spindle, light oil on
the pawls and springs. A light coating is all that is
necessary; the ratchets and springs should never be laden with
heavy grease, as this stuff can adversely affect the winch
operation. With the two halyard winches greased up, all
that remains is to install them on the mast, which I will do
once the cover gets removed in a week or two (if the weather
warms up again...grr.) I also need to lube the two primary
cockpit winches.
After two seasons
of closed seacocks, useless hoses, and splintered, dry
fiberglass tubes, I addressed a "final" solution to
the port cockpit scupper. It looks like the time will
come, this coming fall and winter, to replace both scuppers and
drain arrangements with something better. However, my new
solution will, for this season at least, be a much stronger,
safer option. Read
more about this project here. |
|
|
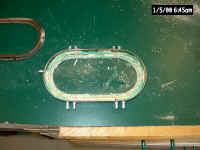
3/23/03 |
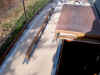
 Did
a few odds and ends on the boat, most notably getting back to work on
that annoying port cockpit scupper hose. I removed the cheap-o old
hose (shown in the photo, left) that I put on as a temporary measure
last year, and put in some heavy reinforced hose that I salvaged from
the old galley sink drain. However, the problem now is that the
old fiberglass "Y" arrangement beneath the scupper is badly
deteriorated, with the very dry fiberglass literally flaking
apart. This has left the connection for a scupper hose untenable,
and something new is needed. At this stage, I don't want to get
into a complete scupper replacement, but I think I will add brand-new
scuppers for both sides of the cockpit to my work list for the end of
this season. I'm sick of dealing with and worrying about this old,
poorly-made , resin-starved junk (the old scupper drain Y connections,
that is), and I think the time has come for a refit. It's probably
more than I want to mess with now, so I'll have to come up with a sound
solution for this season. Perhaps I'll relocate the seacocks in
conjunction. In any event, that job will probably wait till this
fall or coming winter (and by then, maybe the boat will be in a heated
barn?). Did
a few odds and ends on the boat, most notably getting back to work on
that annoying port cockpit scupper hose. I removed the cheap-o old
hose (shown in the photo, left) that I put on as a temporary measure
last year, and put in some heavy reinforced hose that I salvaged from
the old galley sink drain. However, the problem now is that the
old fiberglass "Y" arrangement beneath the scupper is badly
deteriorated, with the very dry fiberglass literally flaking
apart. This has left the connection for a scupper hose untenable,
and something new is needed. At this stage, I don't want to get
into a complete scupper replacement, but I think I will add brand-new
scuppers for both sides of the cockpit to my work list for the end of
this season. I'm sick of dealing with and worrying about this old,
poorly-made , resin-starved junk (the old scupper drain Y connections,
that is), and I think the time has come for a refit. It's probably
more than I want to mess with now, so I'll have to come up with a sound
solution for this season. Perhaps I'll relocate the seacocks in
conjunction. In any event, that job will probably wait till this
fall or coming winter (and by then, maybe the boat will be in a heated
barn?).
 The
snow is retreating. To help speed things along, I shoveled some of
the snow piles next to the boat away, hoping to make it easier to get
around the boat on the ground if I decide to get going on some exterior
work. The
snow is retreating. To help speed things along, I shoveled some of
the snow piles next to the boat away, hoping to make it easier to get
around the boat on the ground if I decide to get going on some exterior
work.
|
|
3/22/03 |
Completed the sump pump installation in the
galley.
Read
more about this project here.
Worked on several other small projects on
board, knocking various things off my work list.
Click
here to see the updated list.
|
|
3/21/03 |
 Installed a new through hull fitting and
hose for the galley sink sump. Read
more about this project here. Installed a new through hull fitting and
hose for the galley sink sump. Read
more about this project here.
With spring finally seeming to be
arriving, however, slowly, I removed two small auxiliary tarps from the
bow and stern to provide better airflow and light into the cover.
Finished varnishing the coamings, and
varnished the tiller and flagpole as well.
|
|
3/18/03 |
Varnishing
continues. The small pieces are done, and I have two coats on one
side of the coamings.
Two of the terminal ends
I need for the new jumper stays are on backorder, but I received the
upper (fork) terminals and the wire, so I decided to install those
now. Read
more about this project here.
With a hand swage tool, I
began the construction of a boom support cable that will eventually run
to the backstay and hook to the boom when not in use. Read
more about this project here.
Out on the boat, finally,
it was warm enough to do some small projects. I replaced the
gooseneck lamp over the galley sink; the old one stopped working during
last summer, and I couldn't make it work no matter what I tried.
So I bought a new one, and finally wired it in and installed it in
place.
I also dismantled the galley
sink drain in preparation for installing a sump chamber. Because
the sink is so close to the waterline, it didn't drain properly at all,
and if the seacock was open when under sail, the sink could flood
badly. With these two annoying problems in mind, I decided a sump
was necessary.
Read
more about this project here.
 Spring
is springing! After a very long stretch of cold weather, with
virtually no breaks since Christmas, things are looking up. The
sun is warm, and the arctic air has retreated, hopefully for good.
The snow is melting and turning the ground to mush. With spring
fever in the air, I scheduled the launch and mast step for Monday, May
12. Spring
is springing! After a very long stretch of cold weather, with
virtually no breaks since Christmas, things are looking up. The
sun is warm, and the arctic air has retreated, hopefully for good.
The snow is melting and turning the ground to mush. With spring
fever in the air, I scheduled the launch and mast step for Monday, May
12.
|
|
3/10/03 |
Finished lubricating the
standing rigging turnbuckles and inspecting all the standing
rigging. I'm glad I did this now, because I discovered that my
jumper stays had indeed been damaged when the jumpers were ruined last
August--the damage was hidden behind the tape that had been over the
stays where they passed over the struts, and I didn't remove the tape
till today. There were nicks and abrasions on the wire, nearly
deep enough to go through a strand, so the wires are trashed.
There's plenty of time to make new ones, though. For this project,
I decided to order Sta-Loks and wire and do the job myself. I
ordered two fork terminals, two turnbuckle studs (I'll reuse the nearly
new turnbuckles and lower studs) and 41' of 1/8" stainless steel
1x19 wire.
Later, when the materials
arrive, I'll post some more information on building the stays.
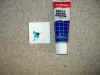 I
use a blue waterproof multi-purpose waterproof grease on the turnbuckle
thread, as well as on many other onboard projects. The stuff I use
is leftover from years ago, when I got it from an old OMC (outboards)
dealer. I have a huge 8 oz. tube of the grease, and since a
little goes a long way, I may never need more. It's excellent
stuff, though, and I'm posting the information here so that anyone
interested can try and find a substitute that's currently available. I
use a blue waterproof multi-purpose waterproof grease on the turnbuckle
thread, as well as on many other onboard projects. The stuff I use
is leftover from years ago, when I got it from an old OMC (outboards)
dealer. I have a huge 8 oz. tube of the grease, and since a
little goes a long way, I may never need more. It's excellent
stuff, though, and I'm posting the information here so that anyone
interested can try and find a substitute that's currently available.
I finally began
varnishing the drop boards, lazarette hatch, tiller, flagpole, and
coamings in earnest--in the house, since the heater in my shop is on the
fritz and it's still frigging cold here. I'll do two coats on the
smaller pieces, and probably 3-4 on each side of the coamings.
|
|
2/11/03 |
Finished sanding the removable brightwork,
including the companionway drop boards, and removing the old silicone
from the back side of the coamings. I sanded the coamings with 120
first, then moved on to 220, since they required a bit more old varnish
to be taken down. I'm starting to get antsy for the season, but
it's still really cold here and very much stuck in the depths of
winter. We haven't had much for new snow since the beginning of
January, but all the old stuff is still on the ground, since it's
been very cold ever since. When it warms up a bit and I can more
easily keep the shop heated to varnish temperature, I'll begin
varnishing. I don't see any reason to burn extra kerosene for the
heat in the shop at this point, since I still have plenty of time
remaining to finish the varnishing.
I even placed an order for most of the
list of small items I need to complete the springtime projects.
Since I had a gift card from Christmas, the order was painless! I
wish they were all this way. In about 4 months I'll be sailing.
 I worked on the new spreader bases and
standing rigging in the shop. The spreader bases required some
sanding and filing in order to make the raw castings fit the spreader
tubes. I worked on the new spreader bases and
standing rigging in the shop. The spreader bases required some
sanding and filing in order to make the raw castings fit the spreader
tubes.
See
more detailed information here.
I began a standing
rigging and lubricated the two upper shrouds' turnbuckles with
waterproof grease. Over the course of a few shop days, I'll get
through the remaining wires--two lowers, the jumper wires, and the
backstay.
|
|
1/15/03 |
Went aboard for a quick
check, and to pick up a couple things. I really miss the boat and
get nostalgic every time I stand in the cabin. Even though it was
cold, I was ready to stay awhile. Launching is 5 months away.
I pulled the coamings,
tiller, lazarette hatch and flagpole out of storage and began sanding
them down in preparation for up to a few coats of varnish. The
coamings will get several coats at a minimum; the other stuff requires
only one or two coats. I didn't get too far with the sanding,
truth be told, but at least now I had to look at the pieces every time I
went into the garage.
|
|
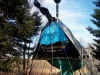
1/6/03 |
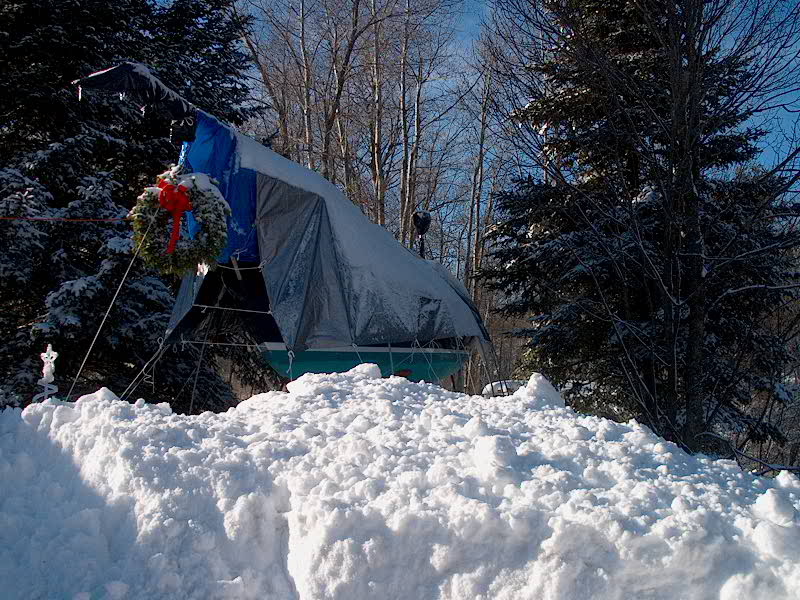
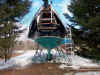
 We've
had two large snowstorms in just over a week's time, dumping nearly
three feet of snow on us. No problem for the tarp, though--most of
the snow just slides right off. In the second storm, the snow
stuck to the tarp a bit more, so I used my roof rake to start some small
avalanches and get all the snow off. I'm sure it would have
slid off eventually, but I felt like I needed to do something
boat-related--it's good for the soul. I went up on the boat
yesterday to check things out and retrieve a spare pair of sunglasses,
since I broke mine. I didn't stay onboard for long, but it felt
nice to be on the boat at least for a while. I hope to start
work on a few small projects soon, but there really is no pressing need
to do anything--the boat could go back in the water as is with no
trouble. We've
had two large snowstorms in just over a week's time, dumping nearly
three feet of snow on us. No problem for the tarp, though--most of
the snow just slides right off. In the second storm, the snow
stuck to the tarp a bit more, so I used my roof rake to start some small
avalanches and get all the snow off. I'm sure it would have
slid off eventually, but I felt like I needed to do something
boat-related--it's good for the soul. I went up on the boat
yesterday to check things out and retrieve a spare pair of sunglasses,
since I broke mine. I didn't stay onboard for long, but it felt
nice to be on the boat at least for a while. I hope to start
work on a few small projects soon, but there really is no pressing need
to do anything--the boat could go back in the water as is with no
trouble.
|
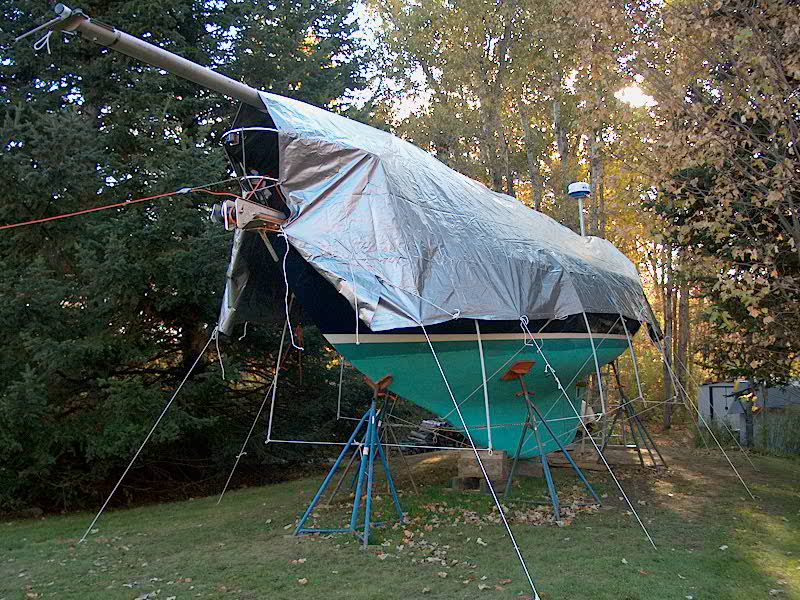
|
11/26/02 |
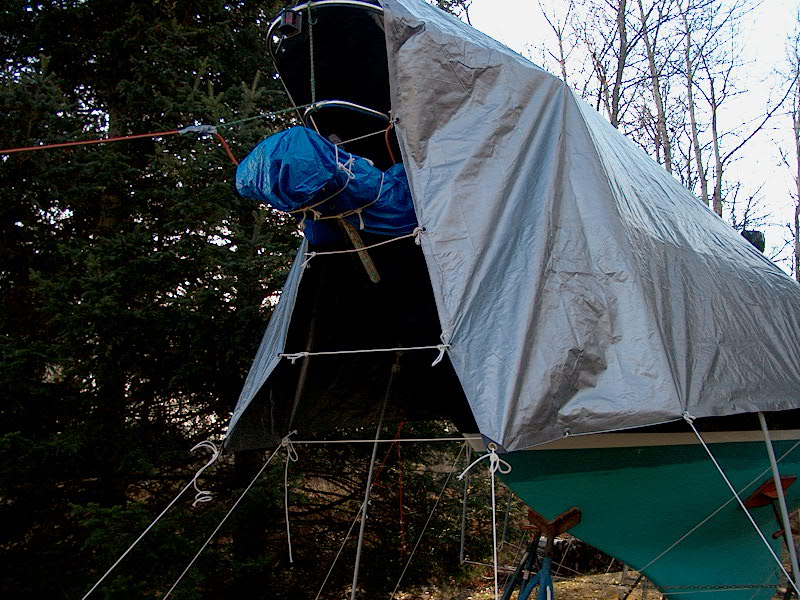
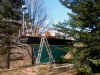
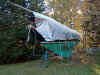
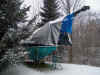 Added
another small tarp to fill in the hole at the bow of the boat. The
regular tarp was too open, and I wasn't happy with how much snow got
inside during a previous snowstorm. The new tarp just slips
beneath the gray one, and is tied in a couple places--very inelegant,
but it gets the job done. There's still plenty of area for air to
flow through, but the opening is now much smaller and will prevent most
snow from getting in. Added
another small tarp to fill in the hole at the bow of the boat. The
regular tarp was too open, and I wasn't happy with how much snow got
inside during a previous snowstorm. The new tarp just slips
beneath the gray one, and is tied in a couple places--very inelegant,
but it gets the job done. There's still plenty of area for air to
flow through, but the opening is now much smaller and will prevent most
snow from getting in.
|
|
11/16/02 |
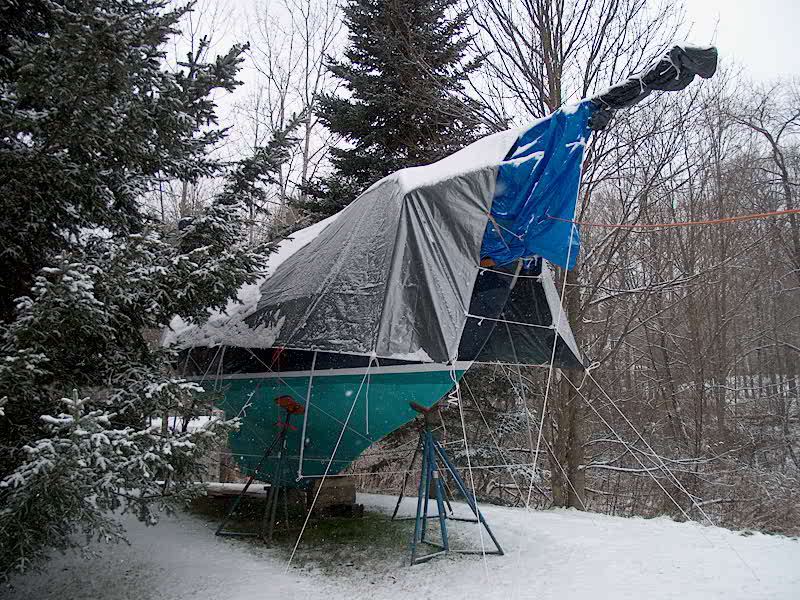
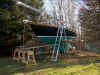
 Added
a small tarp at stern to cover the gap in the tarp, just to keep the
worst of the snow and rain out and off the stern deck. I just sort
of folded a smallish tarp over itself and secured it with a few lines
and some of those tarp-lock fasteners that you can install anywhere on
the tarp. I ran three lines down to more tent stakes in the ground
below. I also added several more lines led to tent stakes (I got a
good deal on a military surplus lot of tent stakes on Ebay) on each side
of the Added
a small tarp at stern to cover the gap in the tarp, just to keep the
worst of the snow and rain out and off the stern deck. I just sort
of folded a smallish tarp over itself and secured it with a few lines
and some of those tarp-lock fasteners that you can install anywhere on
the tarp. I ran three lines down to more tent stakes in the ground
below. I also added several more lines led to tent stakes (I got a
good deal on a military surplus lot of tent stakes on Ebay) on each side
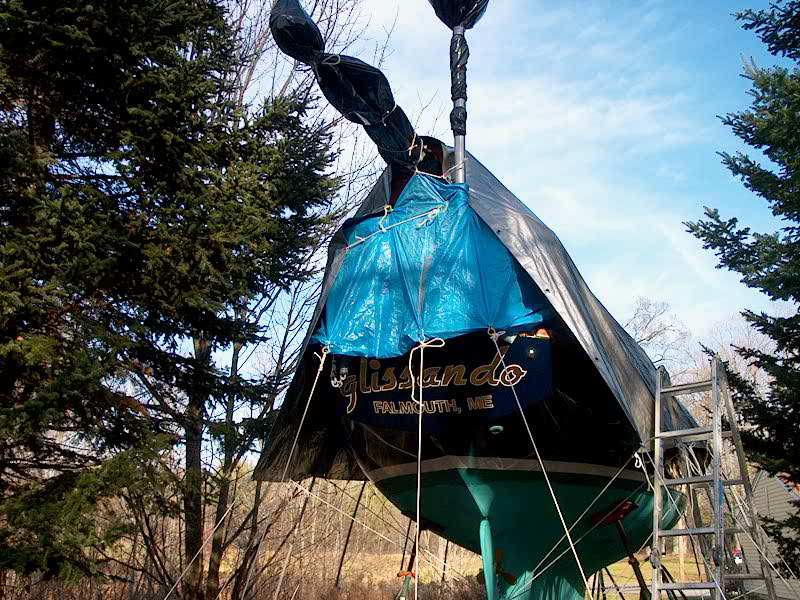
of the  boat,
and finished up wrapping the bow platform in a tarp to protect the
varnish and anchor rollers. Finally, I finished securing the tarp
at the bow, which I had left folded back before because I didn't have
enough tent stakes. Yesterday, I went aboard to just reminisce a
bit...it was the first time I had been aboard in over two weeks--a
personal record, I think. With these small additions, the boat is
now ready for a forecast winter storm this weekend. boat,
and finished up wrapping the bow platform in a tarp to protect the
varnish and anchor rollers. Finally, I finished securing the tarp
at the bow, which I had left folded back before because I didn't have
enough tent stakes. Yesterday, I went aboard to just reminisce a
bit...it was the first time I had been aboard in over two weeks--a
personal record, I think. With these small additions, the boat is
now ready for a forecast winter storm this weekend.
|
|
10/25/02 |
 Covered
the boat because I was sick of leaves falling all over the decks, and
because we have lousy weather coming for the weekend. Covering was
easy this year--I had everything done in about an hour.
Details
on the cover and frame that I wrote last year are here. Covered
the boat because I was sick of leaves falling all over the decks, and
because we have lousy weather coming for the weekend. Covering was
easy this year--I had everything done in about an hour.
Details
on the cover and frame that I wrote last year are here.
Removed batteries for the winter.
I'll give them a full charge before storage, then charge them once a
month or so.
Decided bow Awlgrip repair is good
enough. I will have some buffing and blending in the spring, but
for now it's done.
Read
more detail on this project here.
|
|
10/24/02 |
Applied
a few coats of Awlgrip Flag Blue to bow area. This is becoming a
real pain.
Read
more detail on this project here.
VICTORY! in
the coaming-removal war. I used a guitar string (it's wire,
of course) to saw through the sealant. Because the guitar string
is stronger than regular wire, it didn't tend to break as easily, and I
finally got the thing off--but not without quite a bit more work.
I am eternally grateful to Rick (email) who suggested this idea, and to
Nathan, who provided me with his used guitar strings.
Once I had the starboard coaming off, I
tackled the port coaming, which came off much more easily. I don't
think it was stuck quite as badly to begin with. Phew. Now I
can really get these revarnished nicely. I put 10 coats on
originally, and it lasted two years. Now that I've taken the
coamings off, I will plan on doing so every winter in the future--no
more sealant! (Especially silicone.) |
|
10/22/02 |
Sanded
yesterday's Awlgrip lightly and prepared for what I hope will be the
final coats!
Read
more detail on this project here. |
|
10/21/02 |
Sanded
Awl-Quik primer and prepared area for color coats. Applied Awlgrip
Flag Blue.
Read
more detail on this project here. |
|
10/20/02 |
Applied
several coats of Awl-Quik primer to the sanded areas on the bow. Read
more detail on this project here.
Tried (again) unsuccessfully to remove
coamings for refinishing over the winter. When I installed them, I
applied a dab of silicone behind each screw location, just to seal the
holes a bit beneath the coaming. I did not seal the whole thing,
but even so the silicone is adhere in tenaciously and I'm not sure I'll
be able to remove the coamings or not. I obviously don't want to
damage the coamings or the surrounding area, so prying them off is just
about impossible. I tried running a slim wire through the very
narrow space between the coaming and the fiberglass, but the wire would
break when I tried to "saw" it through the silicone. There's
no room for a knife, or a saw. I had some limited luck with a thin
metal ruler, but it was hard on the surrounding areas and the ruler is
not meant for this work. Plus, the gap gets tighter aft of
the winch pads, and the ruler ceased working the way it had a bit
forward. Rather than continue and probably do some real damage, I
stopped. I want these coamings off!!!
Silicone is pure evil. I hate it
and don't know why I ever, ever used it, ever. Why??? This
junk doesn't tend to adhere when you want it to, and fails consistently
when you do use it. But God forbid you actually want to remove
something stuck on with it--then it holds like there's no
tomorrow. Aauugh! |
|
10/19/02 |
Reassembled
propeller shaft, coupling, flexible coupling, and propeller after
cleaning and painting the various parts while they were out of the
boat. As I reassembled the pieces, I applied blue waterproof
grease to the mating surfaces of the shaft and coupling, on the threads
of the coupling setscrews, on the studs and nuts of the flex coupling,
the threads of the packing nuts, and the shaft taper and propeller nut
threads. The waterproof grease will help keep corrosion from
forming, and should make later removal much easier--especially when removing
the coupling and/or propeller from the shaft. All the pieces went
together without any problem and the job was complete within 30 minutes,
start to finish.
See
some pictures of the reassembled coupling here.
I also sanded the final coat of filler on
the bow repair.
Read
more detail on this project here. |
|
10/18/02 |
Sanded first
coat of epoxy on starboard bow and applied second, and hopefully, final
coat of filler. I used Interlux Epoxy Surfacing Compound, #
417/418. This is a smoother finishing putty that is a good choice
for final filling.
Read
more detail on this project here. |
|
10/17/02 |
Sanded the
scarred starboard bow in preparation for filling gouges with
epoxy. After sanding and cleaning, I filled the depressions with
thickened epoxy and left it to cure.
Read
more detail on this project here.
Rinsed leaves and debris from yesterday's
nor'easter off the decks, cleared scuppers. Removed everything
from the two cockpit lockers and washed the lockers out thoroughly with
soap and fresh water, and washed bilge in shaft alley and the main
bilge.
I also completed the removal of the
propeller shaft and coupling. The coupling fought me right to the
end. Even though it slid continually forward as I tightened the
four bolts and gradually pulled it off the shaft, it was tenacious to
the end and resisted attempts to use some rubber-mallet persuasion to
speed up the process. I had to use several different sized sockets
as spacers, and three or four different bolt lengths when all was said
and done. I dropped a 1/2" deepwell socket into the bilge
beneath the engine and Vetus Waterlock and it simply vaporized--I
couldn't find it, my grabby tool (no jokes, please) came up empty, and
even blasting water from my hose through the area didn't turn it up.
Sigh. Had half the tools on the boat out in the cockpit to account
for the three different diameter nuts and hex heads on the various
lengths of bolts I had on hand.
To make this project easier in the
future, a length of threaded rod would make sense. One end could
extend into the narrow area between the coupling and the transmission
housing, and be secured with double nuts to lock them in place.
Then, the outer nut could simply be tightened as much as needed to
gradually pull the couplings off. One of the difficulties inherent
using the regular-bolt method is that, as you tighten the bolts down,
you inevitably run out of room as the threads extend into the space next
to the transmission. Then, you have to remove the bolts entirely,
choose a different socket length and/or different bolt length, and start
all over. This is irritating and frustrating.
I removed the coupling for maintenance
purposes only. Not wanting to ever be in a position where the
bolts, coupling or propeller were frozen inexorably in place, I decided
from the onset that every other year I would break everything
free. This seemed like a good plan till I was hanging upside down
fighting the coupling.
With all the various pieces out of the
boat, I could inspect everything for condition. The Cutless
bearing is in excellent condition and looks brand new; the shaft
was nicely and evenly polished where it passed through the
bearing. There is unfortunately some slight scoring on the shaft
at the stuffing box; I know that the stuffing box was too tight for a
time last year, and figure this is when the damage occurred.
Fortunately, it's not bad enough to worry about now--it won't keep the
packing from sealing, or weaken the shaft. The packing is still in
good condition and will not be replaced at this time.
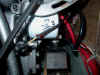
I spent some time cleaning up the shaft
so the coupling and propeller would slide on easily. I also
cleaned up the rusty coupling (mild steel) and polishing the inside and
keyway. With everything cleaned up, I spray painted the coupling
and the flex coupling with multiple layers of red engine paint.
Hopefully, this will keep things nicer, longer. |
|
10/15/02 |
Began removal
of shaft coupling. Four nuts securing coupling to rubber flex
coupling, and four more securing flex coupling to transmission flange,
came off easily with no trouble. Prepared to remove coupling by
inserting deep socket wrench as a spacer between the shaft coupling and
transmission, and used four long bolts to begin pulling coupling off
shaft. Of course there's no such thing as the exact-right-length
bolt--the first ones I tried were about a millimeter too short, so I had
to use extra-long bolts with spacers at the outer end to prevent them
from hitting the transmission housing. Got the coupling part
way off, got sick of lying with my head hanging upside down in the
bilge, and thought it would be better to quit for the day.
Resoaked the coupling with PB Blaster for good measure. |
|
10/14/02 |
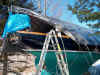
Applied final
coat of Awlgrip to new Boottop; removed tape later in the day.
Read
more detail on this project here.
Applied PB Blaster spray penetrating oil
to shaft coupling and associated bolts in preparation for removal. |
|
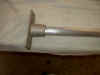
Week
Starting 10/6/02 |
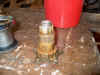
Removed
propeller in preparation for pulling shaft (for inspection and to keep
the coupling, etc. free and easy to remove in the future). I used
my prop puller for the first time; it worked pretty well, but the
threaded bolt bottomed out too early, so I loosened it again and
inserted two wooden shims (about 1/4" - 5/16" thick) between
the forward portion of the puller and the prop. With this added
thickness, I could tighten the puller bolt enough to pop the prop free.
Worked to raise waterline and strike new
level boottop.
Read
more detail on this project here.
Winterized engine, septic, and potable
water systems. |
|