|
The Gooseneck (Page 3)
This page was last updated on 26 August 2004.
|
<Back to Page 2
Two days before departing on a 4-week cruise,
I received a call from Metalmast: the new boom was done. Since
there was no time to arrange to pick up the boom before our departure, I
asked Claude if they would please store the boom for me, to which he
readily agreed. Of course, I had to pay for the boom at that point,
however.
The repair I had made using a stainless
steel banding tool worked well during our cruise, with no issues. However,
upon our return I quickly contacted Metalmast to arrange for me to come
down and pick up the boom. I set the date and received driving
directions; I had assumed that the company would be located on or near the
coast, and was pleasantly surprised to find that it was in a northerly
corner of Connecticut, just over the Massachusetts border, which greatly
shortened the trip for me--and also made it look pretty painless.
|
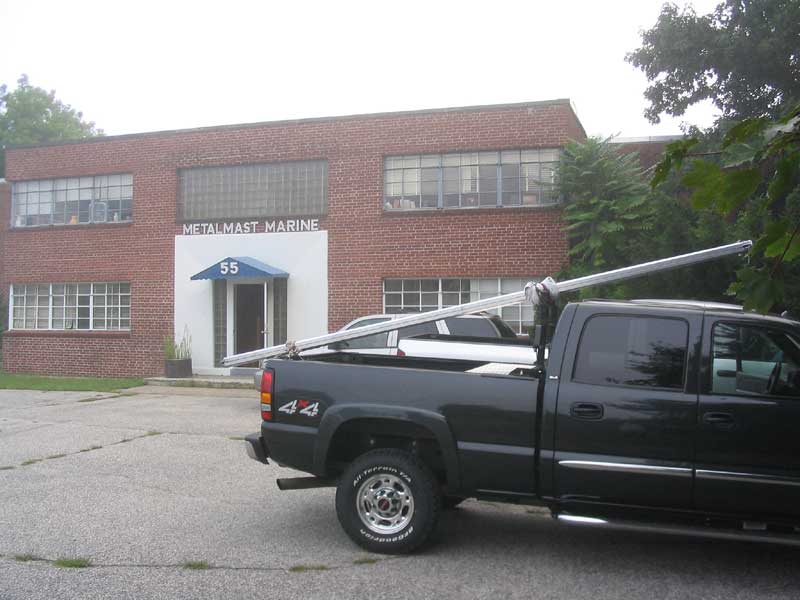
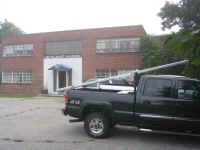 On
the appointed day, I departed very early in the morning--0420--so that I
could get to Metalmast upon their opening at 0700, and then return home
with plenty of day remaining. Traveling early is always more
pleasant for me anyway, what with less traffic and such. My trim
down was uneventful, and I pulled up at Metalmast Marine just
before 0700. I'm not sure what I expected, but what I found was
hardly it: an old brick building fronted with a weedy parking lot,
in a random neighborhood seemingly light years away from the
ocean. Not to matter, though: after all, I prefer operations
that lack glitz and pomp and circumstance. All that mattered was
that they were nice to deal with (they were) and competent (which, as I
found out as soon as I saw my new spar, they also were). On
the appointed day, I departed very early in the morning--0420--so that I
could get to Metalmast upon their opening at 0700, and then return home
with plenty of day remaining. Traveling early is always more
pleasant for me anyway, what with less traffic and such. My trim
down was uneventful, and I pulled up at Metalmast Marine just
before 0700. I'm not sure what I expected, but what I found was
hardly it: an old brick building fronted with a weedy parking lot,
in a random neighborhood seemingly light years away from the
ocean. Not to matter, though: after all, I prefer operations
that lack glitz and pomp and circumstance. All that mattered was
that they were nice to deal with (they were) and competent (which, as I
found out as soon as I saw my new spar, they also were).
|
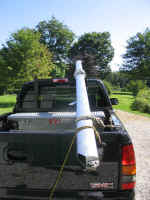
 Inside,
I met the very pleasant Dick, who was holding down the fort; Claude was on
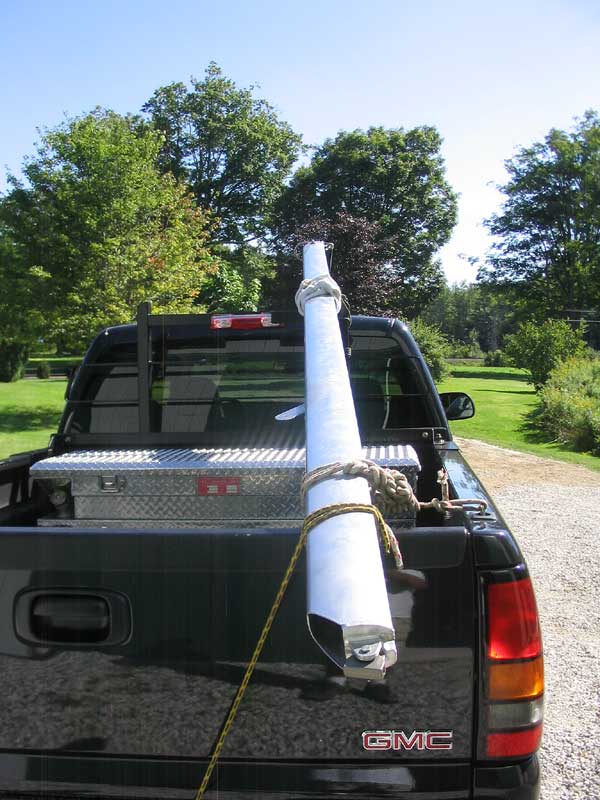
vacation, visiting his homeland. In mere moments, my boom
appeared--it looked great--and soon I had it strapped to my truck
outside. Turnaround was in record time. As I pulled back out
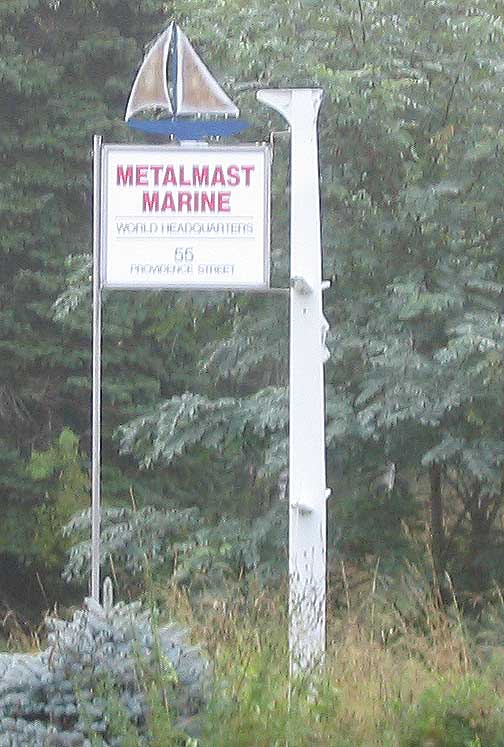
into the street, a sign I had missed on the way in caught my eye; I don't
know, but something struck me funny about this small sign, which proudly
proclaimed this location to be the "world headquarters" of
Metalmast Marine. A bit tongue in cheek, perchance? Inside,
I met the very pleasant Dick, who was holding down the fort; Claude was on
vacation, visiting his homeland. In mere moments, my boom
appeared--it looked great--and soon I had it strapped to my truck
outside. Turnaround was in record time. As I pulled back out
into the street, a sign I had missed on the way in caught my eye; I don't
know, but something struck me funny about this small sign, which proudly
proclaimed this location to be the "world headquarters" of
Metalmast Marine. A bit tongue in cheek, perchance?
The ride home was uneventful, and I arrived
back home just after 1000.
|
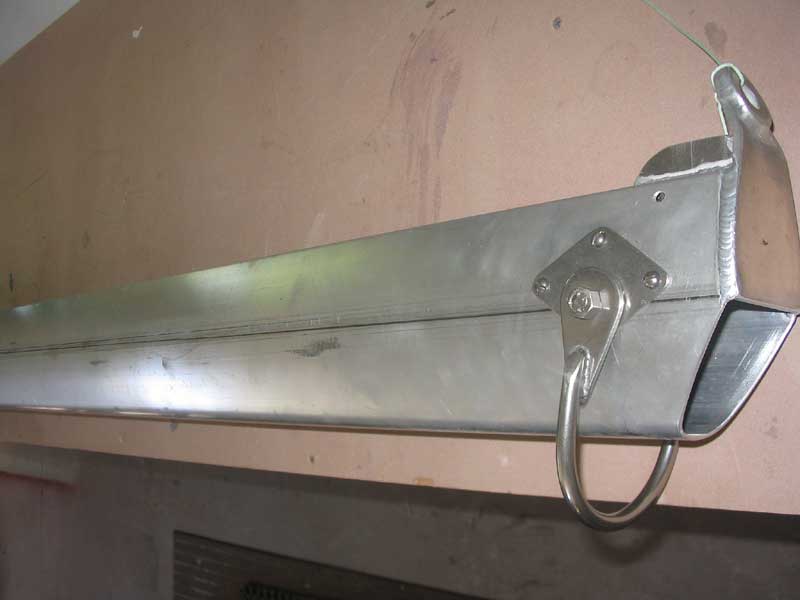
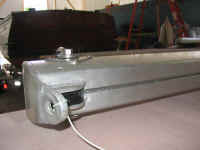
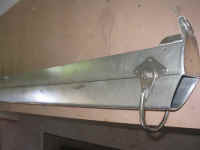
 The
new boom section was much larger than the skimpy original Triton spar, but
also seemed to be lighter in weight; this was just a guess, as at the time
I could not form a direct comparison. The new section featured a
flat top, 1/2" foot groove, and cleanly tapered and welded end
caps. I was pleased to see the welds displaying that "stacked
coin" appearance that is indicative of a quality aluminum weld. The
new boom section was much larger than the skimpy original Triton spar, but
also seemed to be lighter in weight; this was just a guess, as at the time
I could not form a direct comparison. The new section featured a
flat top, 1/2" foot groove, and cleanly tapered and welded end
caps. I was pleased to see the welds displaying that "stacked
coin" appearance that is indicative of a quality aluminum weld.
|
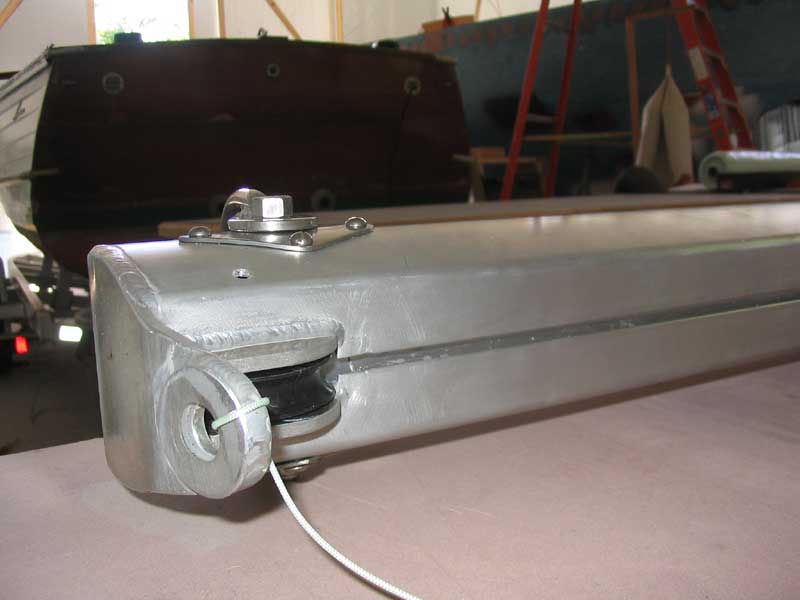
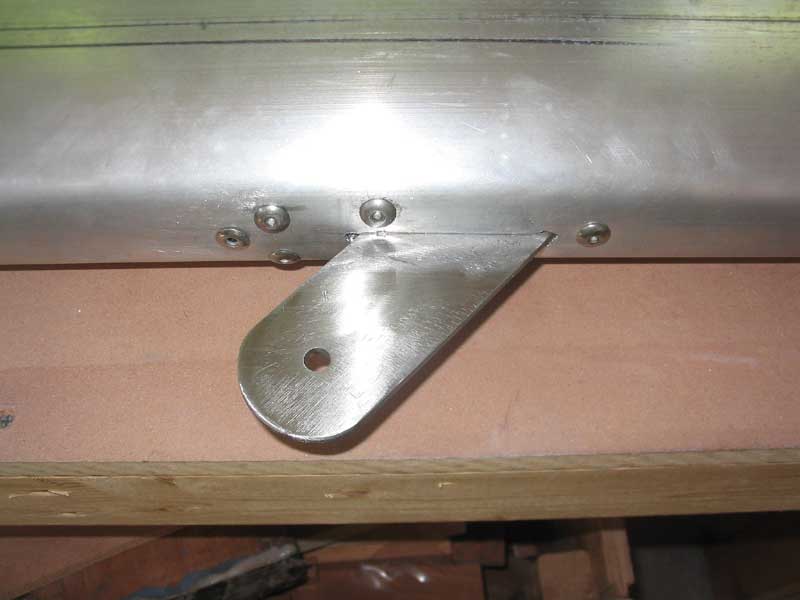
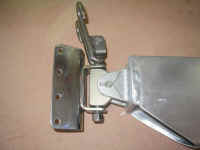 The
mast end of the boom featured a new aluminum toggle, as well as the
long-awaited mast gooseneck bracket, equipped with double reef
hooks. Finally, a decent setup! Sheer laziness and complacency
were the only reasons I hadn't done this much earlier, instead of dealing
with Mickey-Mouse repairs to an aging, incompatible system in the first
place. The
mast end of the boom featured a new aluminum toggle, as well as the
long-awaited mast gooseneck bracket, equipped with double reef
hooks. Finally, a decent setup! Sheer laziness and complacency
were the only reasons I hadn't done this much earlier, instead of dealing
with Mickey-Mouse repairs to an aging, incompatible system in the first
place.
|
|
|
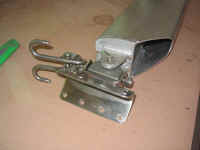
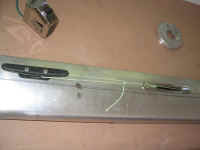
 The
after end of the boom featured a beefy mainsheet bail, a welded eye on the
top end for halyard storage (or a supporting wire to the backstay), and a
single sheave for an internal outhaul. I had chosen to maintain my
external reefing lines, as I've never been fond of the way reefing lines
led through the aft end of the boom work: they just don't pull the
reef cringle down and aft enough to properly stretch the new
"foot" of the sail at the reefpoint. Therefore, I elected
to configure and install my own reefing hardware, which I expected to keep
much the same as it was on the current boom. The
after end of the boom featured a beefy mainsheet bail, a welded eye on the
top end for halyard storage (or a supporting wire to the backstay), and a
single sheave for an internal outhaul. I had chosen to maintain my
external reefing lines, as I've never been fond of the way reefing lines
led through the aft end of the boom work: they just don't pull the
reef cringle down and aft enough to properly stretch the new
"foot" of the sail at the reefpoint. Therefore, I elected
to configure and install my own reefing hardware, which I expected to keep
much the same as it was on the current boom.
|
|
|
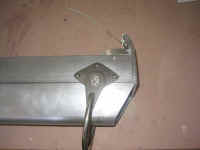
 Finally,
the boom came equipped with a boom vang tang, which was riveted in place
internally in the boom. Just forward of the tang on the port side
was a slot for the outhaul control exit; apparently, there had been a
minor miscommunication during the ordering process (small wonder, given
the dimensions, ideas, and issues being bandied about at the time), and
there was a cleat installed just forward of the outhaul outlet.
Since I run the outhaul aft to the cockpit for ease of control, this cleat
was unnecessary in my case, so it was a simple matter to remove it,
leaving only two small, threaded holes behind. Finally,
the boom came equipped with a boom vang tang, which was riveted in place
internally in the boom. Just forward of the tang on the port side
was a slot for the outhaul control exit; apparently, there had been a
minor miscommunication during the ordering process (small wonder, given
the dimensions, ideas, and issues being bandied about at the time), and
there was a cleat installed just forward of the outhaul outlet.
Since I run the outhaul aft to the cockpit for ease of control, this cleat
was unnecessary in my case, so it was a simple matter to remove it,
leaving only two small, threaded holes behind.
|
 After
some consideration, I had decided to go ahead and paint the boom with
white Awlgrip. Now, if this seems like a small decision, consider
that it is unacceptable, to me at least, to have a mismatched boom
and mast, so the decision to paint the boom white also meant that I was
committing myself to finally painting the mast white as well--something I
had considered doing just about every year since before the boat's
restoration was actually even complete. To begin preparing the
boom, I removed all the hardware I could, including the mainsheet bail,
some trim pieces, and the outhaul exit trim piece. After
some consideration, I had decided to go ahead and paint the boom with
white Awlgrip. Now, if this seems like a small decision, consider
that it is unacceptable, to me at least, to have a mismatched boom
and mast, so the decision to paint the boom white also meant that I was
committing myself to finally painting the mast white as well--something I
had considered doing just about every year since before the boat's
restoration was actually even complete. To begin preparing the
boom, I removed all the hardware I could, including the mainsheet bail,
some trim pieces, and the outhaul exit trim piece.
|
I planned to prepare and paint the new
aluminum boom using the basic process prescribed by US Paint:
1. Etch aluminum with Alumiprep 33
2. Coat etched surface immediately with Alodine 1201 Conversion
liquid
3. Apply proper sprayed coat of 30-Y-94 anti-corrosive primer
4. Apply Awlgrip topcoats (Snow White)
After confirming the materials and the
proposed process, I ordered the supplies from my wholesale supplier,
except for the Alumiprep 33, which I had in stock from 2001, when I first
expected to paint the spars. The process I intended to use--for
untreated aluminum surfaces in good condition, which required no fairing,
and which would be located above the waterline--had the benefit (as well
as the burden) of taking fewer than 24 hours (elapsed) to complete.
|
Please click here to
continue.>
|
|